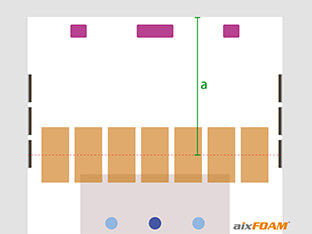
Where should I place my sound absorbers?
As soon as acoustic problems occur in a room, whether due to unpleasant reverberation or too much noise, sound absorbers are the most effective means of improving room acoustics. After selection of suitable aixFOAM sound absorbers (material, thickness, colour, etc.), the next question is where the acoustic elements should be placed for best performance.
As is often the case in the field of acoustics, it is not possible to formulate a standard answer that will suit any room situation. However, in this article we would like to explain what you should pay attention to, as well as some suitable methods to help you place your sound absorbers as effectively as possible.
1. What is the nature of problem and what kind of improvements are required?
First, you should ask yourself what you want to use the room in question for and what the acoustic problem is. The best way to explain why this plays a decisive role in the positioning of your sound absorbers is by way of an example. Compare the acoustic requirements in an office with those in a home cinema.
1.1 Avoiding noise - office example
In an office, it is usually a matter of minimising the noise at individual desks. Separate areas should therefore be more or less soundproofed and noise should be absorbed as much as possible. For this, both direct sound and the indirect sound reflections of wall and ceiling surfaces must be blocked.
1.2 Improving Sound - home cinema example
In a home cinema, it's about extinguishing only a special part of the sound. The direct sound, i.e. the sound that gets directly from the loudspeakers to the listening position, is of course desired. Whereas sound, which initially reflects on wall surfaces and arrives delayed at the hearing position, must be kept low. This indirect sound, also called reflection, usually causes disturbances in the high- and medium-frequency range and expresses itself, for example, through annoying hissing, which is particularly noticeable during film dialogues.
Particular attention should be paid to the initial reflections, i.e. those places where the sound first hits the wall and thus has the most energy.
2. Insulating noise - blocking direct sound with sound absorbers
To show you what to look out for when ordering your sound absorbers to offer the most effective direct sound attenuation as possible, let’s stick to our office example.
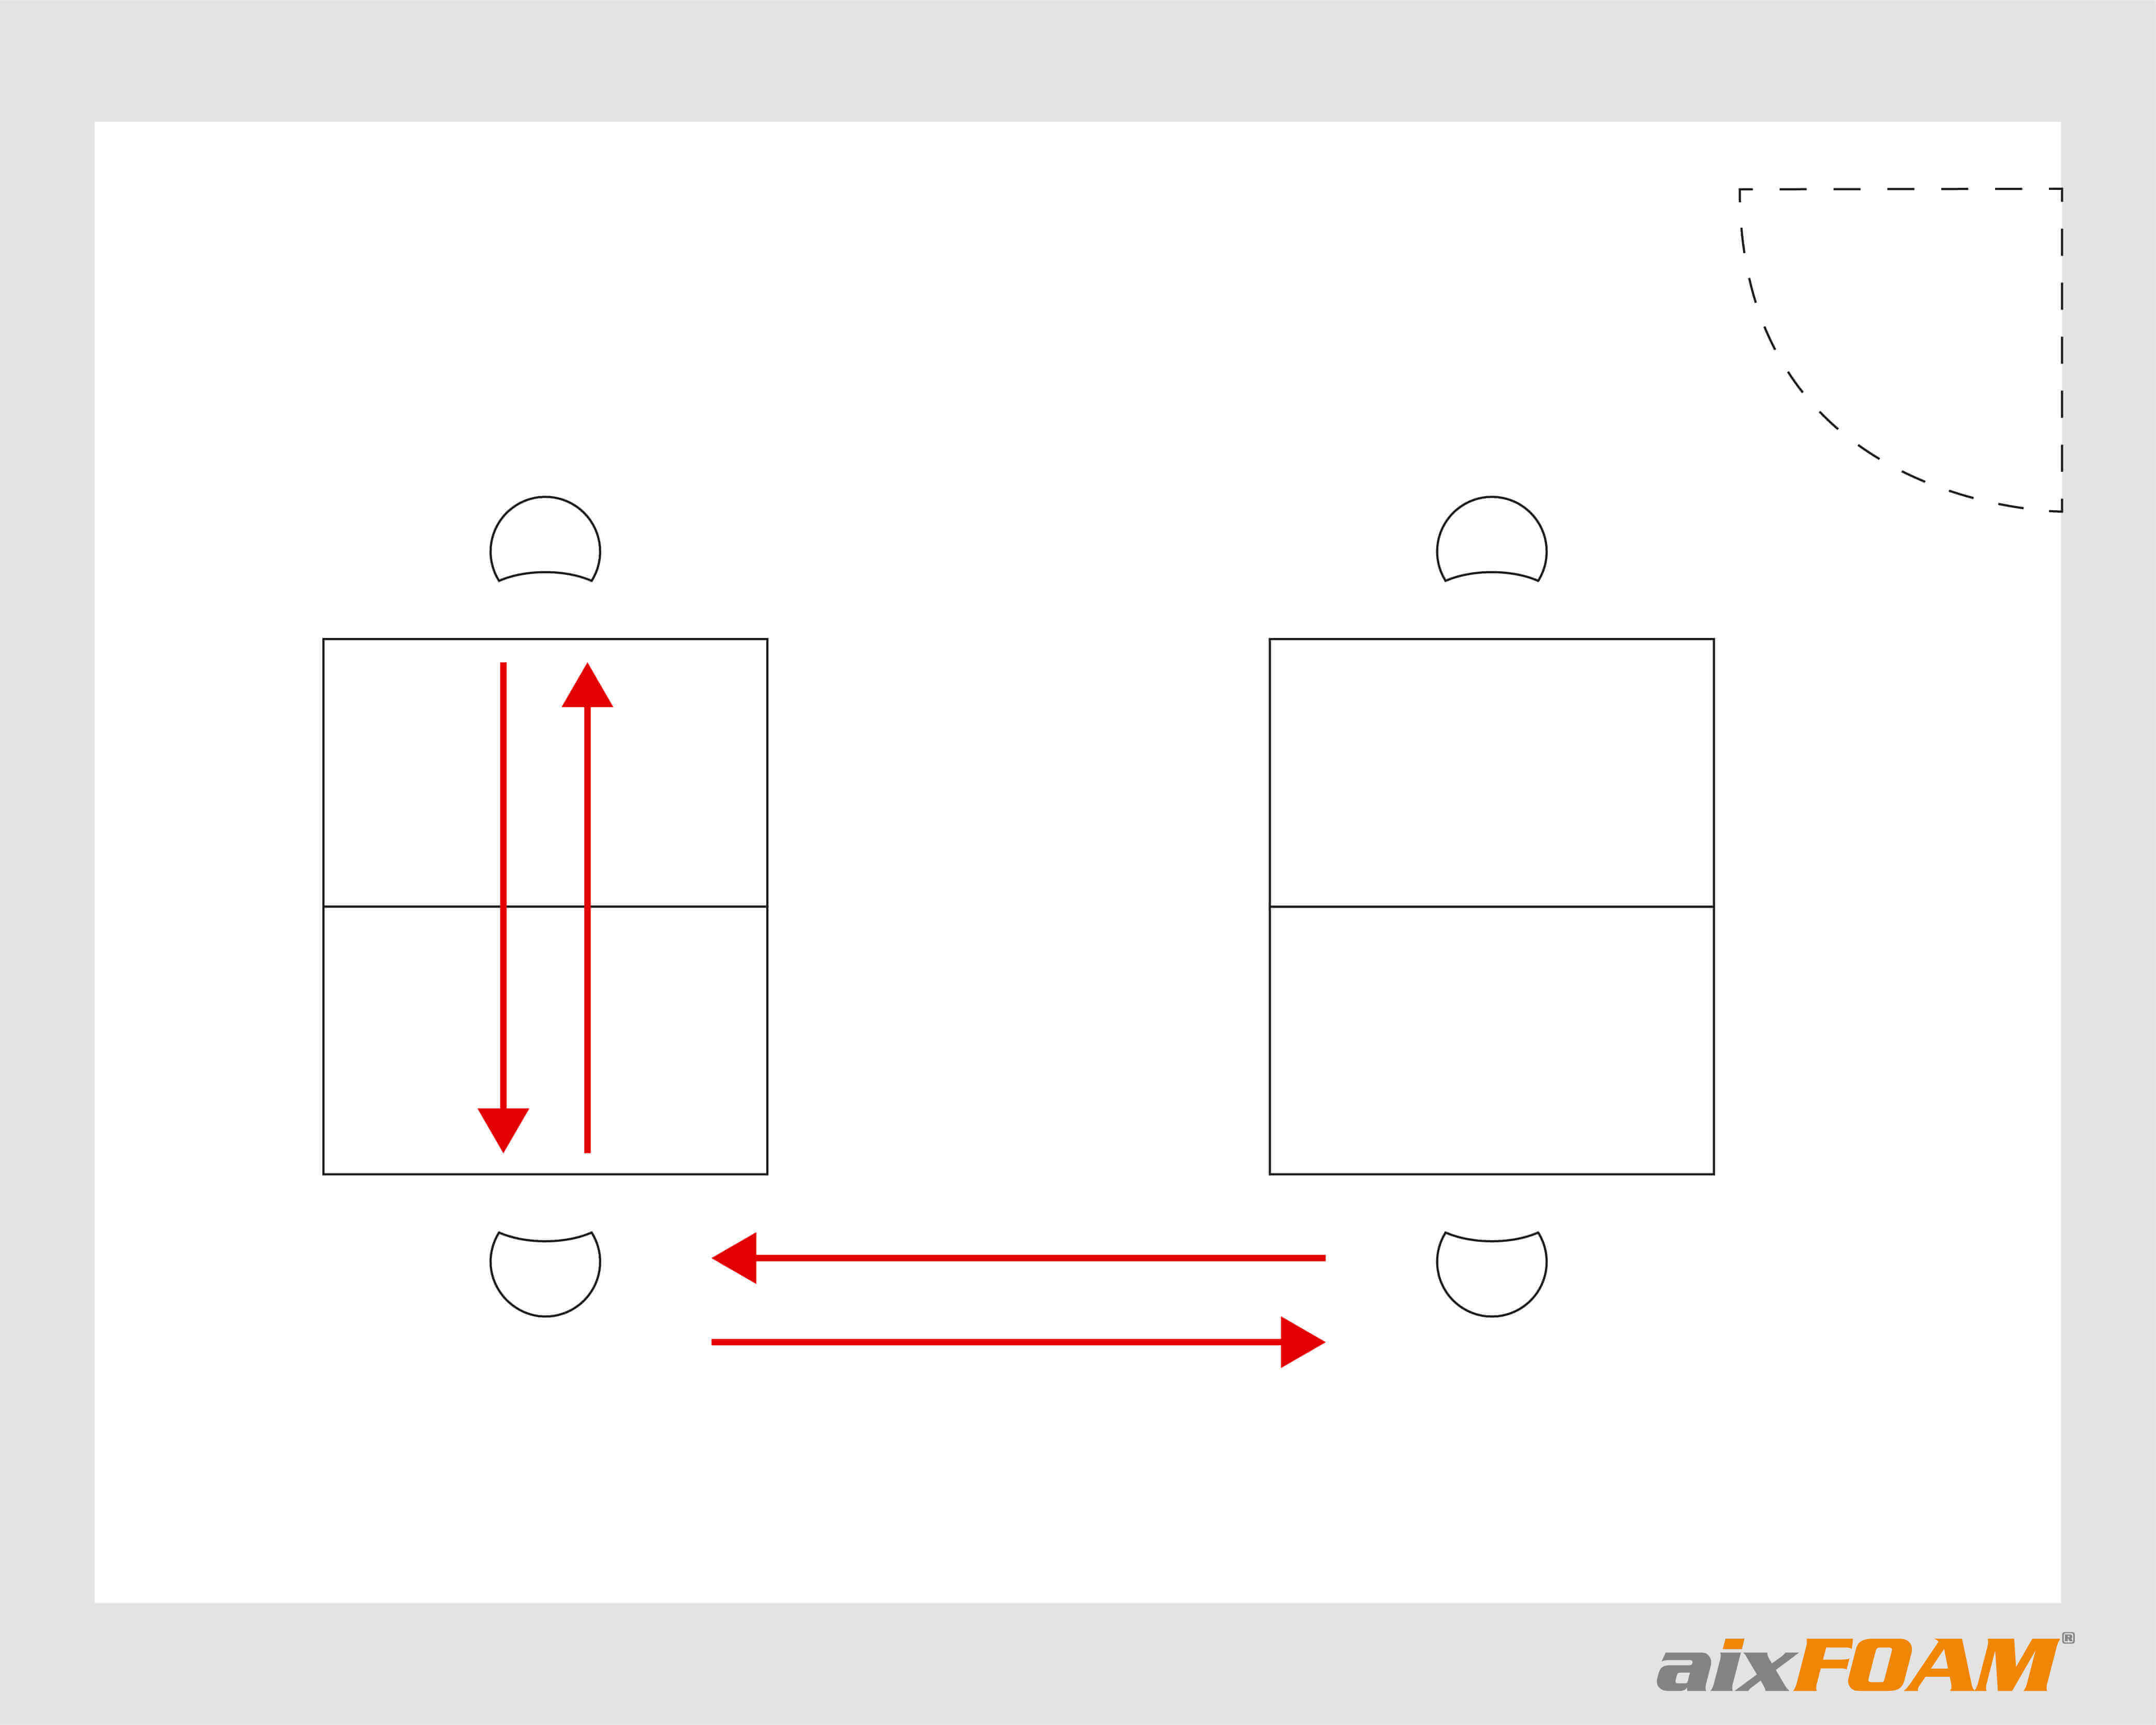
This picture contains a sketch of an office floor plan with four desks, two of which face each other. The red arrows represent the direct sound. This comes, for example, from other desks or office equipment.
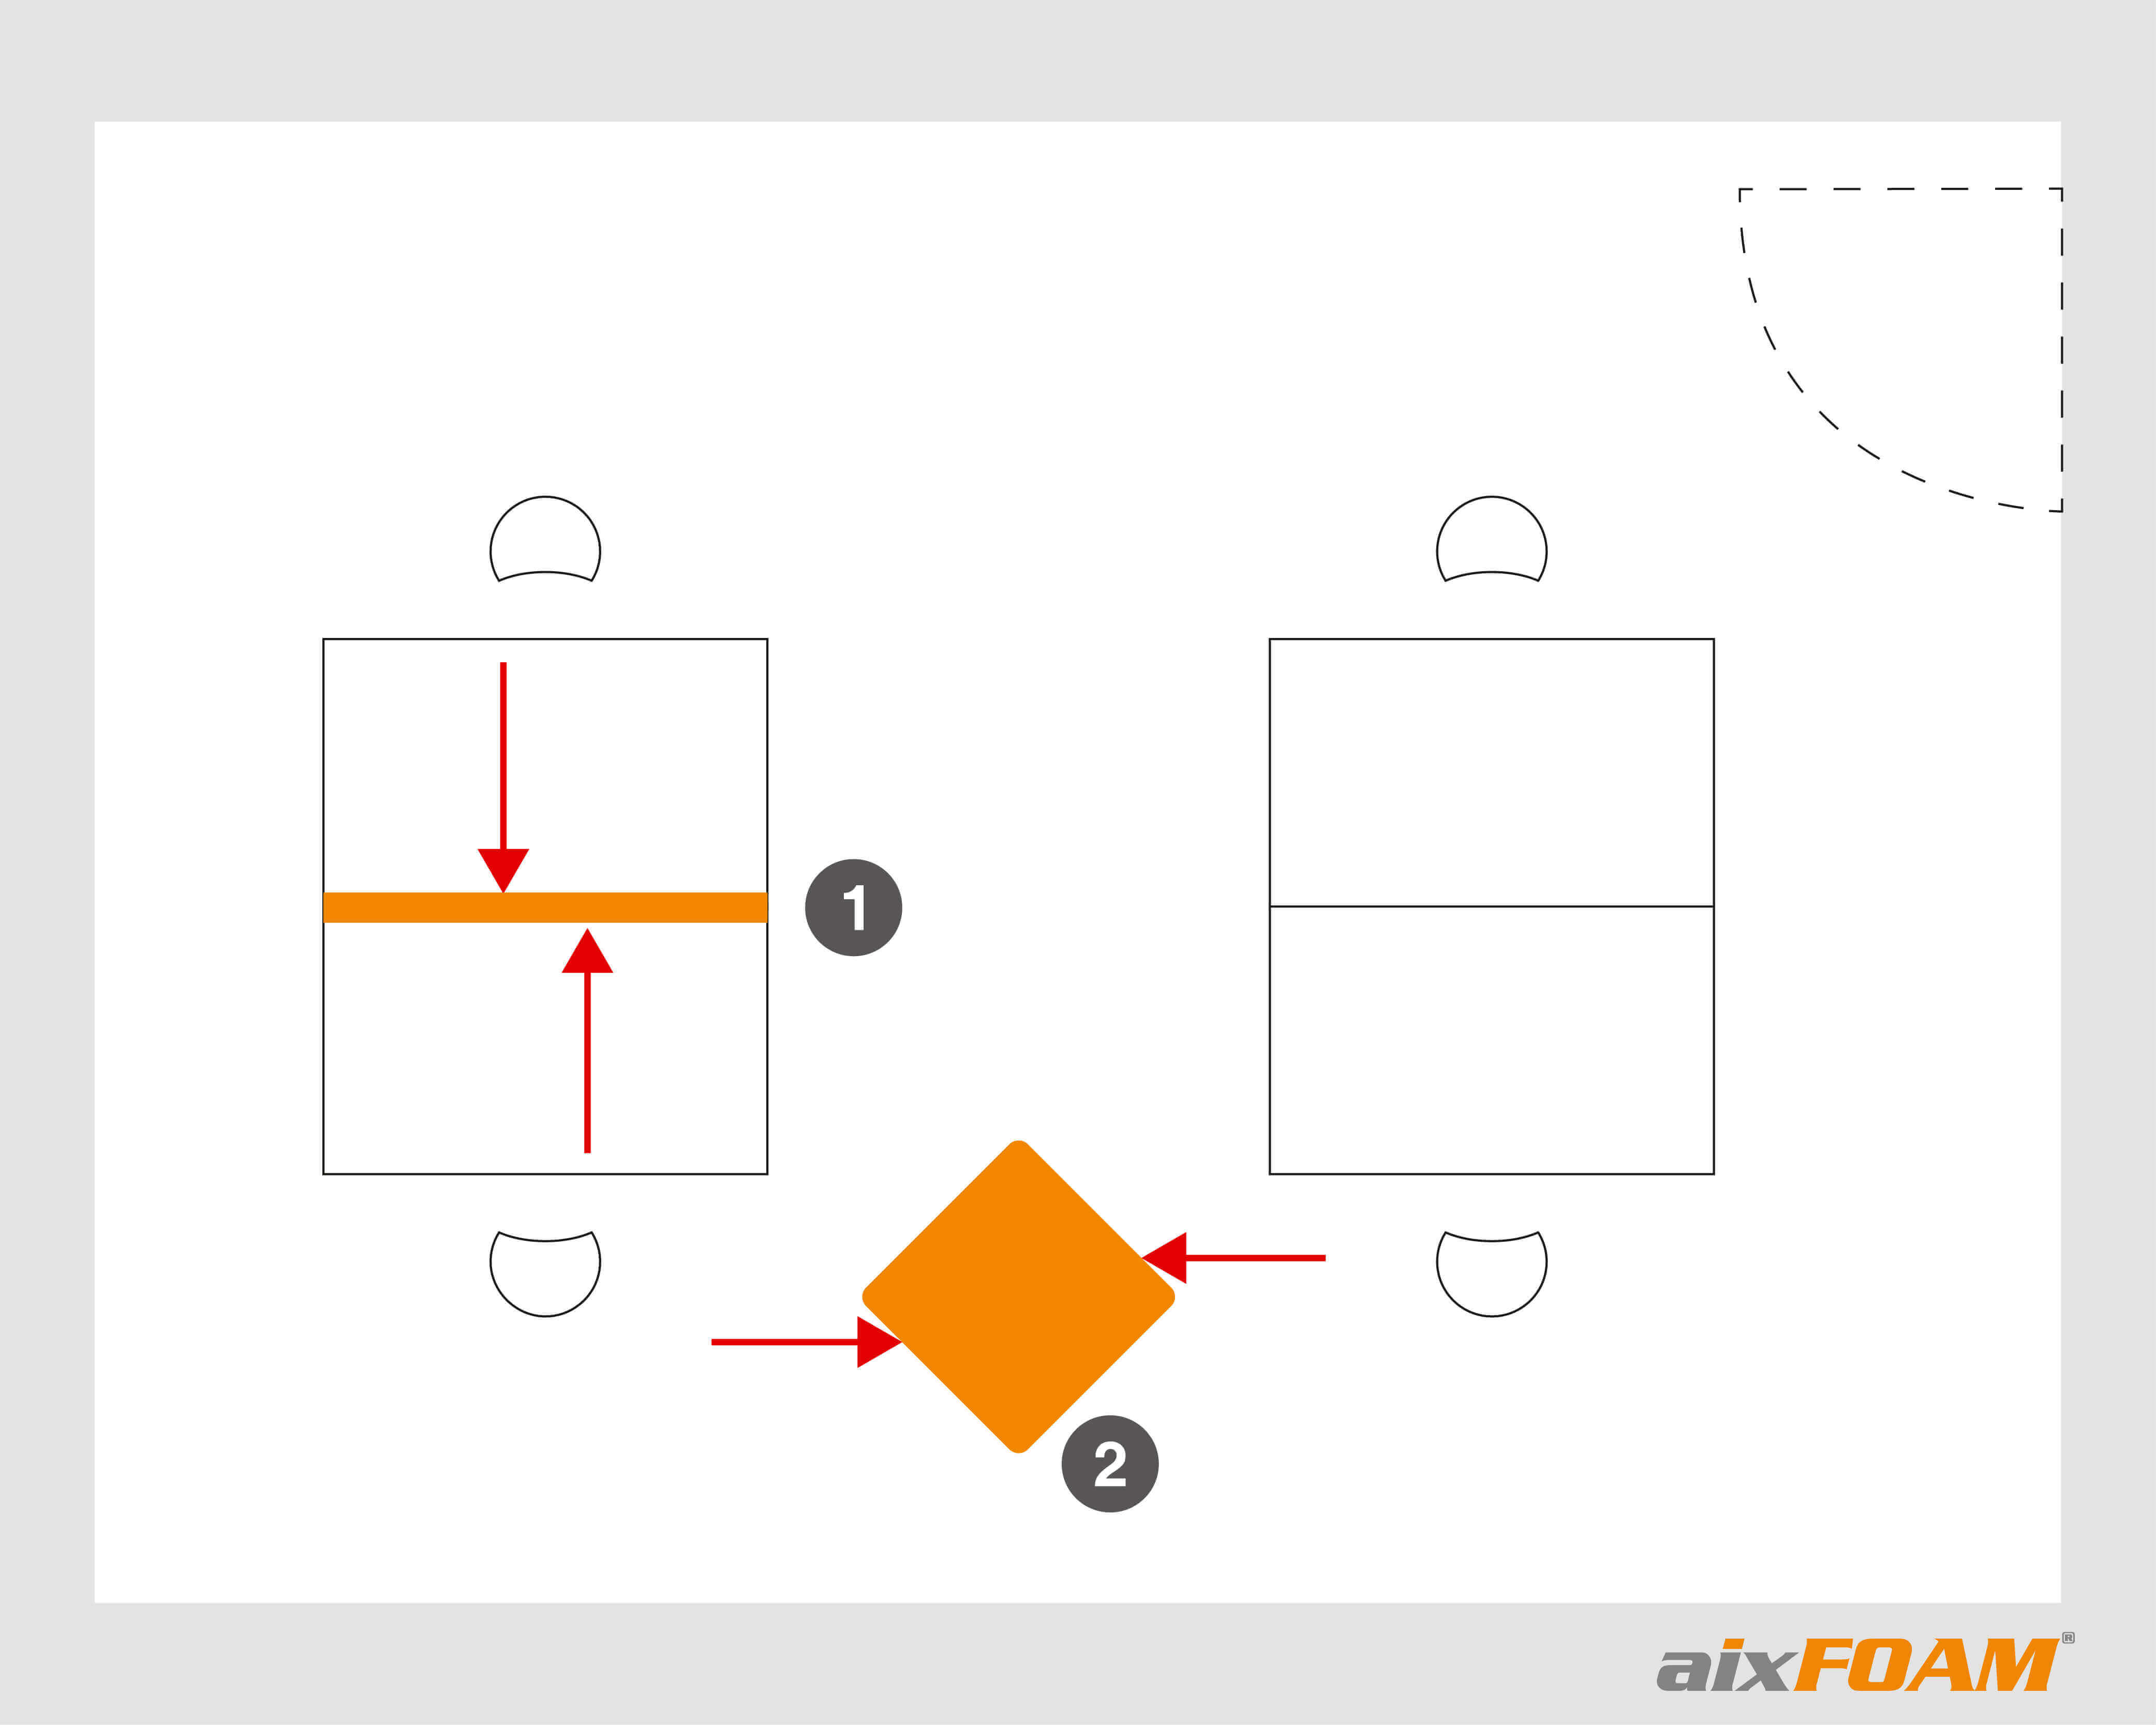
To block direct sound, sound absorbers should be used as an obstacle in the line of sight between the noise source and the hearing point. In our office space, this could look like this:
Acoustic table separators (1), which are placed in the language direction of the employees, are a suitable means to block distracting sound. It is important that the table separators are as high as possible, so that the direct sound does not simply travel over the absorber and reach the person sat opposite. A simple test is sufficient to check this: If the employees sitting on the opposite side can still see each other, the table separators are too low.
In order to shield the two desk pairs from each other, acoustic partition walls – room dividers can also be used – either suspended from the ceiling or, as in our sketch, in the form of an acoustic column (2). Here, too, the following applies: If employees sitting next to each other can see each other, sound can also reach the neighbours directly.
Less noise and stress in the office
aixFOAM acoustic elements for better acoustics and less noise in the office and call centre
Here you will find soundproofing, especially for use in offices and call centres! Whether table separators, acoustic columns, acoustic sails, room dividers or acoustic partition walls – aixFOAM sound absorbers improve room acoustics at the workplace and therefore promote concentration and productivity.
To the products
When noise proofing, it is also useful to place sound absorbers as close as possible to the sound source, as this will reduce the sound propagation, which otherwise takes place evenly in all directions. The closer the absorber is placed to the sound source, the more effectively the noise propagation is blocked. In office spaces, for example, it makes sense to attach floating acoustic elements with hanging systems directly above the individual workstations.
3. Determining and attenuating sound reflections
As mentioned at the beginning, not only direct sound has an influence on the room acoustics or the noise level, but also the sound, which is reflected by sound-hard surfaces (walls, ceilings, furniture, etc.).
With each reflection, sound waves lose energy, so the sound waves should be insulated, which arrive at the receiver with only a few reflections. Sound waves, especially those that arrive at the hearing point after only one reflection from a wall or ceiling, should be considered in acoustic measures. This sound is called initial reflection.
In order to effectively dampen initial reflections, it is necessary to know the places on the wall or ceiling where the sound is reflected and place sound absorbers there.
But how exactly do you locate these reflection points? The following explains some methods by which you can find the right position for your aixFOAM sound absorbers in the simplest way possible. Which one you prefer is entirely up to you.
4. Finding reflection points using the mirror method
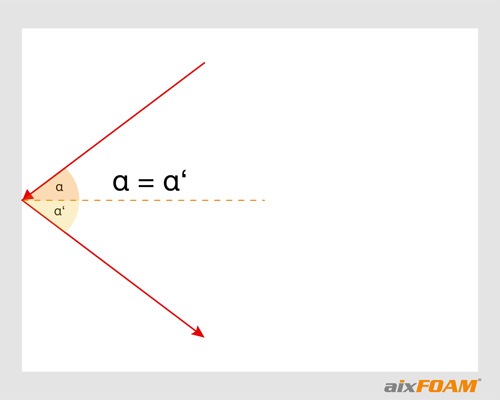
The mirror method uses a very simple physical principle, which will surely be familiar to you from your school days. Just like light rays, sound waves are reflected at the same angle as they hit a surface. The angle of incidence is thus equal to the reflection angle.
In order to explain this method for finding the points for the initial reflection as clearly as possible, let’s return to our office example from the previous section.
As the name “mirror method” suggests, you will need a small mirror and one or two people as assistants to determine the reflection points on the wall and ceiling.
Proceed as follows: Let your two helpers sit facing each other at the table. Now hold the mirror flat against the wall or ceiling and move it slowly along the surface. As soon as your two helpers, who should be watching the mirror closely, can see each other, you have found a point for the first reflection and thus an important position for attaching your sound absorbers.
Ideally, the sound absorbers should be arranged in such a way that the main reflection points are approximately in the middle of the sound absorbers. As an indication of height, the middle of the absorber should also be placed at ear height.
The mirror method is a very simple, at the same time effective and accurate variant to determine sound reflection points experimentally. You can use them on the wall as well as on the ceiling and in virtually any room situation.
For example, if you want to determine the reflection points of the speakers in your home cinema, you can work according to the same principle. Go to your listening place, such as your couch, and let a second person walk by it whilst holding a mirror flat against the wall. As soon as you can see the front of your speakers in the mirror, you have found a first reflection point and thus the position for your sound absorbers.
5. Defining reflection points - The drawing method
In addition to the experimental approach with the mirror, you can also determine the position of the reflections graphically. All you need is a true-to-scale blueprint or a drawing of your room.
To introduce you to this method, we would like to show you how to determine the reflection points in a home cinema. We will use the following floor plan in this example:
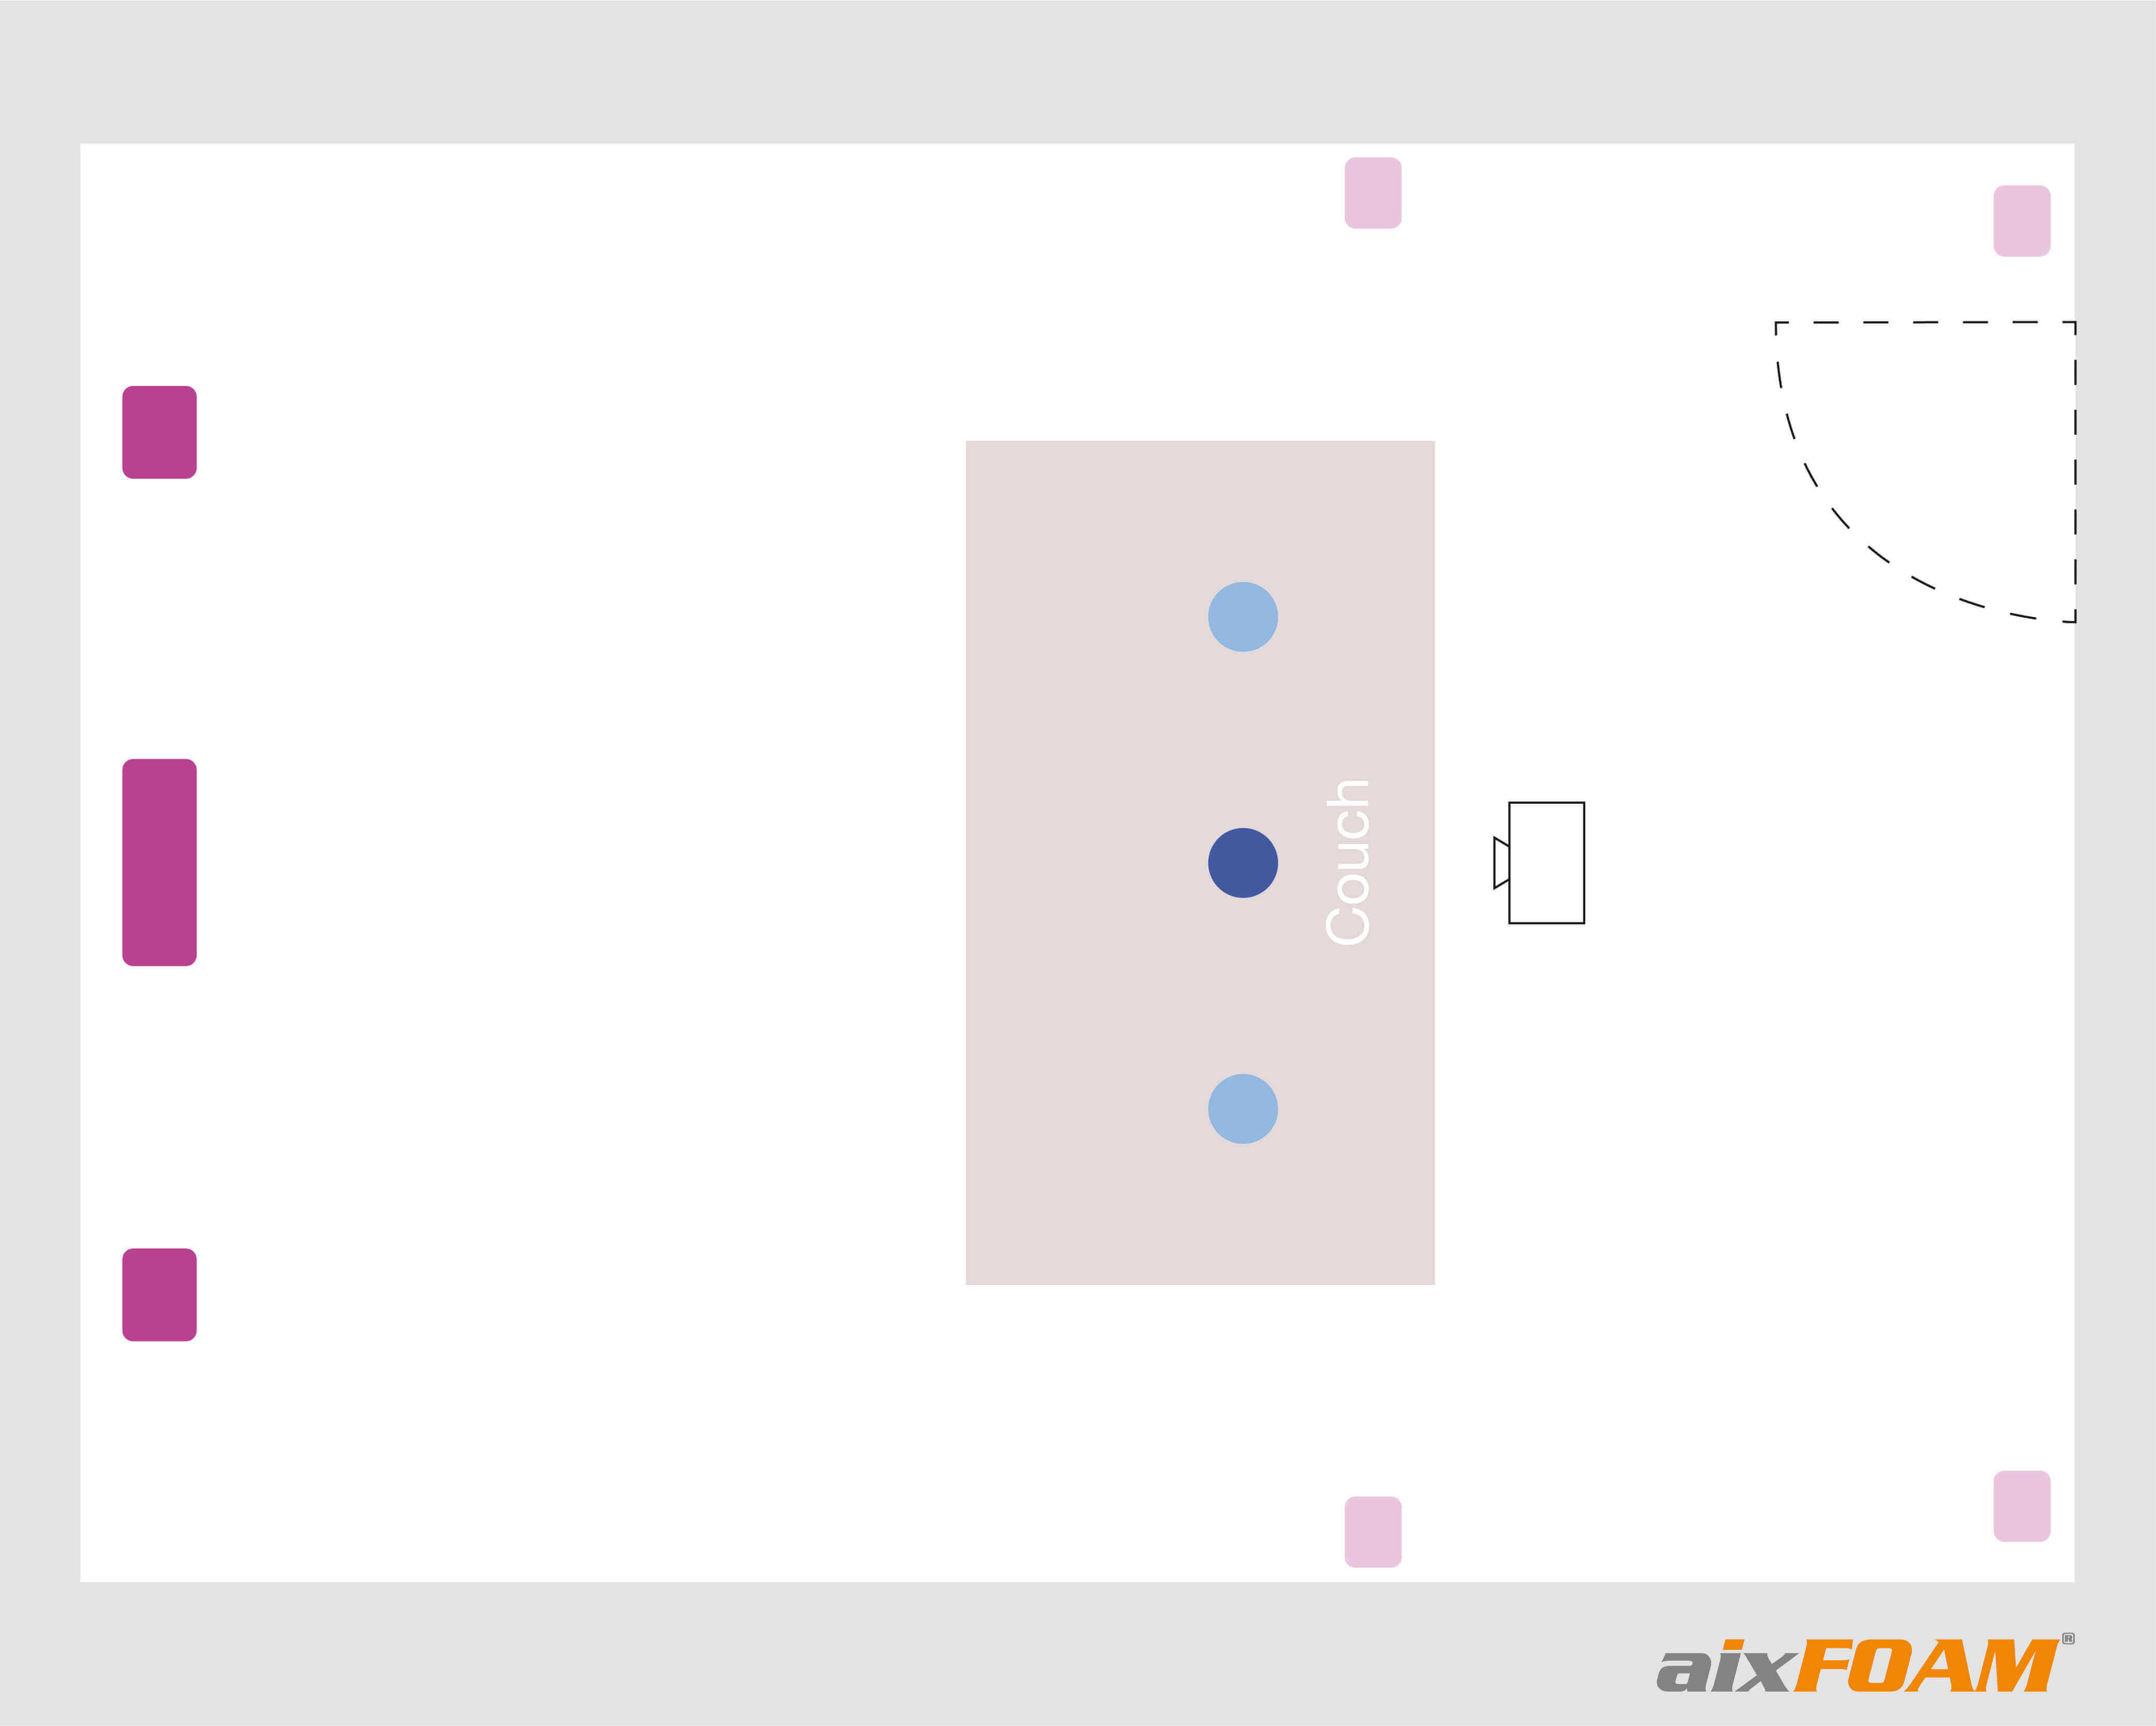
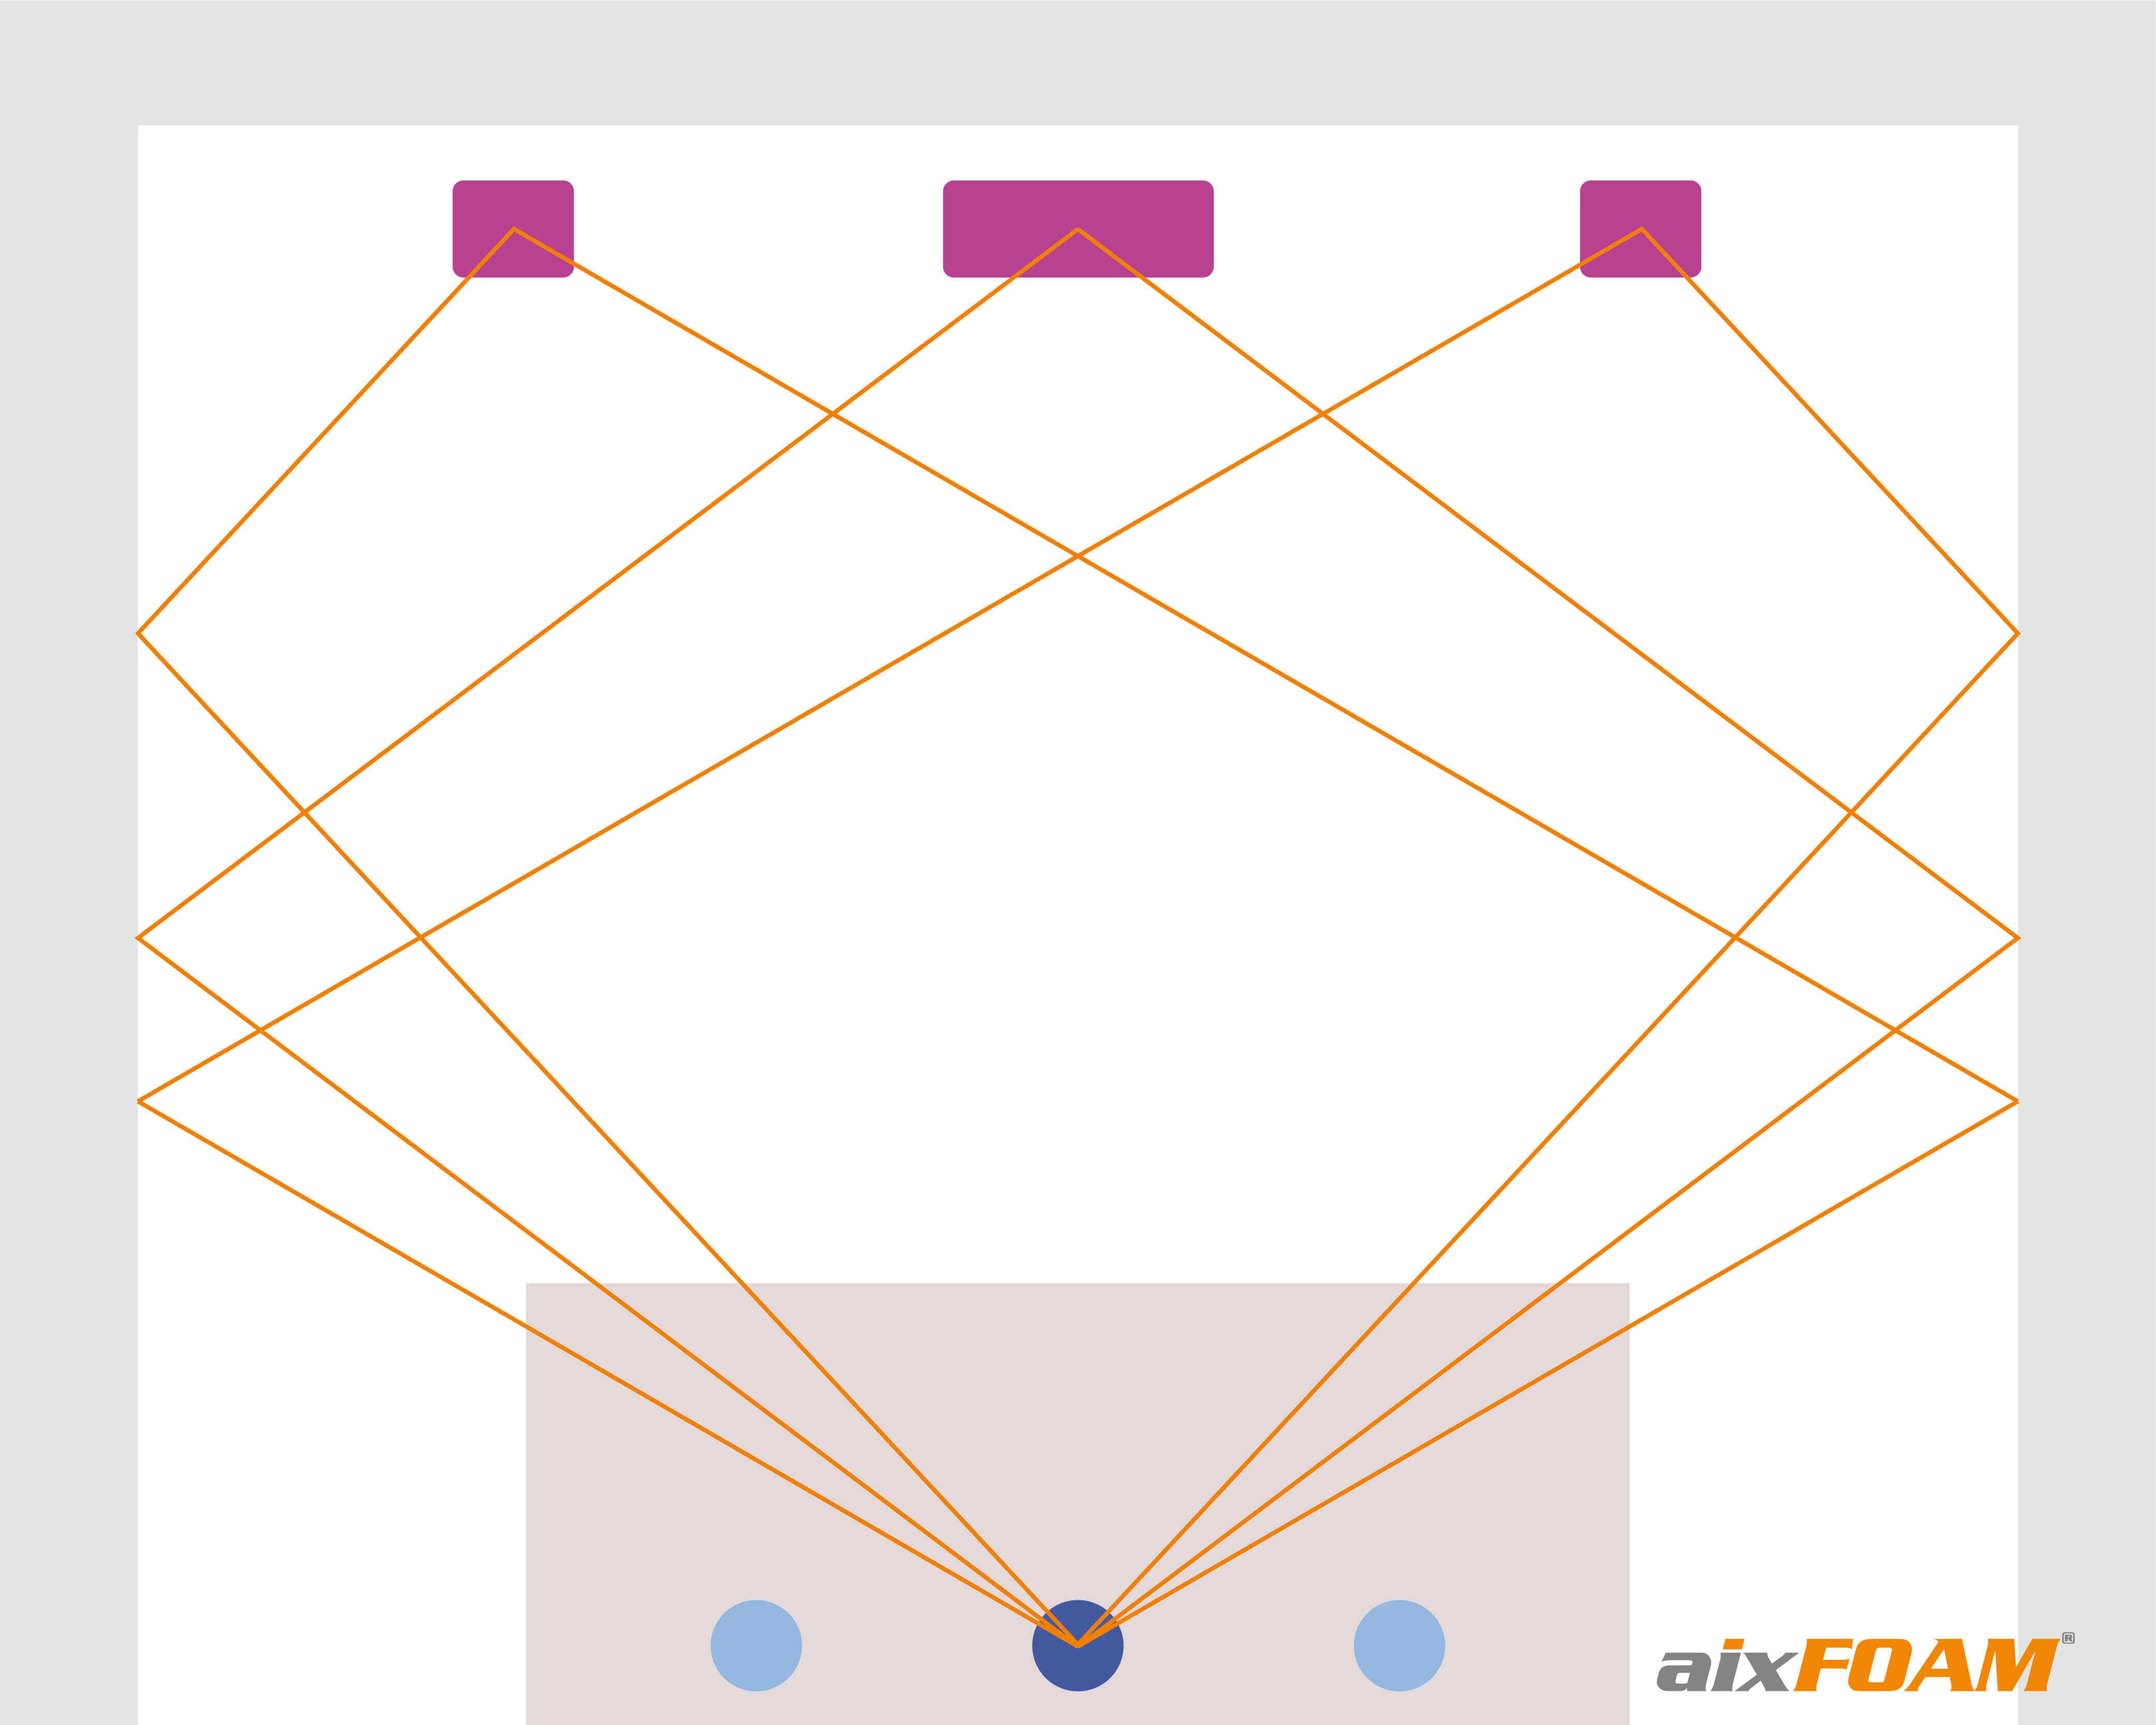
The plan shows a home cinema room with a three-seater couch and a 7.1 speaker system. To help you understand the drawing method for determining the initial reflection points, in this example we'll only look at the front, dark-purple speakers, that is, the centre, and the left and right main speakers. The principle can of course also be used later for all other loudspeakers in the room.
As with the mirror method, the sound reflection law mentioned above is also important for the drawing method, i.e. angle of incidence is equal to the angle of reflection. In this case, however, we do not determine the angle or the reflection points experimentally, but – as the name suggests – by drawing. So how do we do this?
First of all, it doesn't matter if you make your drawing on paper or digitally on the computer. The only important thing is that your presentation is true to scale, so that you can accurately transfer your reflection points later.
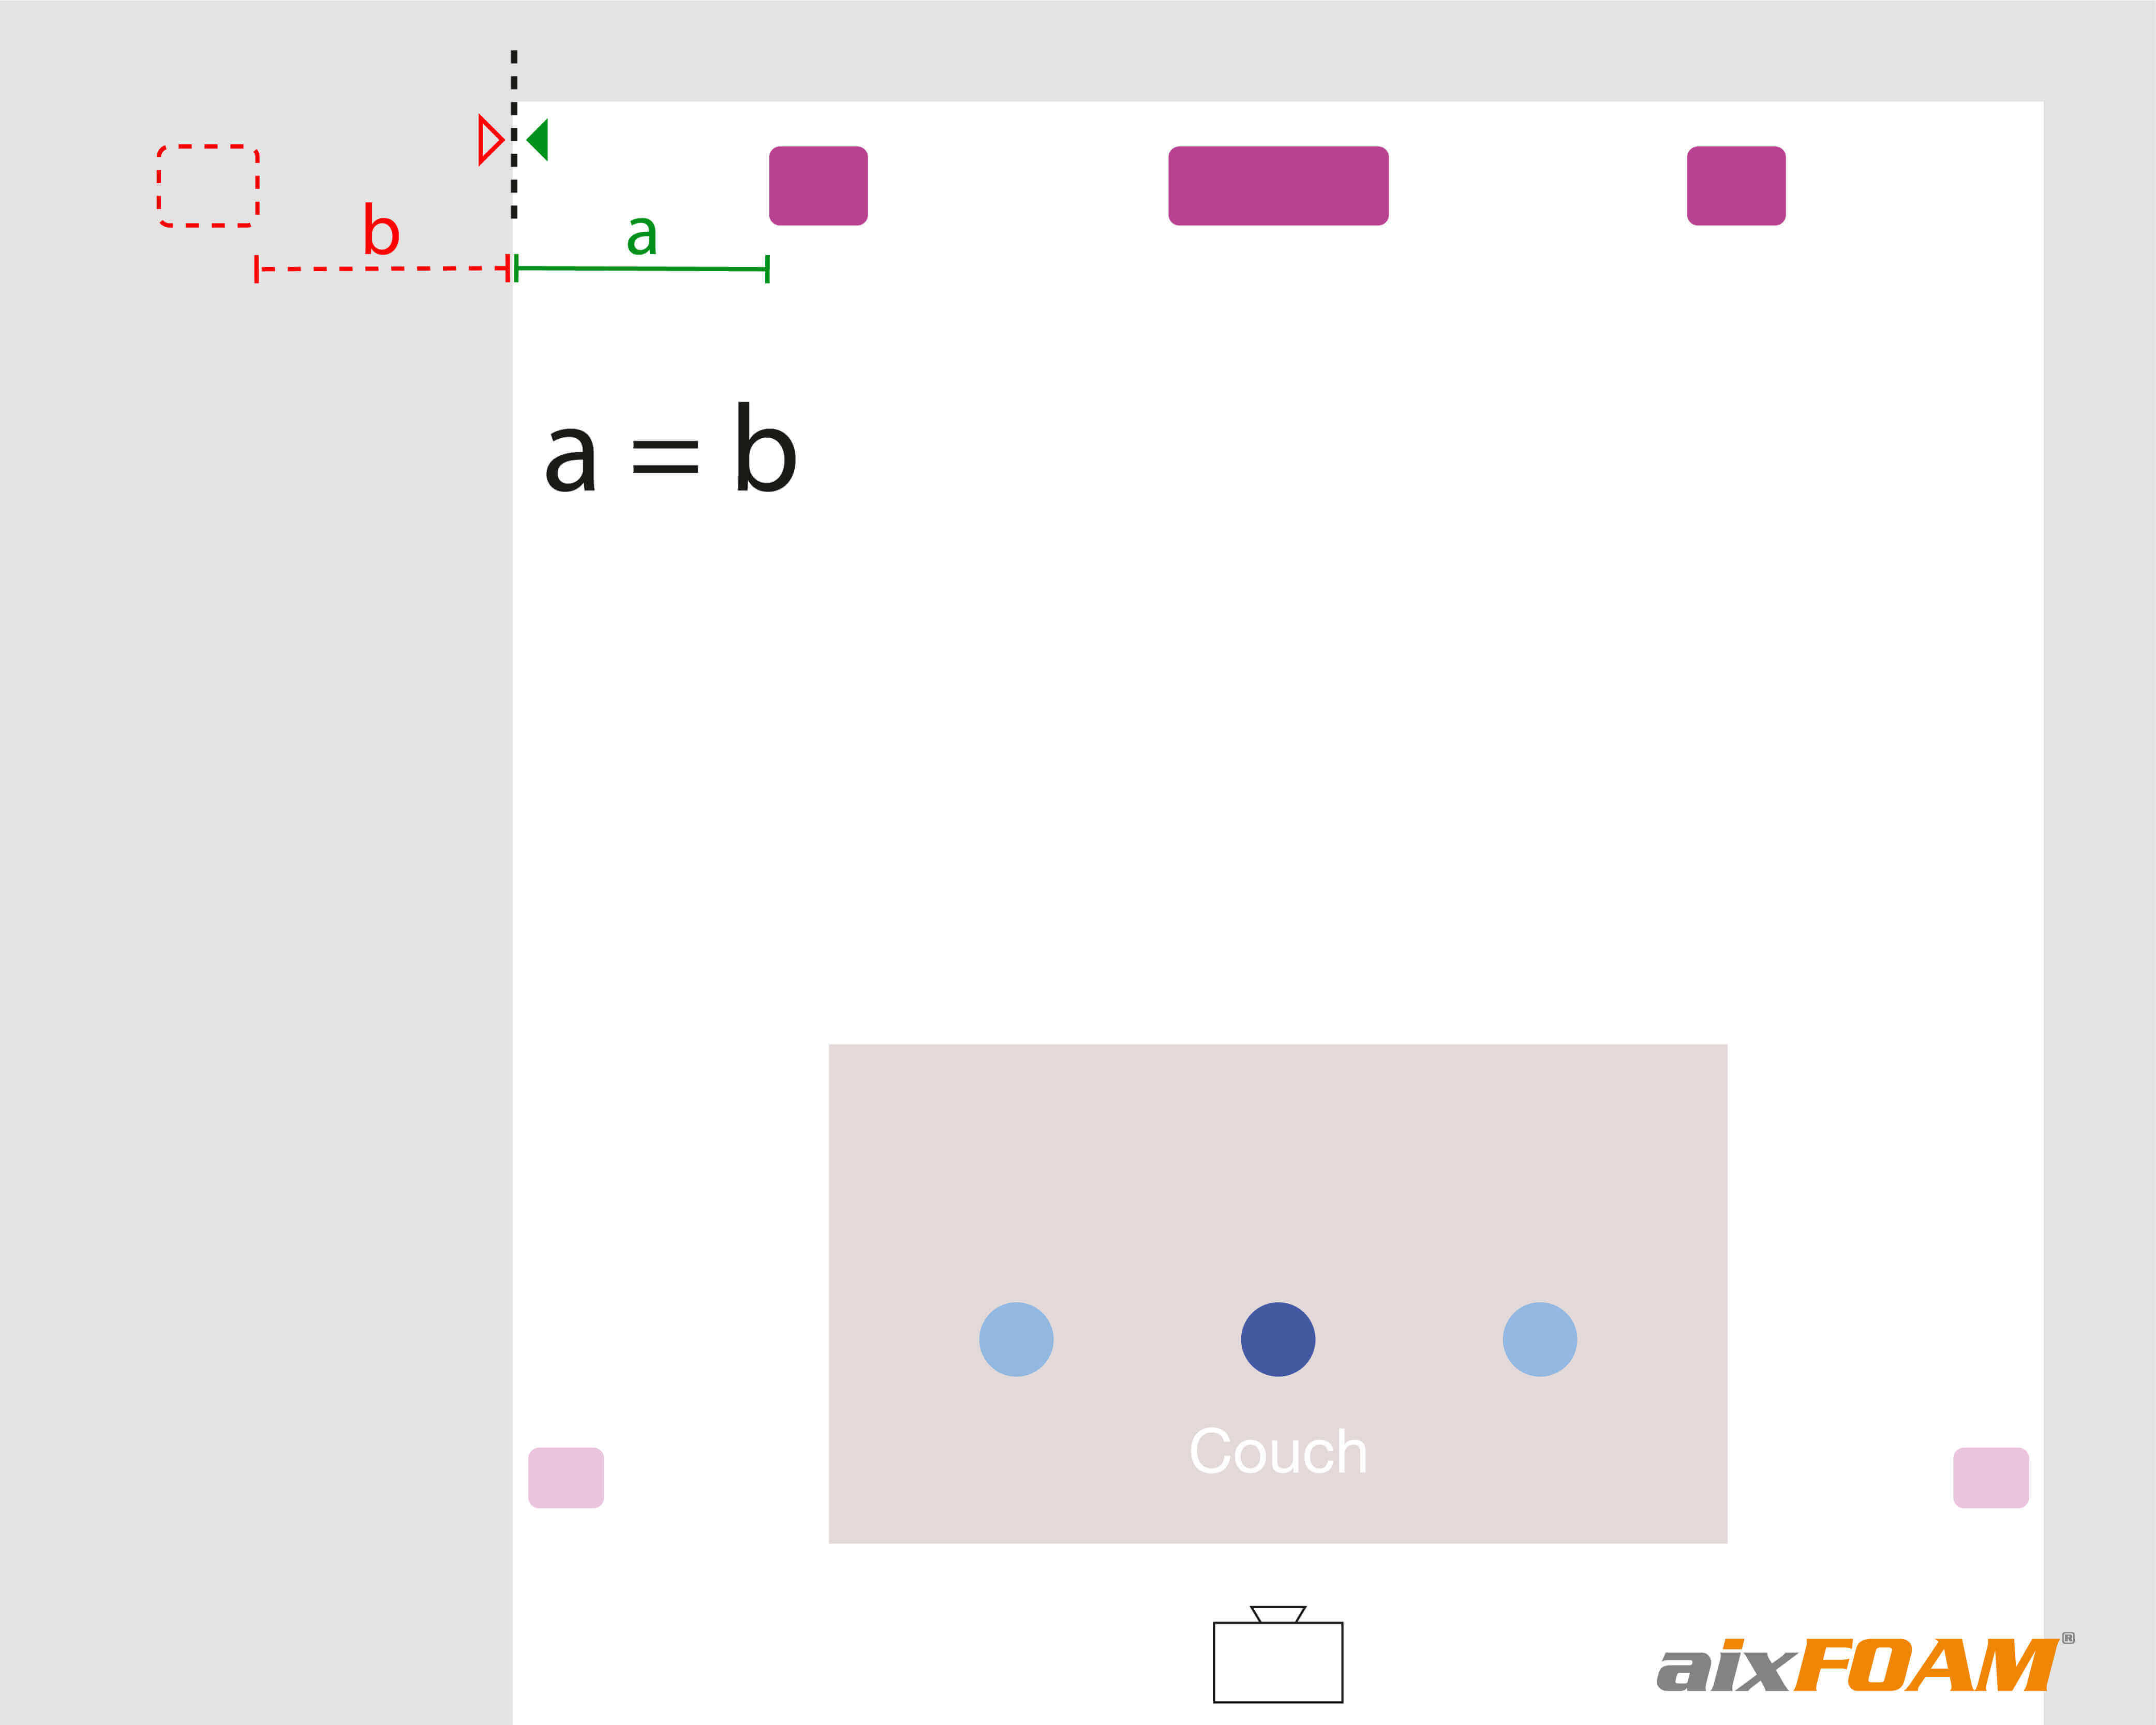
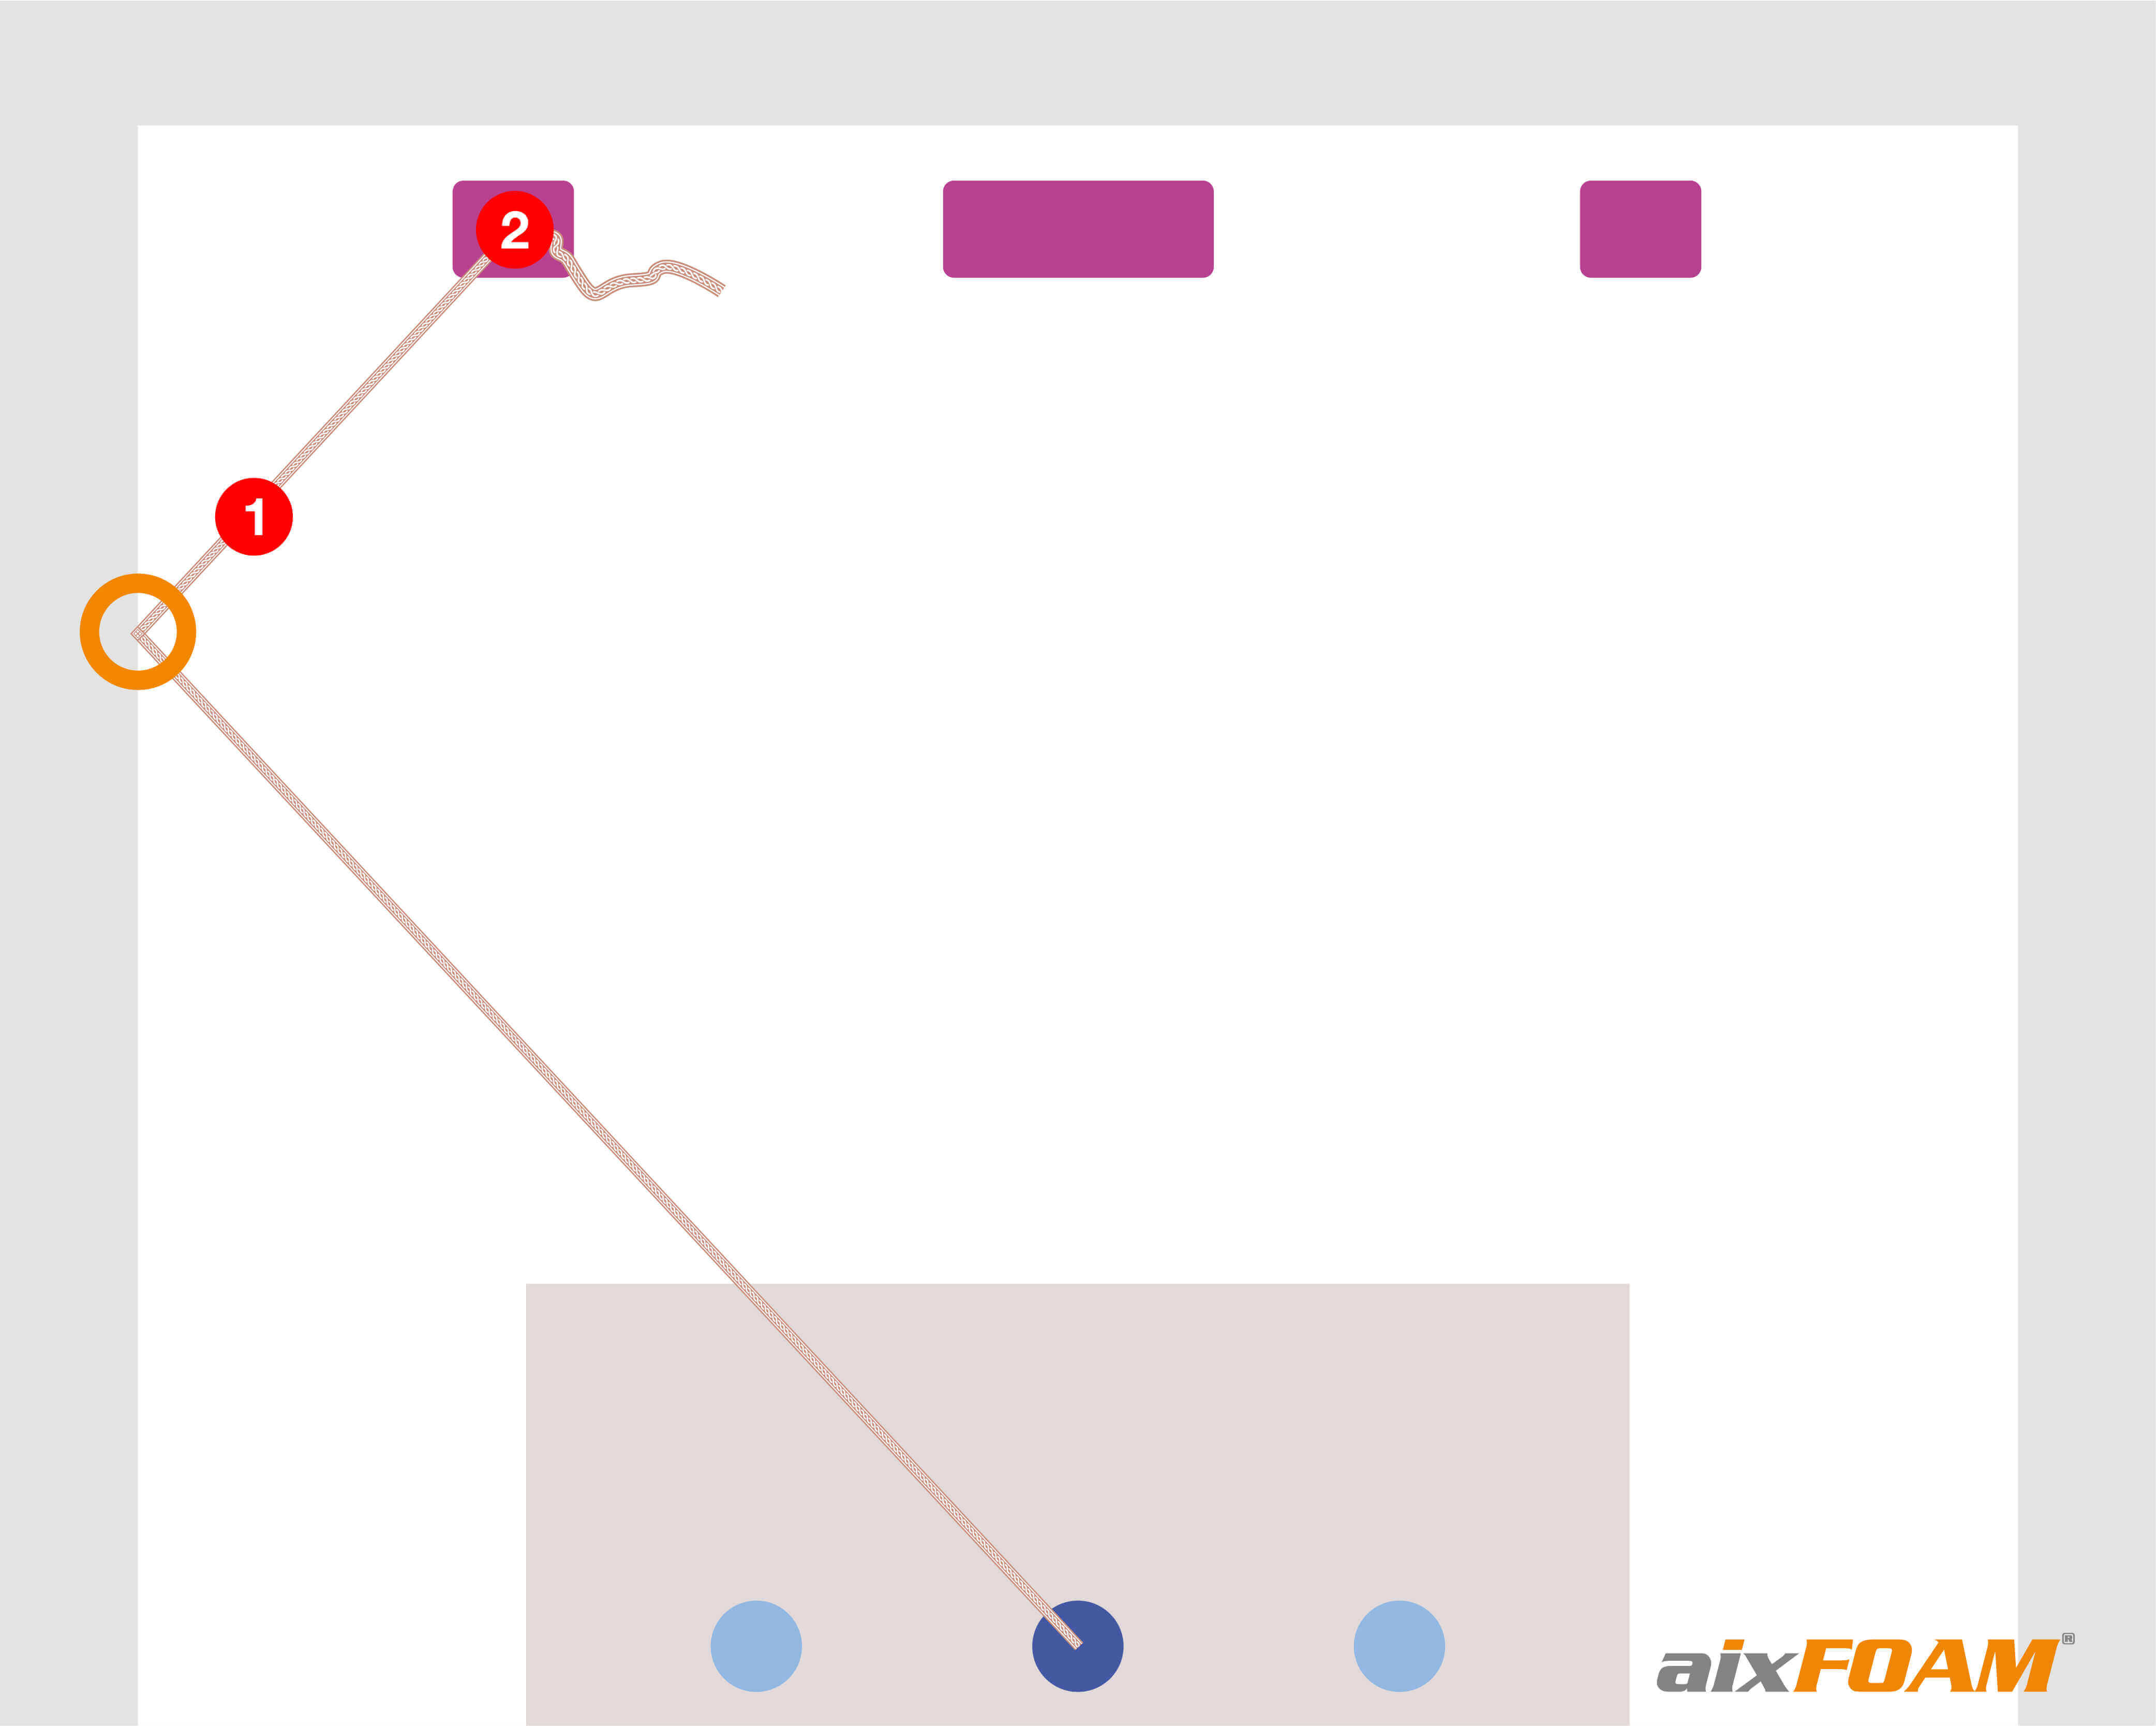
Let's start with the left main speaker. First, mirror it on the reflecting wall. Let’s start here with the left wall. Some graphics or drawing programs offer an automatic mirroring function. Otherwise, simply measure the distance of your speaker to the wall and draw this on the other side of the wall. This gives you an imaginary point outside your floor plan.
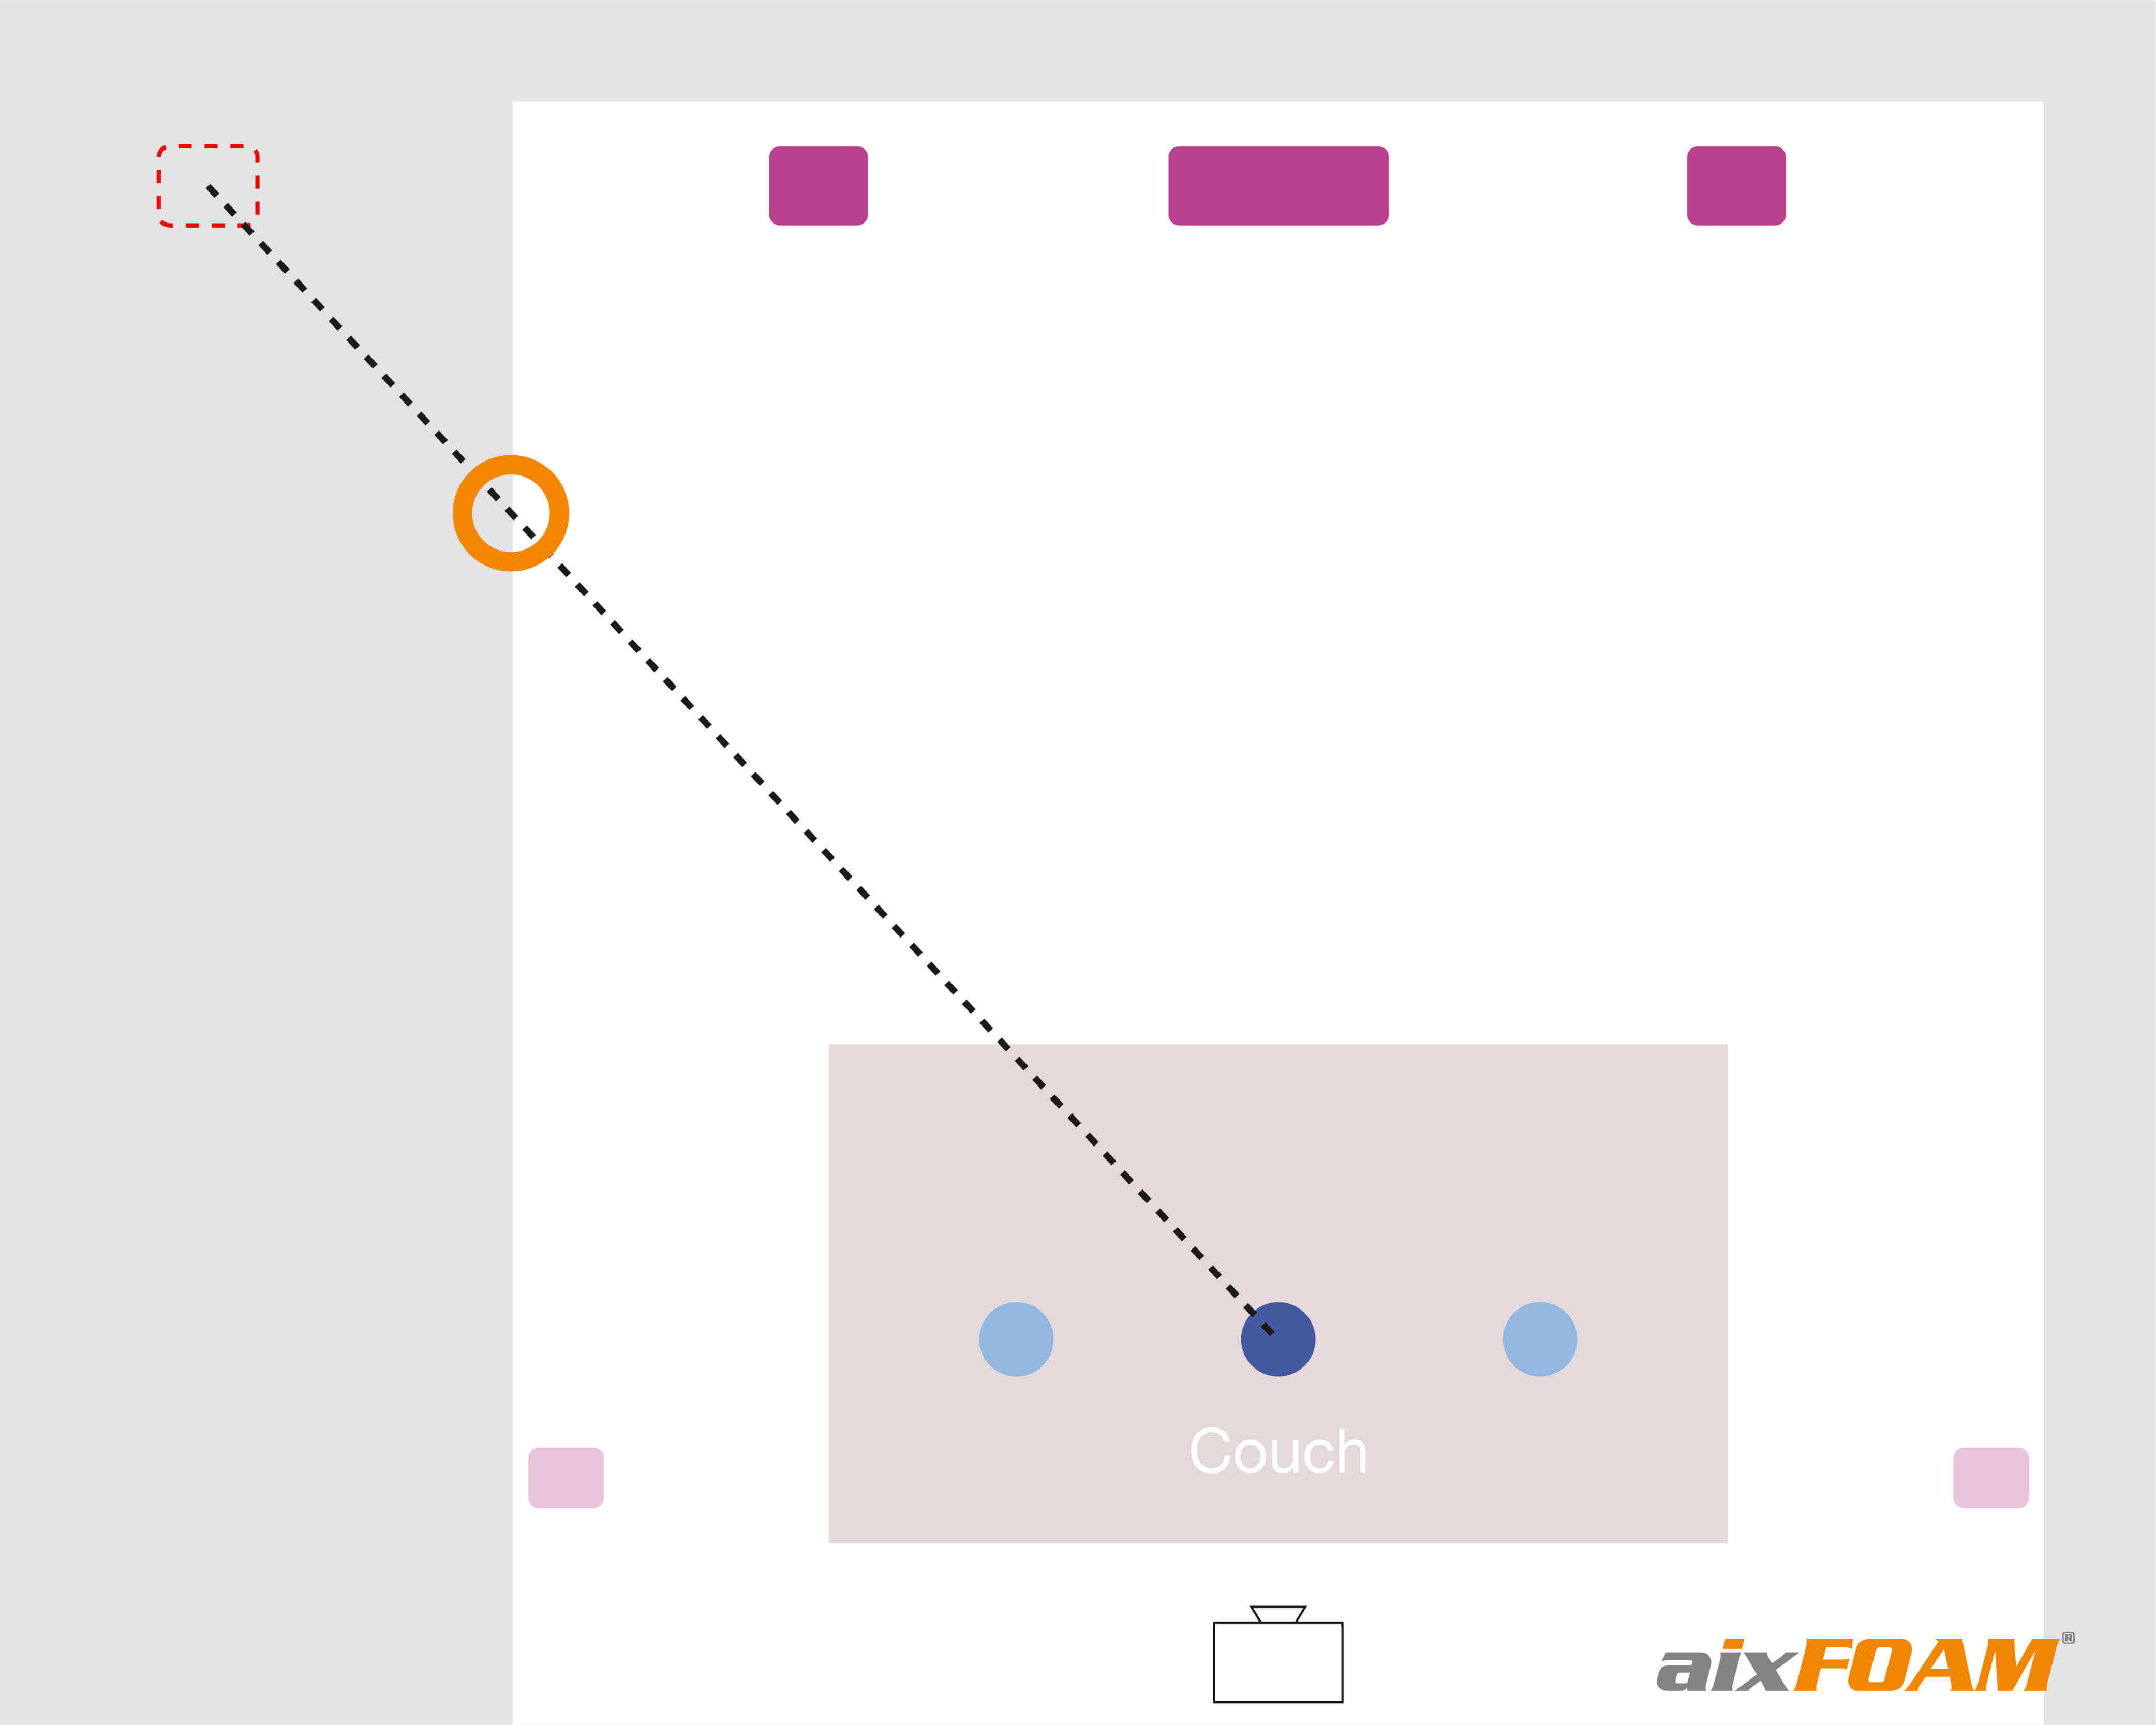
In the next step, draw a guideline from the mirrored speaker to the listening position. In our example, we start with the middle seat (dark blue), i.e. the main sitting position, on the couch. Mark the intersection between your guideline and the wall.
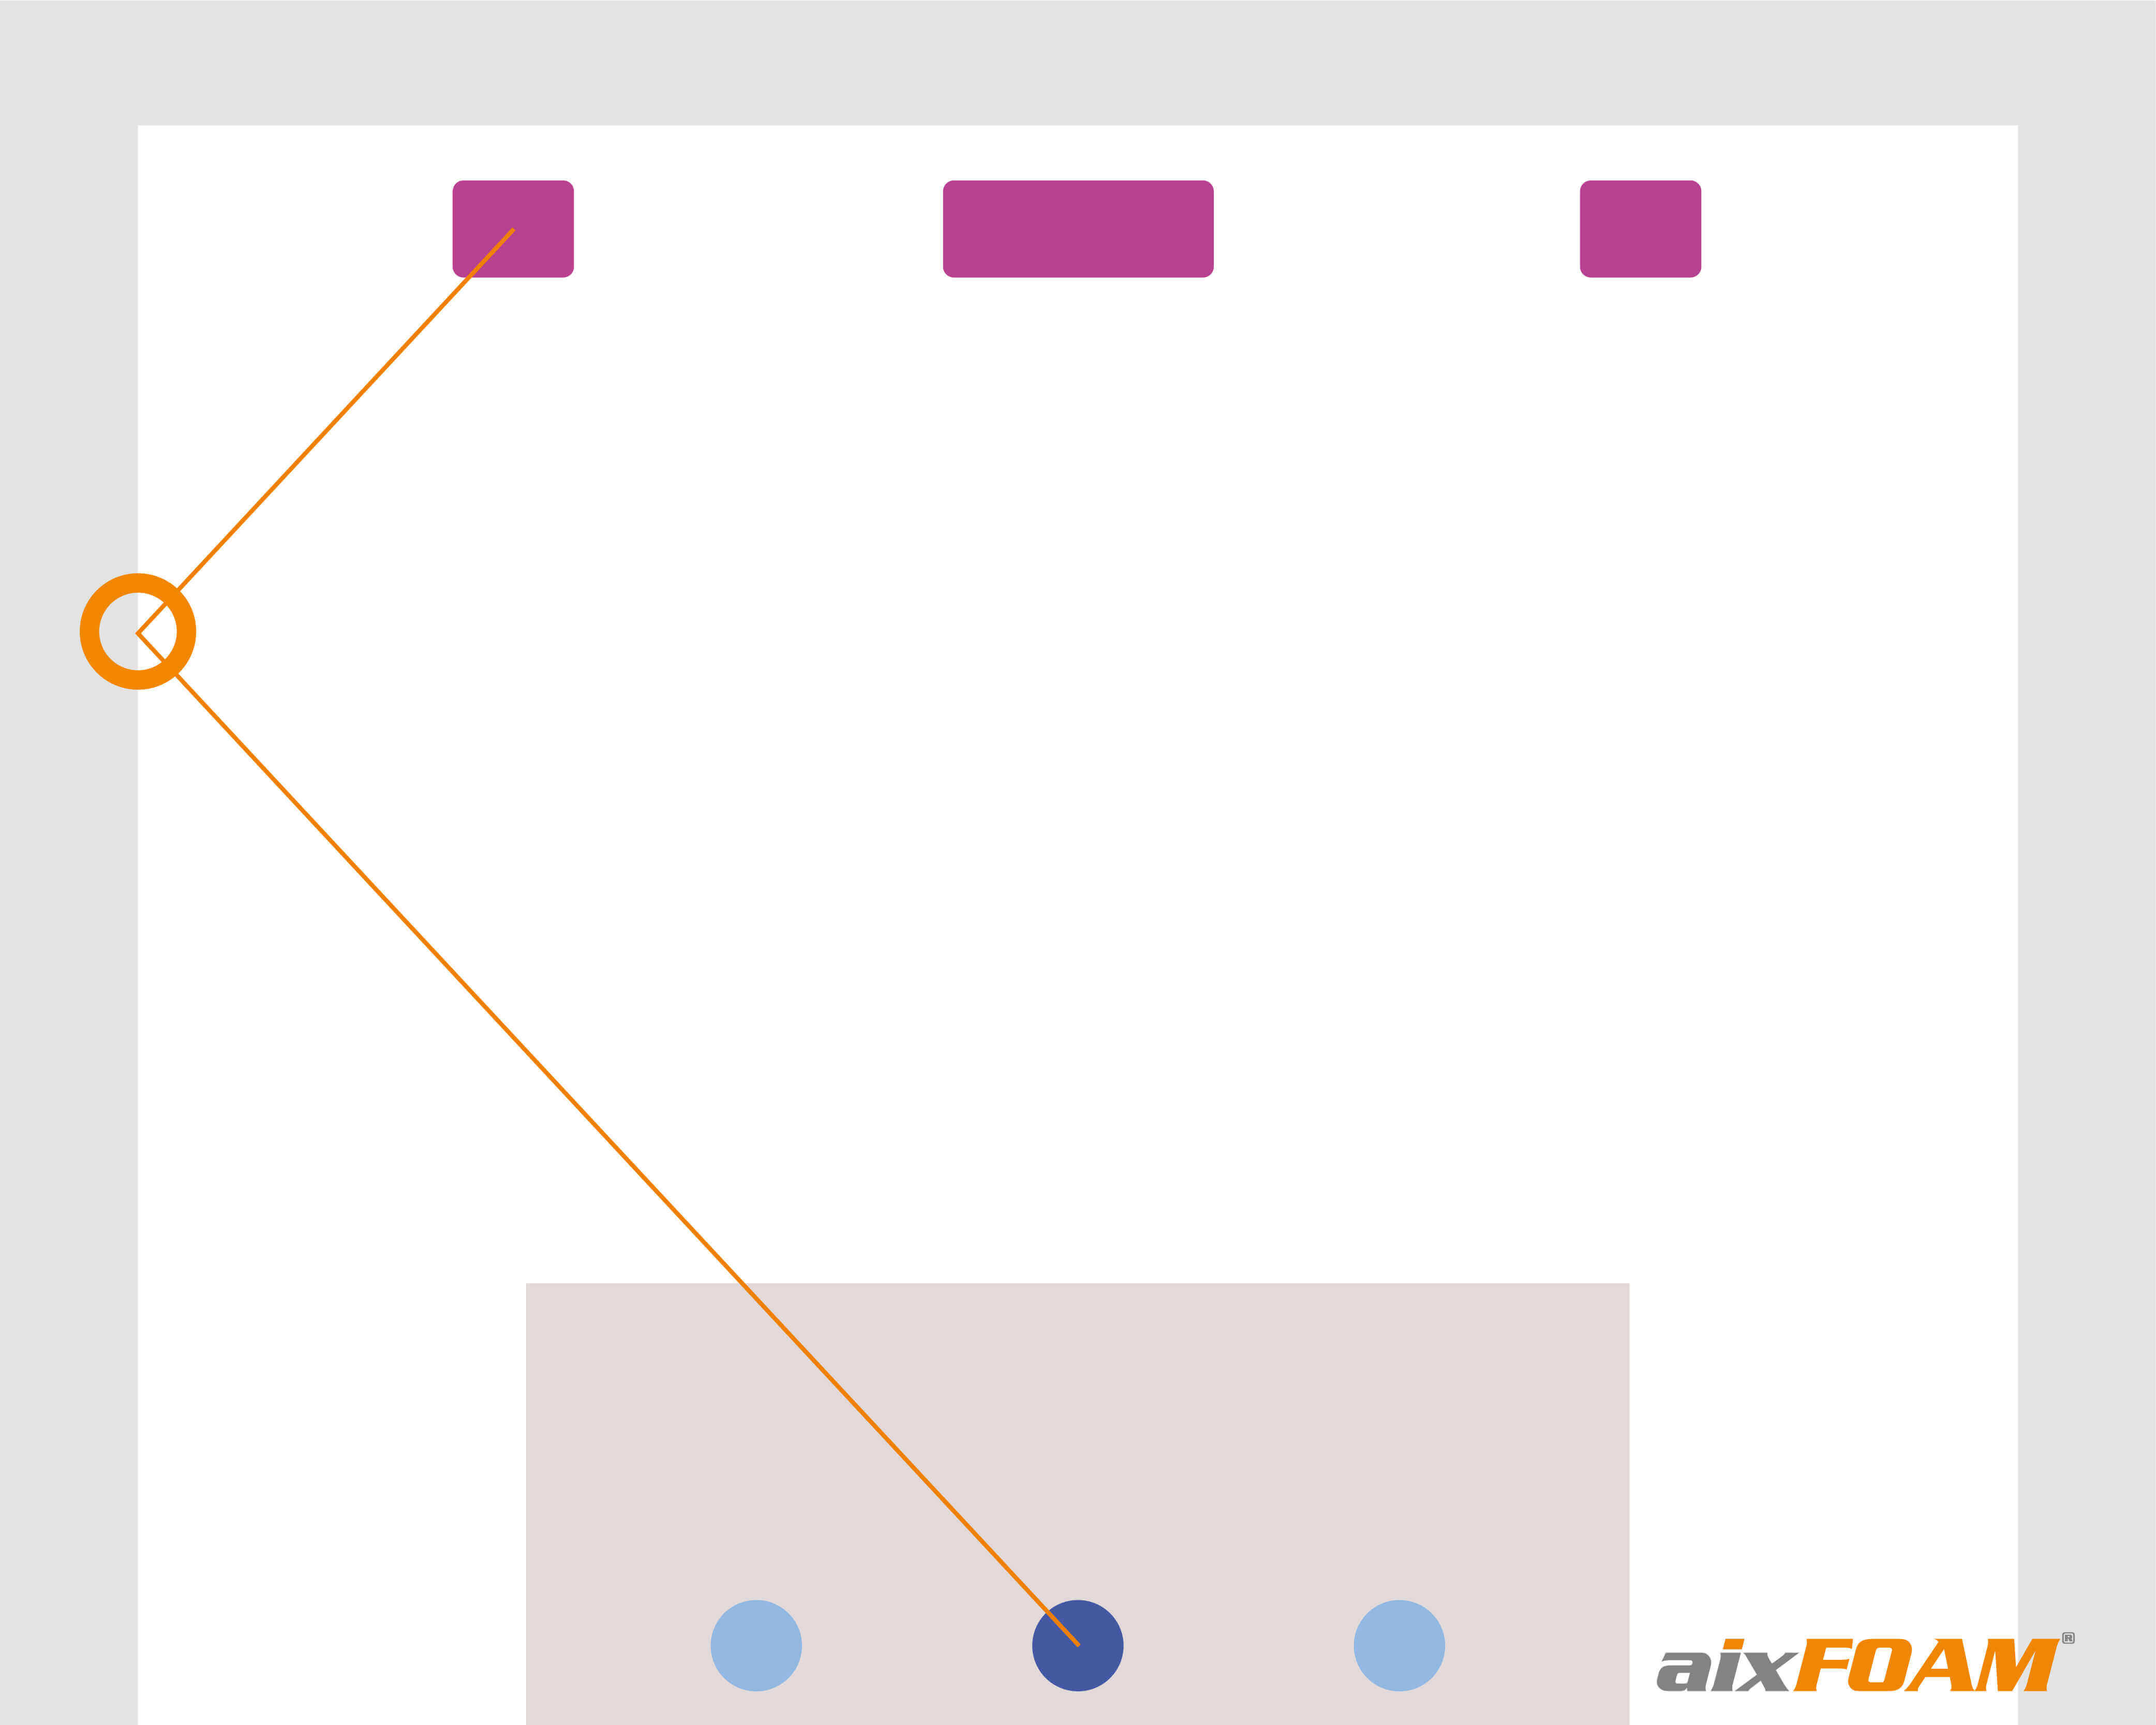
Now, when you trace the sound path from the speaker to the wall and then to the listening position, you will see that you have an precise angled line — angle of incidence equals angle of reflection. The marked point on the wall is your desired reflection point and thus the right position for your aixFOAM sound absorbers.
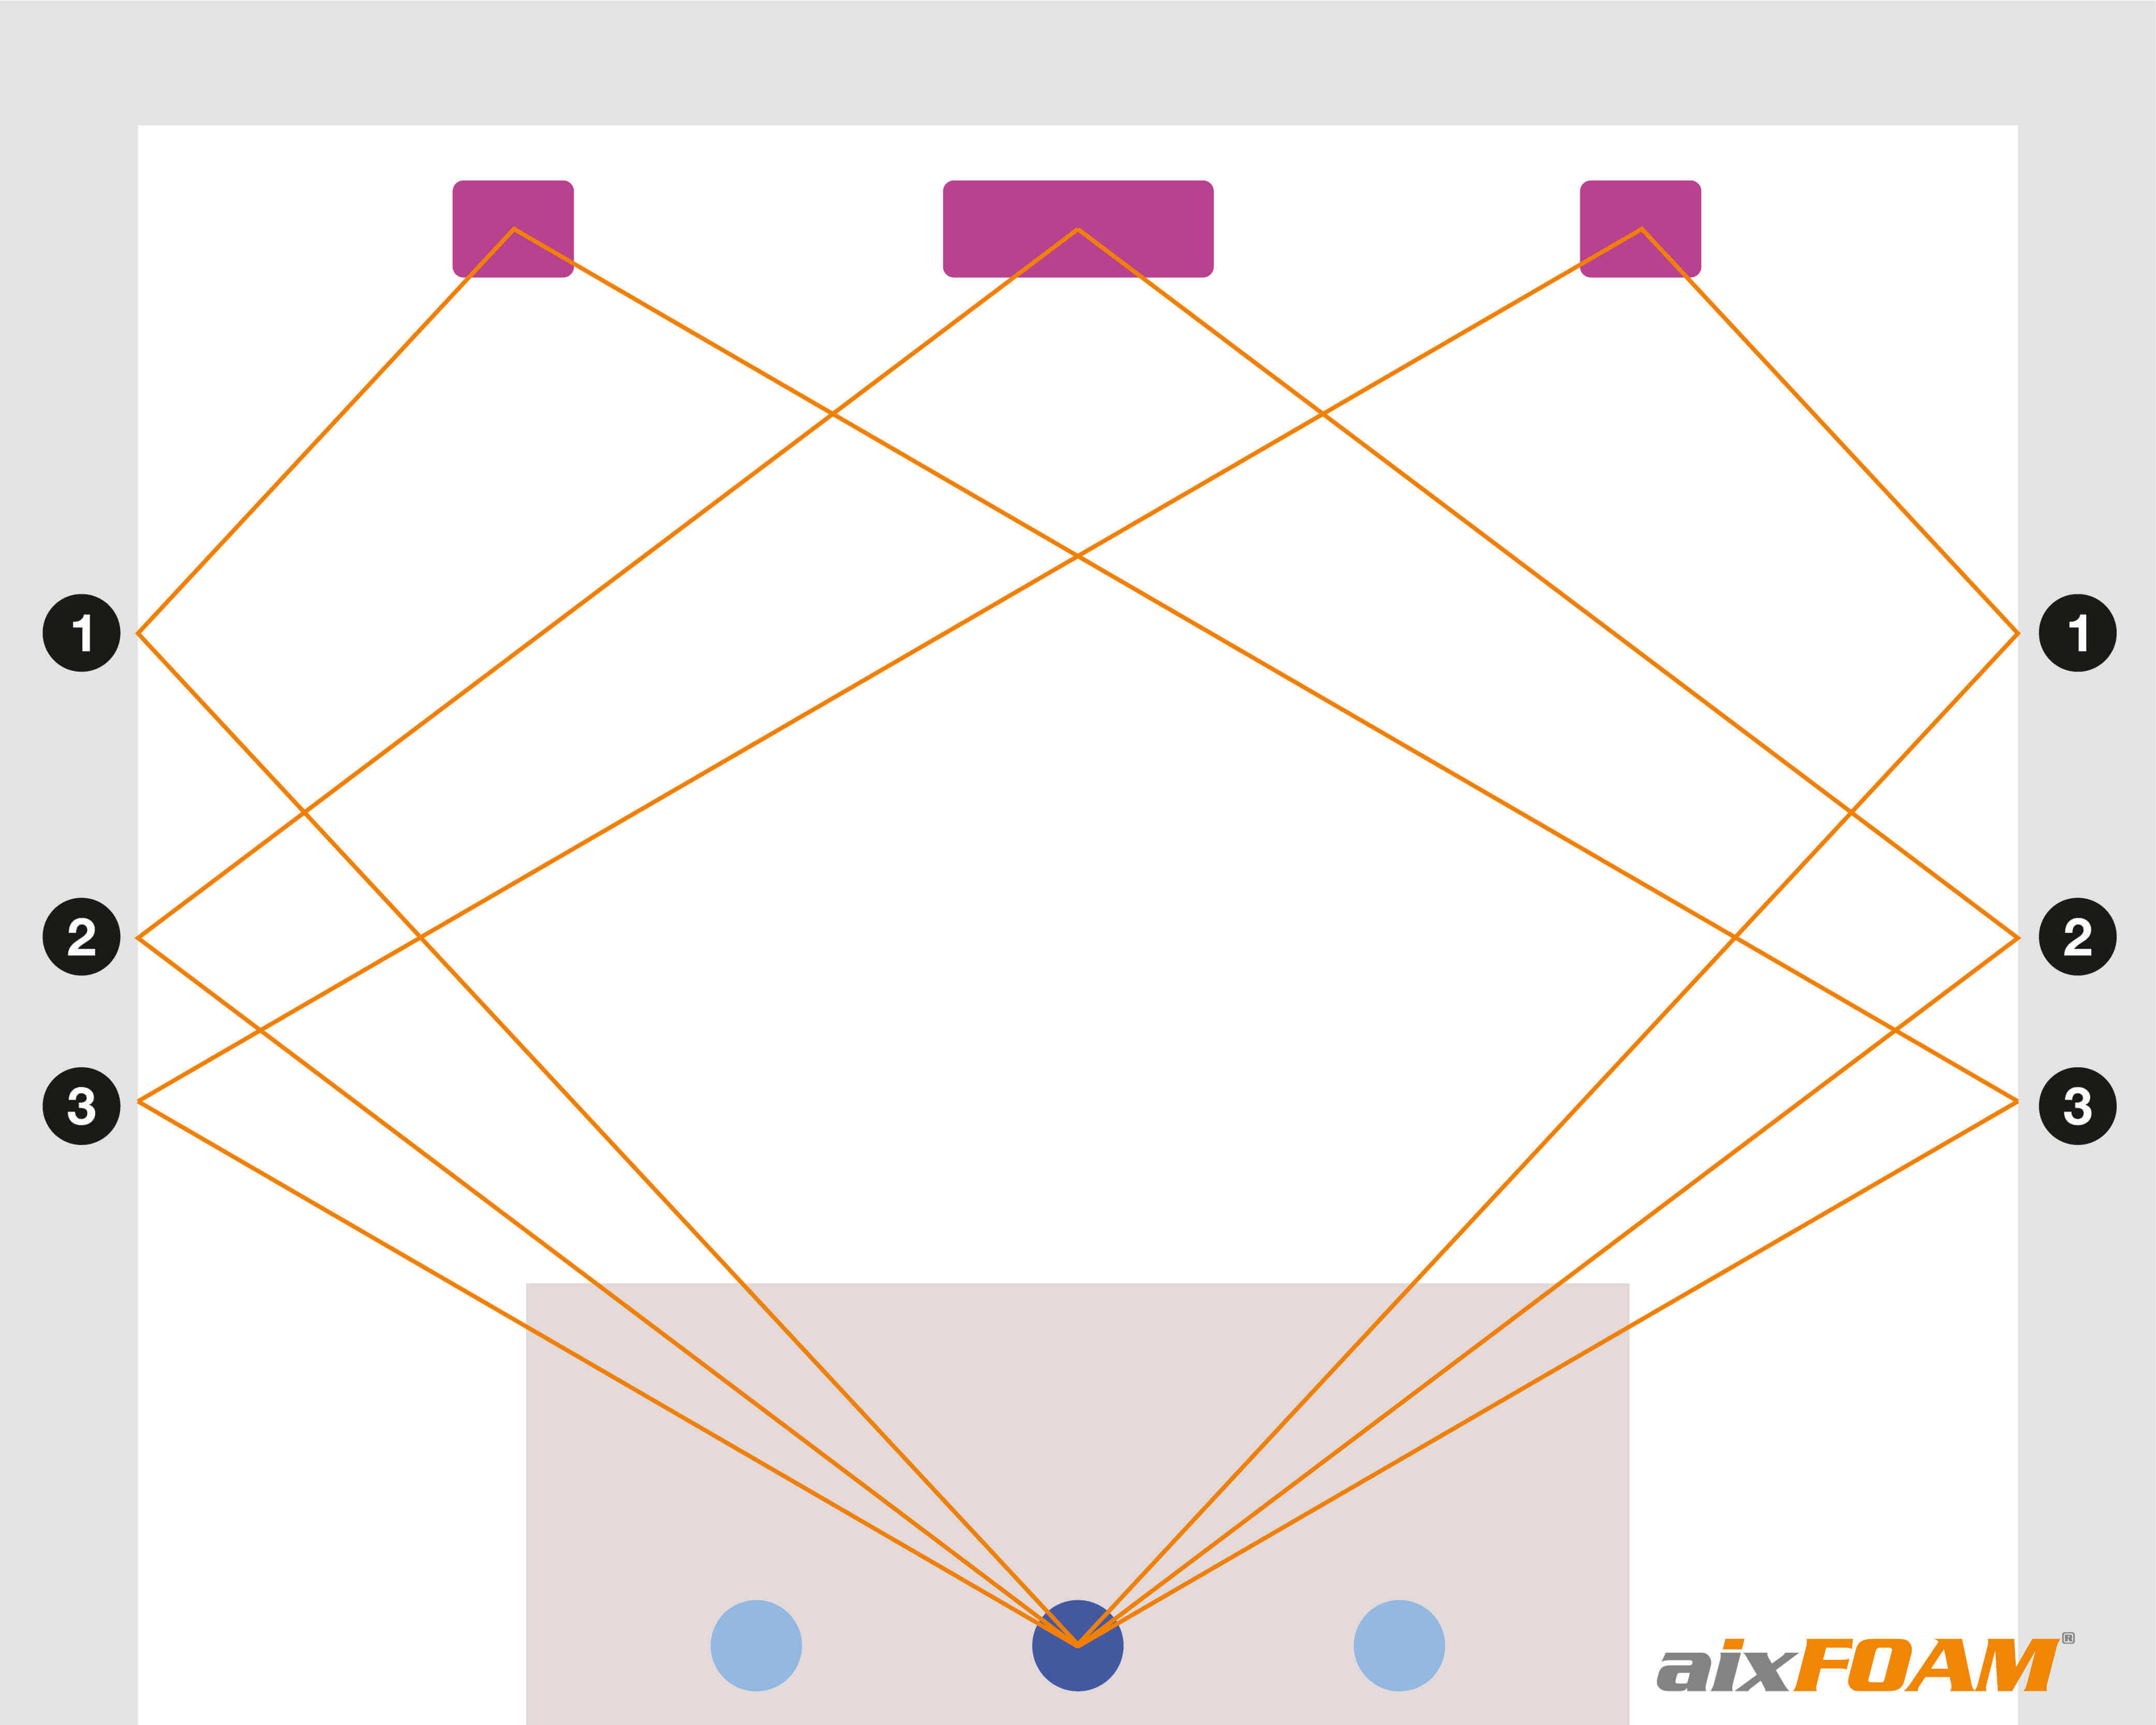
Repeat the process for all loudspeakers on the left and on the right wall. After that, your drawing should look something like this:
5.1 Prioritise reflection points
The sooner the sound hits a wall surface, the more energy it has, therefore it also reflects more. It is therefore important to give priority to the points where sound from the speakers hits first. The following sequence makes sense in our home sense:
- 1. The left wall at the left speaker and the right wall at the right speaker
- 2. Both walls, starting from the centre
- 3. The left wall at the right speaker and the right wall at the left speaker
5.2 Consider multiple listening points
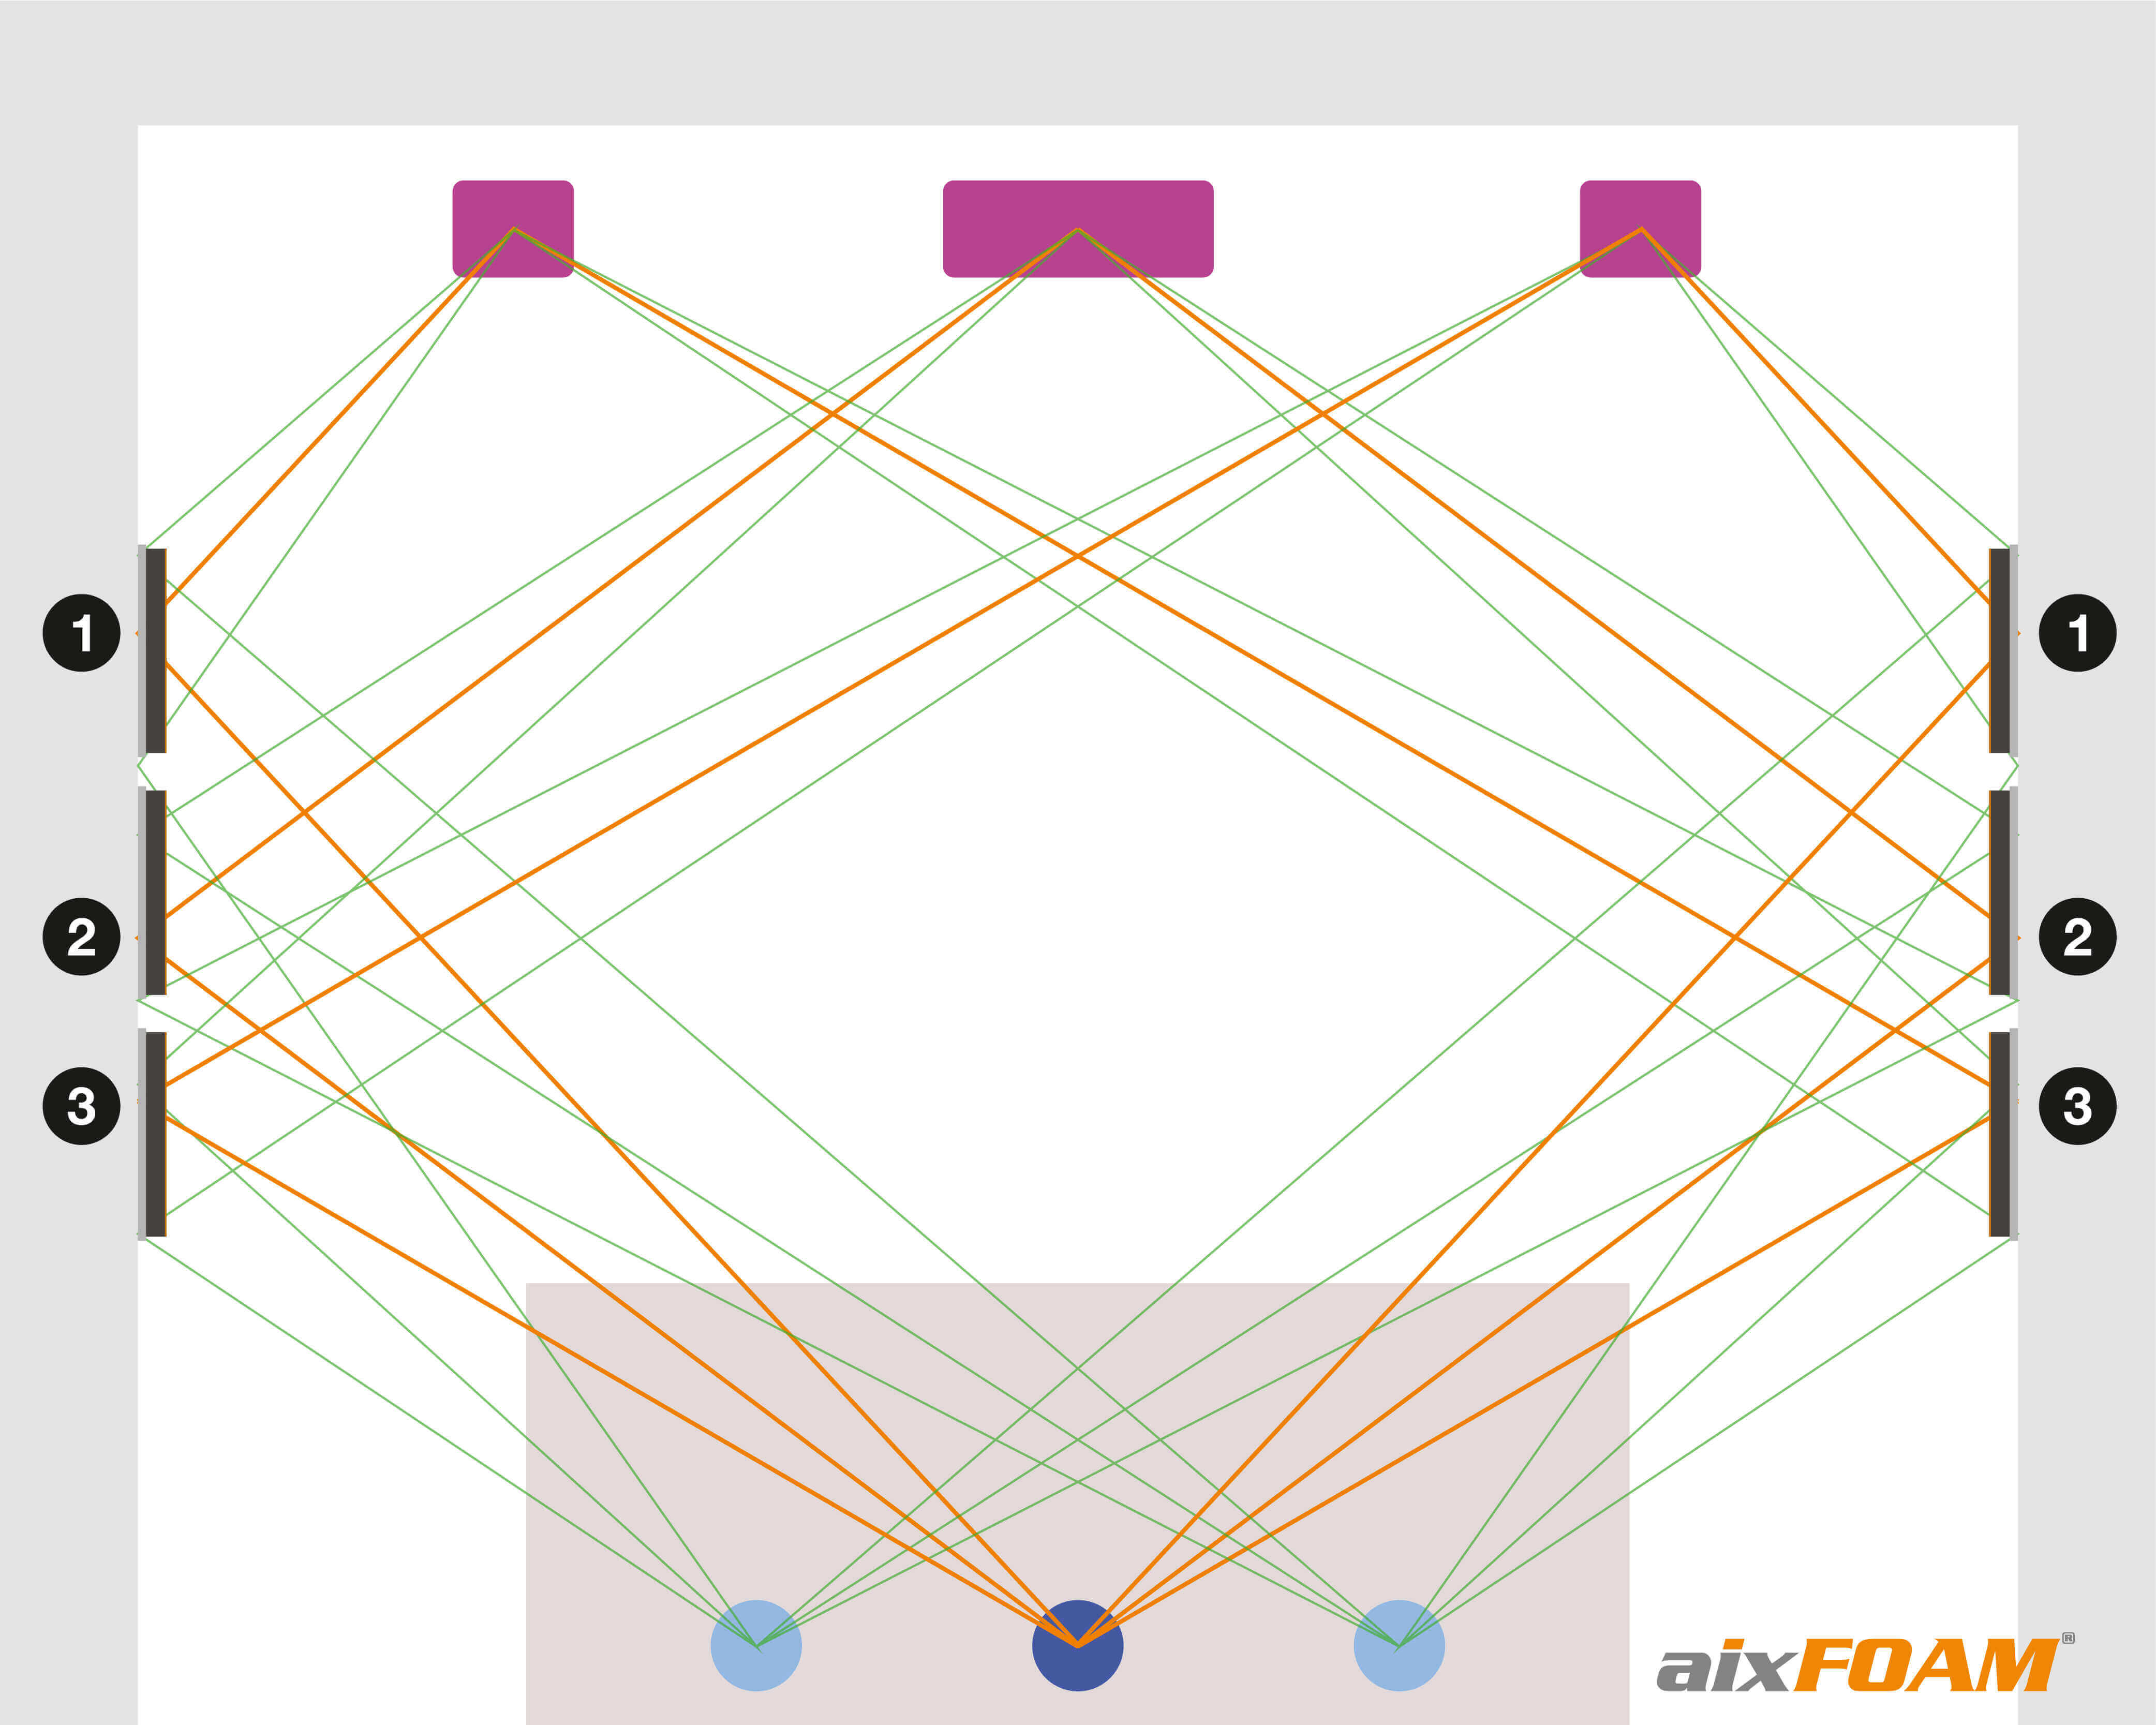
In our drawing, we initially only determined the reflection points between the speakers and our main seat. Of course, you can also repeat the procedure for all other seats in your home cinema.
You will probably find that this creates quite a tangle of lines and it may not make the decision where to place your sound absorbers any easier. Because in addition to the acoustics, visual aesthetic is also important in a room like a home cinema.
We recommend concentrating on the positioning of sound absorbers at the main reflection points (orange) – i.e. those that relate to the middle seat. As you can see from this picture, this automatically covers a large part of the other reflection points (green) anyway.
Ideally, the absorbers should be arranged in such a way that the main reflection points are approximately in the middle of the sound absorbers. As an indication of height, the middle of the absorber should be placed at ear height.
5.3 Determining the initial reflections on the ceiling via the drawing method
Determining the initial reflections on the ceiling is a little more difficult, since only a two-dimensional view can be reproduced on paper or in simple graphics and drawing programs. Nevertheless, this method can also be used to locate these reflection points.
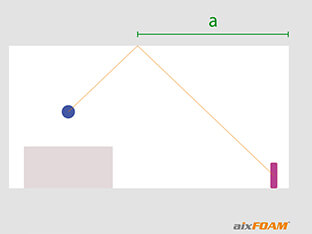
To do this, we don’t view our home cinema from above, but from the side and then determine the point of reflection as before. We then transfer the determined point back to our floor plan and use this distance as the starting point for attaching our ceiling absorbers.
6. For advanced users: Locating reflection points using the string method
The last method for determining reflection points, which we would like to show you, is the so-called “string method”.
Admittedly, this method is more for home cinema enthusiasts or hi-fi professionals who are a little familiar with the acoustic measurement of rooms. Nevertheless, for the sake of completeness, we would like to explain it here using the example of our home cinema.
The string method is based on acoustic room measurement and the creation of a so-called ETC diagram (energy-time curve). There are several common, as well as a free, software packages such as REW.
Numerous home cinema, recording or acoustic forums contain detailed descriptions and threads for the correct operation of the software and use of the measurement, therefore we would like to forego this at this point.
In order to then be able to use the string method correctly, it is necessary for the measuring microphone to be at the listening point, i.e. at the position of the middle cinema seat in our home cinema. Then the measurement and ETC determine how many milliseconds (ms) the first reflections arrive at the listening point.
Let us assume that the first reflections arrive at our listening point after 4 milliseconds (ms). What does this mean for the determination of our reflection points?
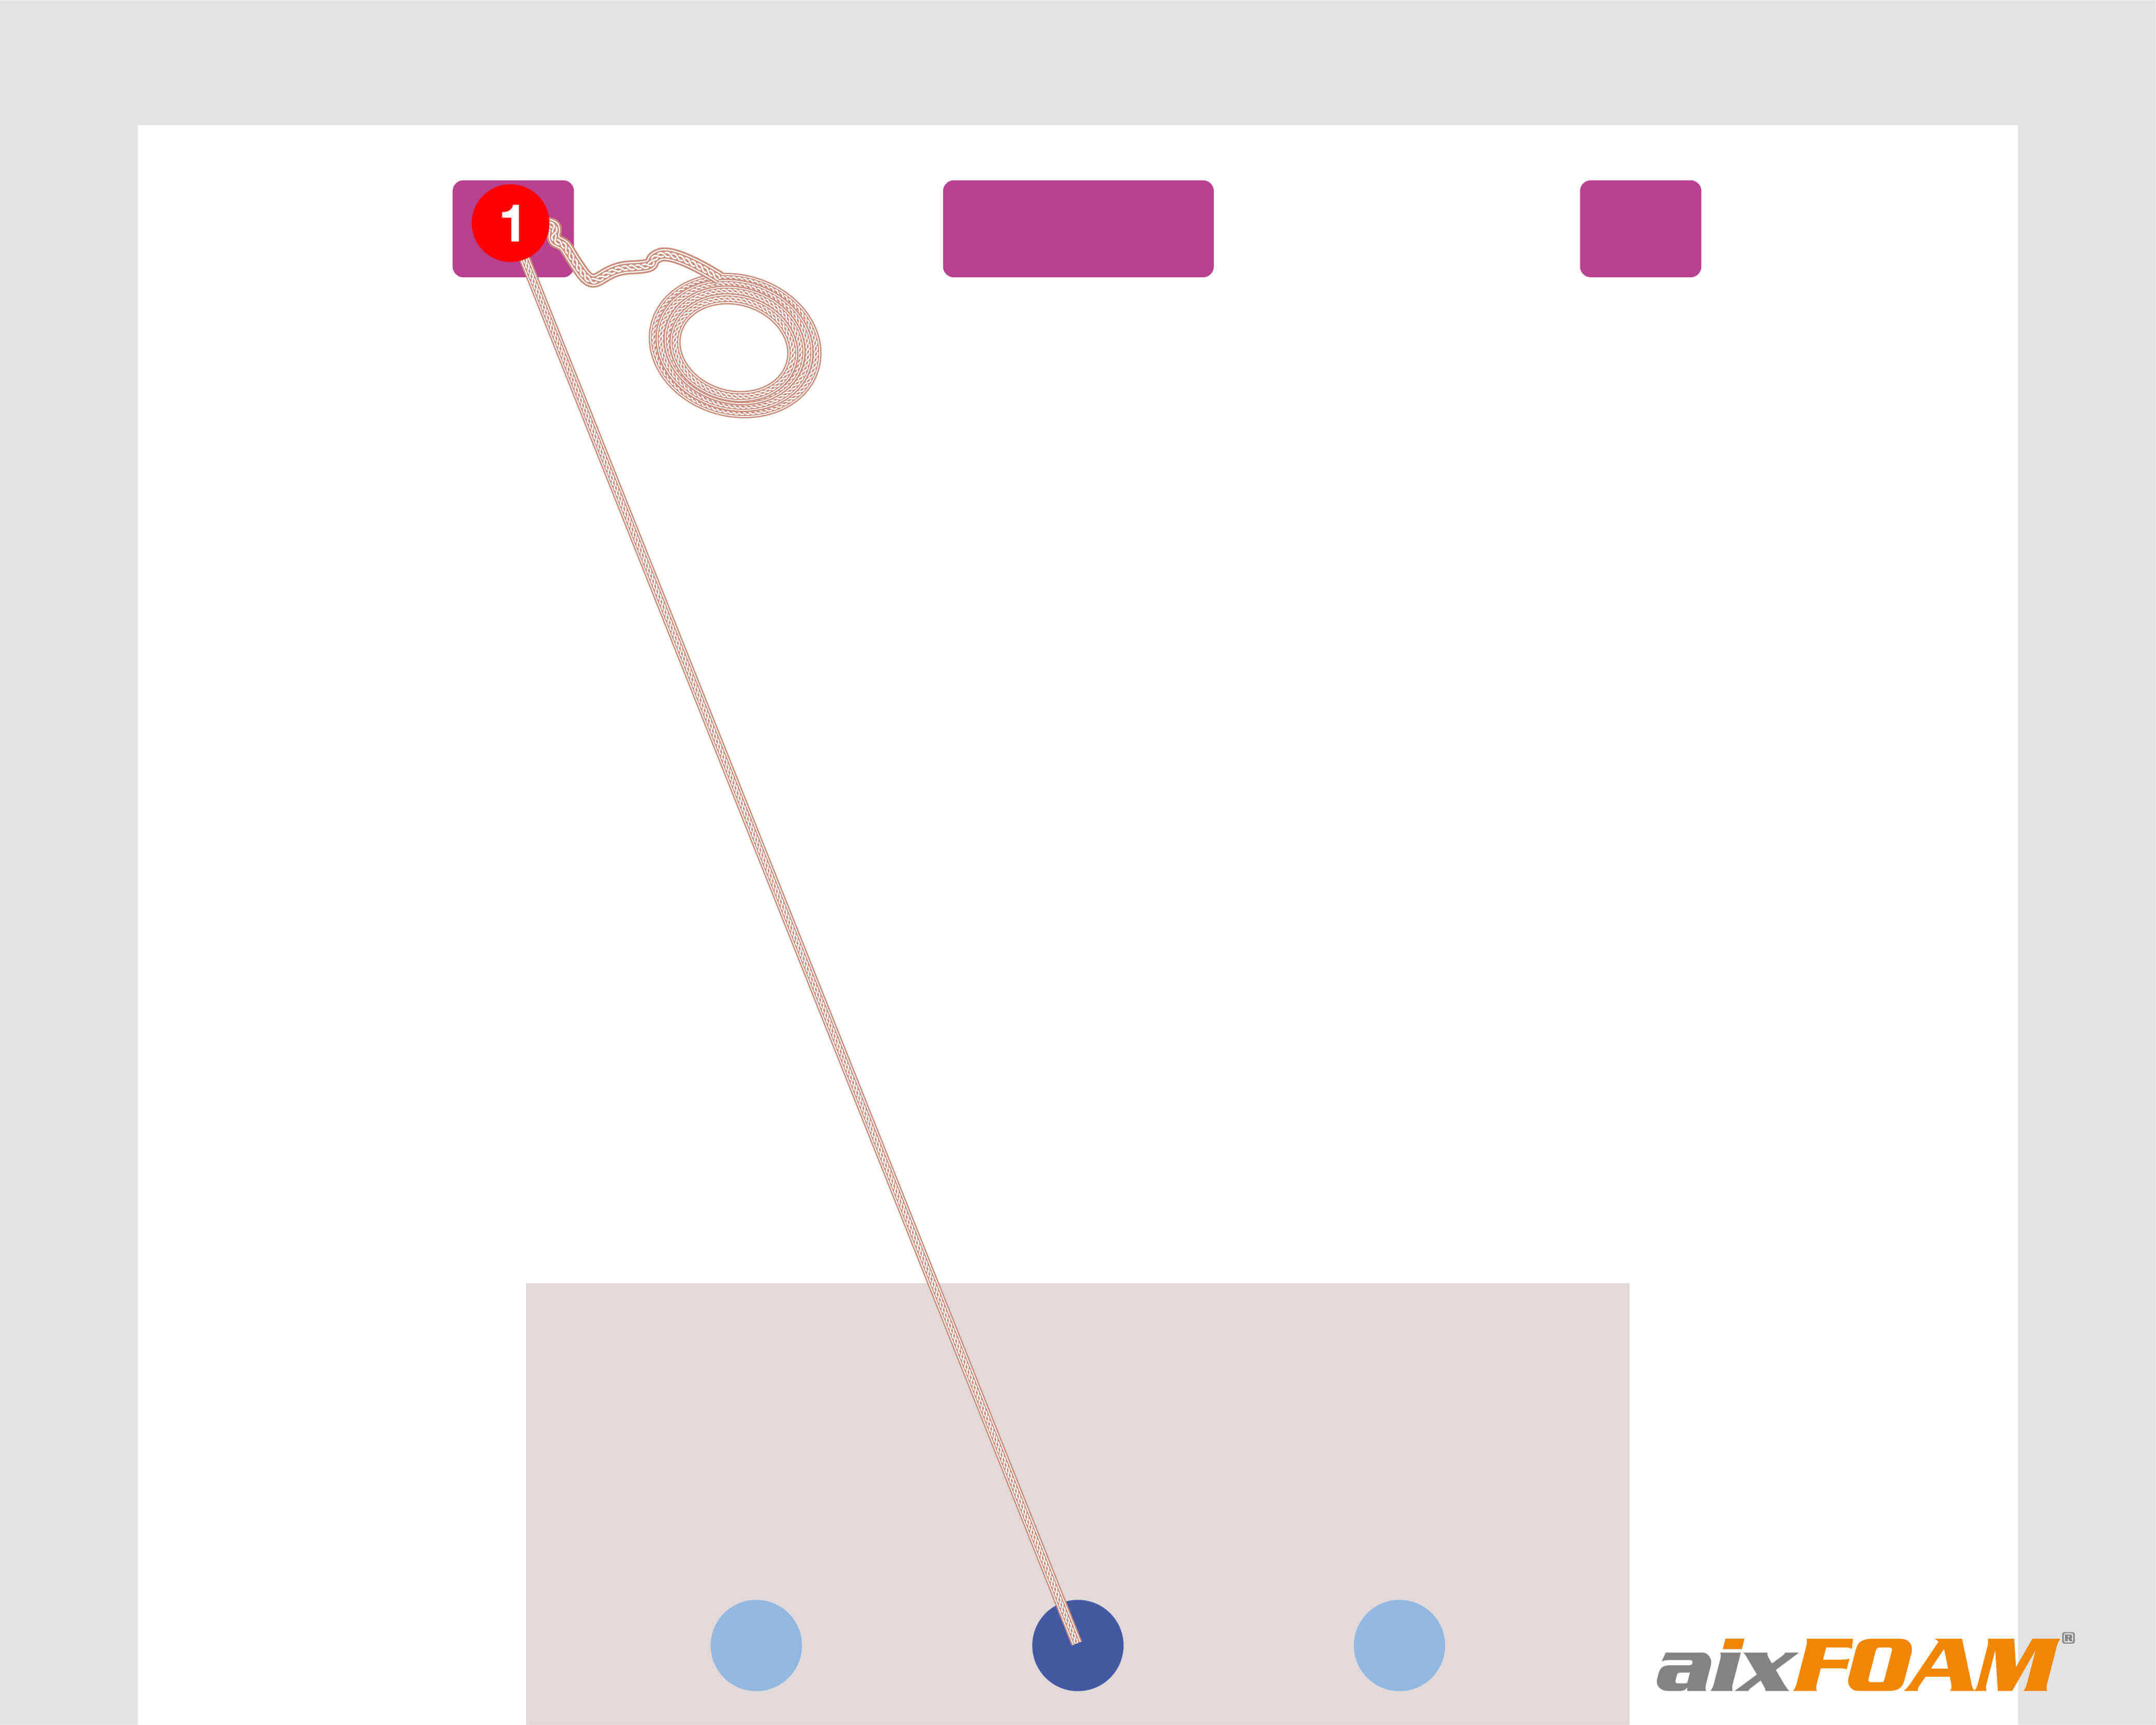
The speed of sound is 343.2 m/s or the equivalent of 0.342 m/ms. This means that the sound in our home cinema travels a distance of � 1.37 m in 4 milliseconds before it arrives at the listening point. We will need this value later in the procedure.
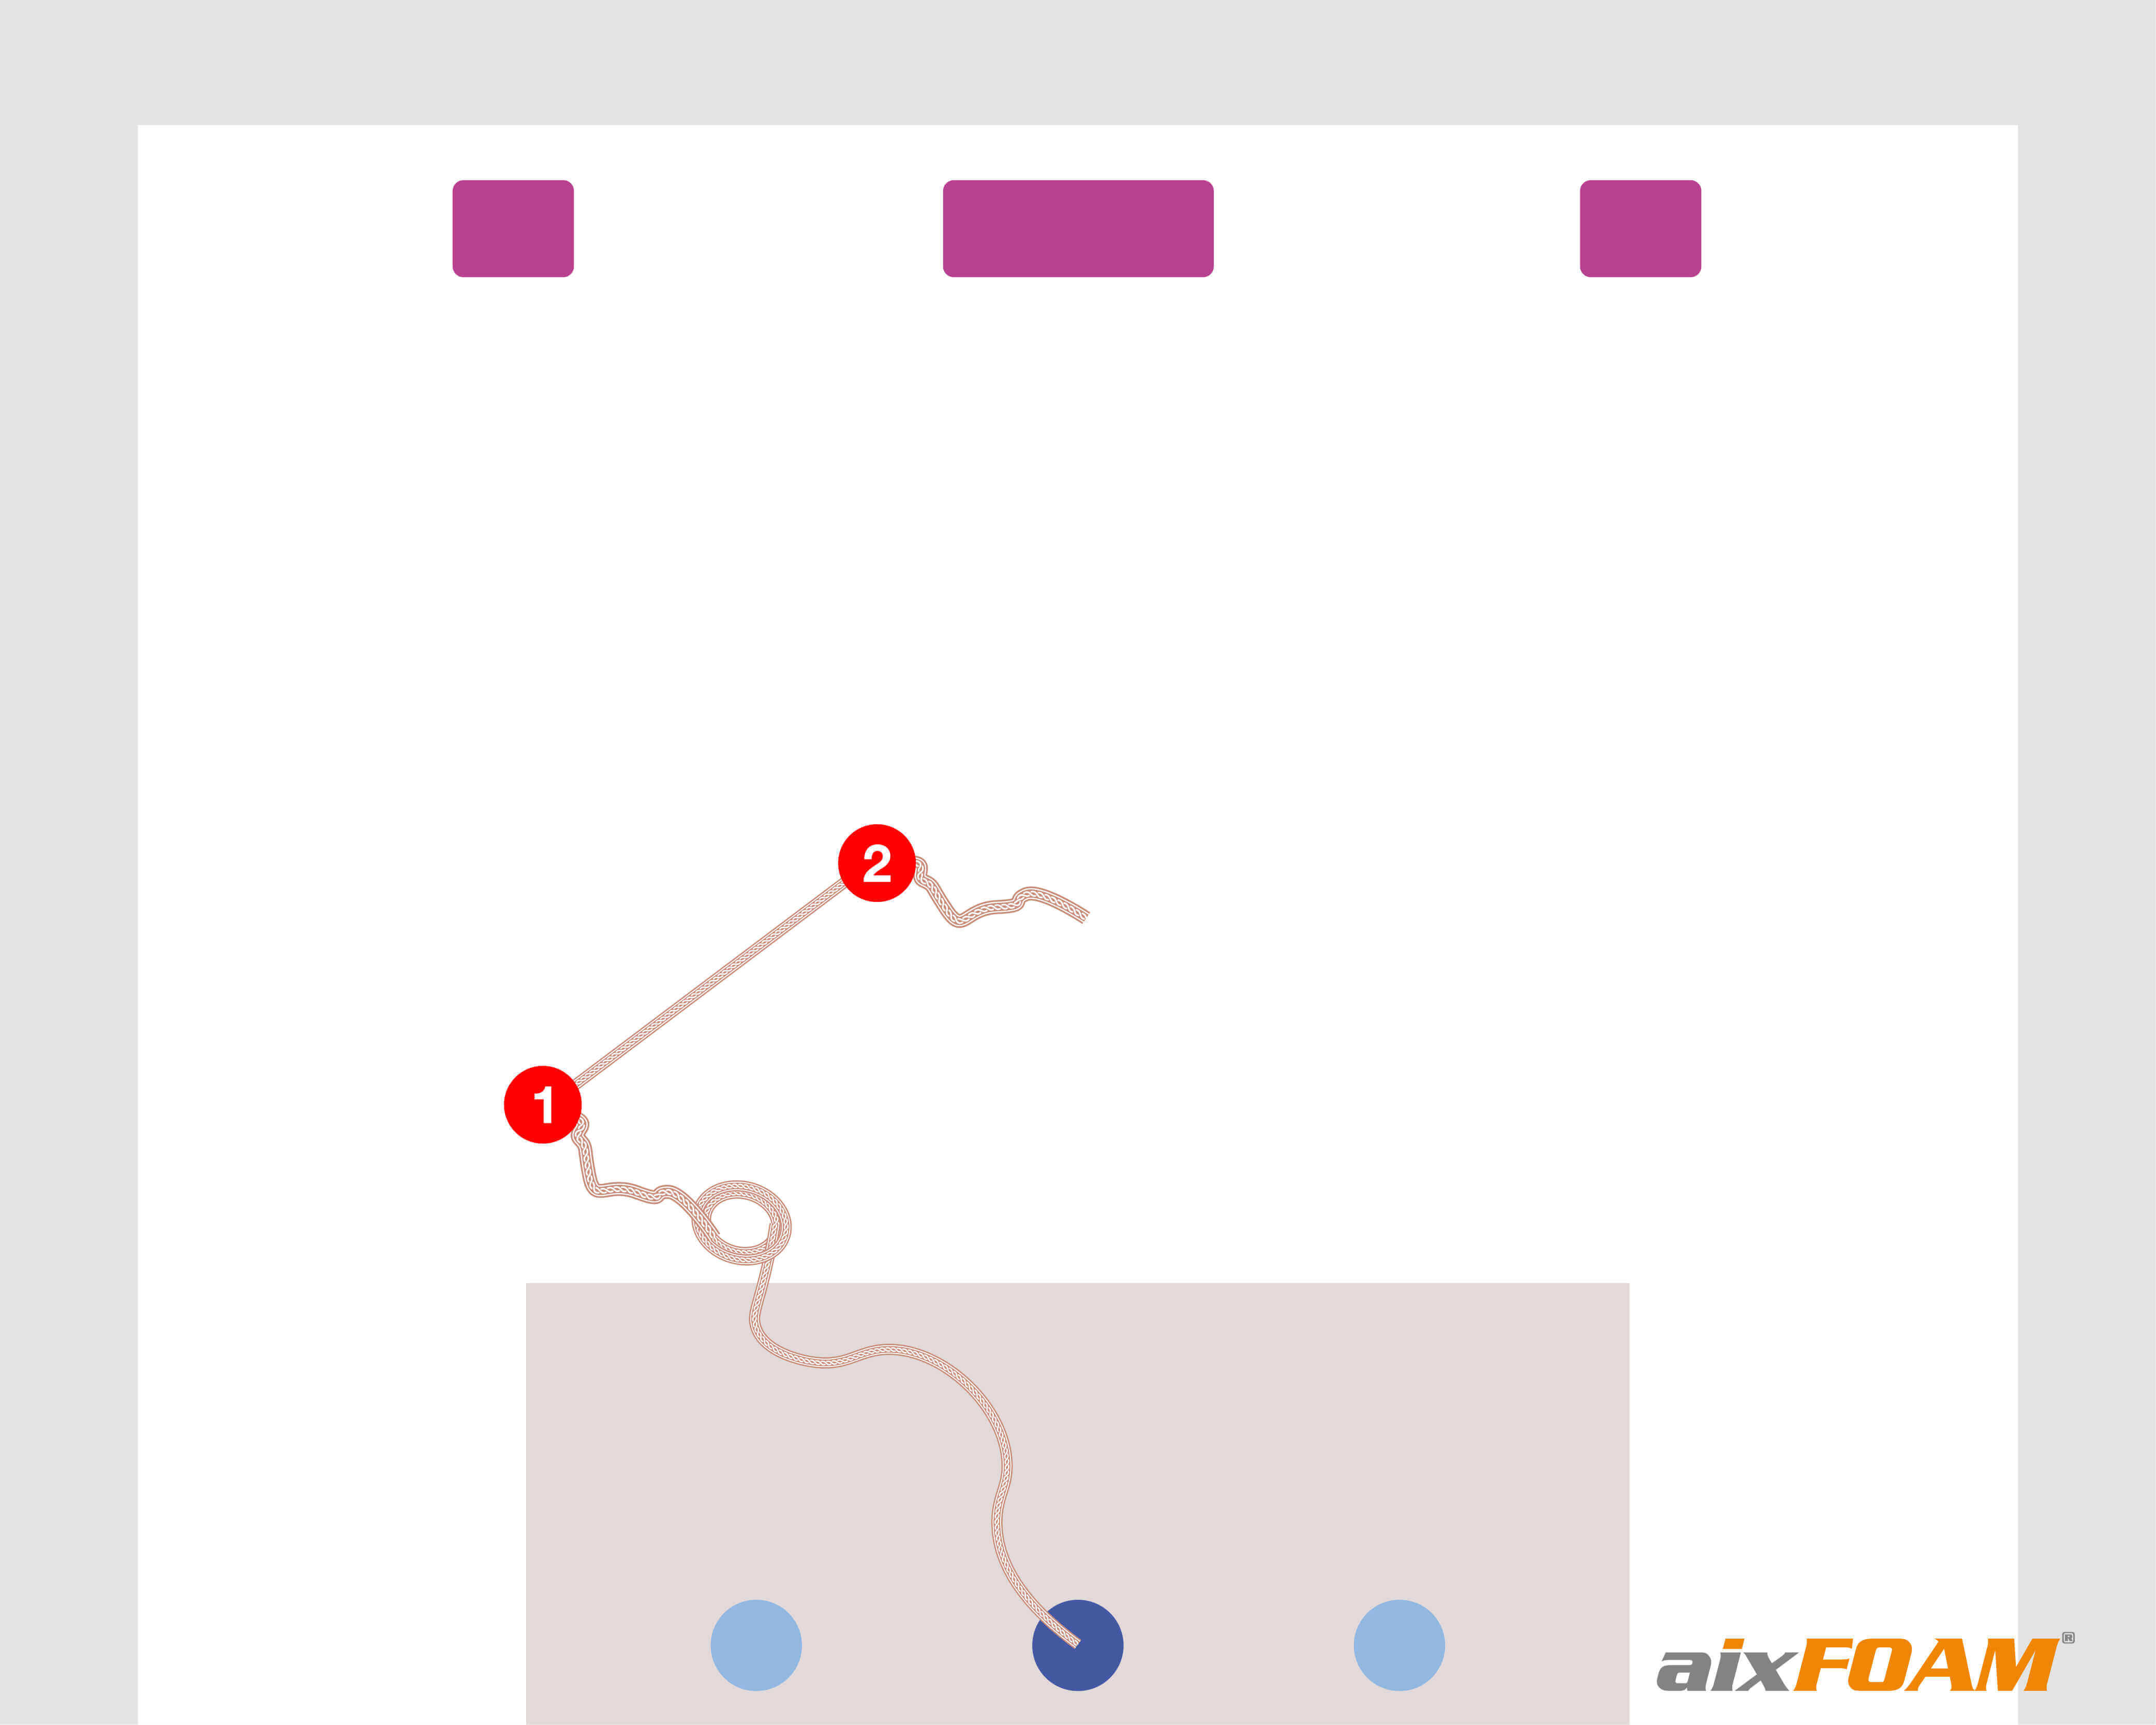
We need a very long string to determine the initial reflection points using the string method. Now we attach one end to our middle cinema seat (listening place). Then we stretch the string up to the loudspeaker that we want to determine the reflection points for - in our case the left one - and make a knot (1) at this point. This route marks the path of direct sound from the loudspeaker to the listening position.
Next, we need the value determined above for the distance that the sound travels in time until the first reflections arrive at our listening position - i.e. 1.37 m. We measure this distance from the first knot (1) on our cord and make a second knot (2) here.
Now we attach the second knot to the left speaker and run the slack string up to the wall. The point where the string is completely taut and touches the wall is our point of initial reflection.
We can now repeat this procedure for all loudspeakers on the left wall, the right wall and the ceiling and the respective reflection points e.g. mark with masking tape.
As with the drawing method, the reflection points can be determined for all the seats in the cinema, but measurements must be taken and a new ETC made again as the listening point changes. However, you should probably decide whether this extra effort makes sense. In practice, it is usually sufficient to only fit sound absorbers for the reflection points of the main seat. But this is often a matter of personal taste and depends on the listener’s subjective perception of the acoustics.
Finally, the absorbers should be installed at ear level so that the main reflection points are centred on the sound absorbers.
7. Conclusion - what needs to be considered when arranging your sound absorbers?
So you can see that the position of your sound absorbers is influenced by a number of factors. Regardless of whether you want to dampen all sound (direct / indirect) or just distracting reflections, we recommend that you proceed step by step when installing your aixFOAM sound absorbers. Set priorities: Which noise sources are most annoying? Where are your main reflection points (initial reflections)? It is better to start with a small amount of acoustic elements and then feel your way through your personal “feel-good acoustics”. This not only saves you money, it also prevents unnatural or over-damped acoustics.
Of course, we’re also happy to answer any questions about the selection of suitable aixFOAM sound absorbers and their ideal positioning in a free acoustic consultation. Simply contact our aixFOAM specialist planners by phone or email.
Click here to go to the top of the page!

