It is every film lover's dream come true: A cinema in your own four walls! That is why we at aixFOAM have taken up the challenge and invite you to look over our shoulders in this article when building our home cinema.
Starting with the selection and planning of a suitable room, through the choice of suitable acoustic elements and their installation, to a tour of a high-quality oasis for cinema lovers - in this workshop we explain everything step by step.
Just one more thing before we get started: In this report, we deliberately neglected the subject of “home cinema technology”, i.e. the specific selection of hi-fi and projector systems. If necessary, you can find extensive and professional advice elsewhere online or at a specialist dealer you trust to find the right components for your home cinema. In general, of course, any hardware can be combined with our design and the aixFOAM acoustic elements.
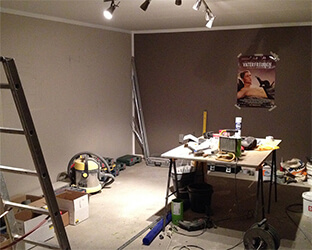
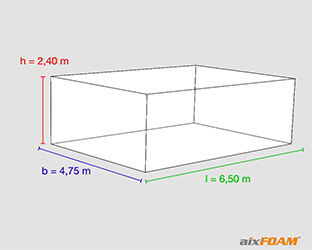
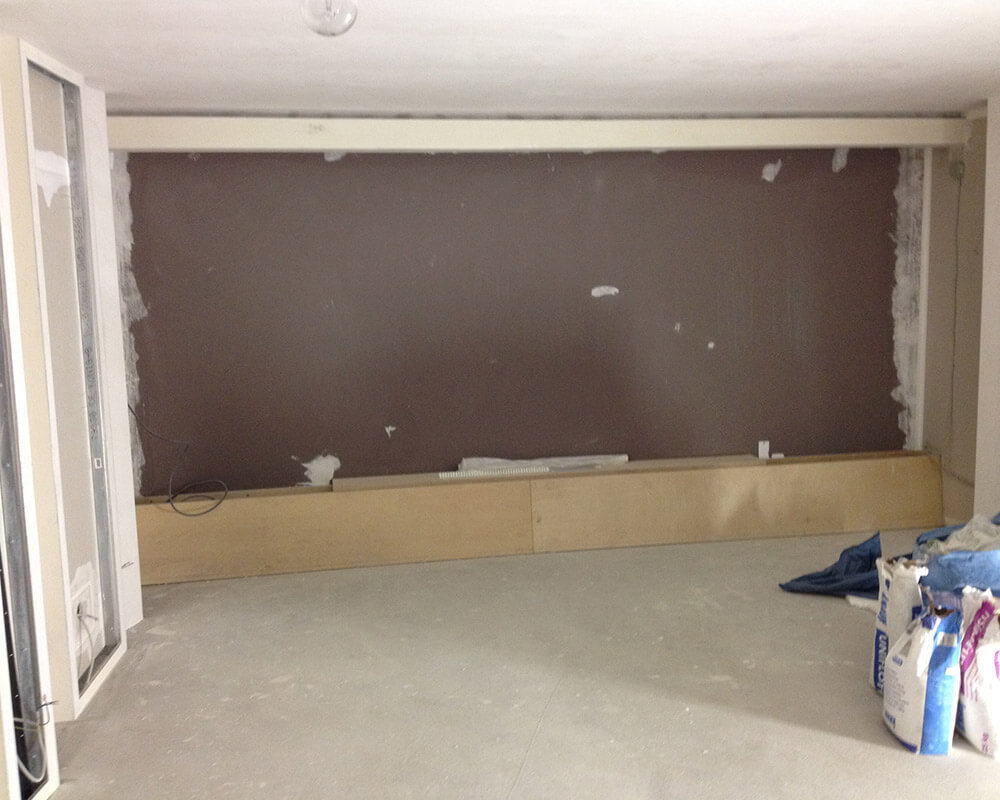
Before you start planning your home cinema, it is important to select a suitable room in the existing building or to discuss the desired room size with the planning architect in the case of a new building. In this way, you create the ideal prerequisite for setting up your cinema according to your wishes and ideas. With our aixFOAM home cinema, we chose a spare room in the basement of the building. The room has a width of 4.75 m, a length of 6.50 m and a height of 2.40 m.
The selection of a suitable room for your home cinema is influenced by a whole range of factors, which you should definitely consider carefully and take into account when planning. Otherwise, you may run into problems later in the implementation that can hinder your project or, in the worst case, even cause it to fail. Therefore, you should consider the following points when choosing a suitable room:
Darkening of windows and doors
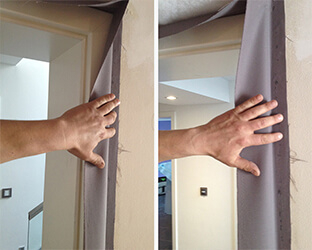
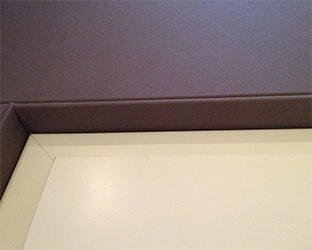
If there are windows or doors with glass inserts in your room, you should consider whether you can darken them permanently or at least when using your home cinema. Our chosen room has no windows, just an outer door that can later be darkened with a curtain or a sliding door.Heating and ventilation
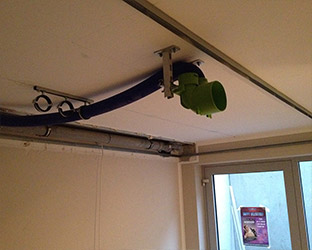
For a cosy home cinema atmosphere, your selected room should have a heating system, regardless of whether it is a “standard” wall heater or, for example, underfloor heating. Adequate room ventilation is also necessary, especially if it will be used by several people. Windows and doors can of course be used for this, as well as a separate ventilation system with a shaft. However, this is usually more complex and has to be carefully considered. The aixFOAM home cinema features a ventilation system for continuous ventilation and wall heating for cosy cinema evenings. In addition, the existing outer door can be used for ventilation.Lighting and electricity
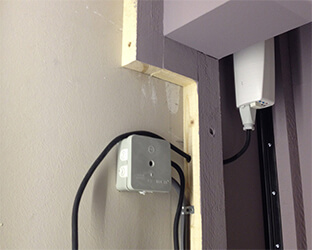
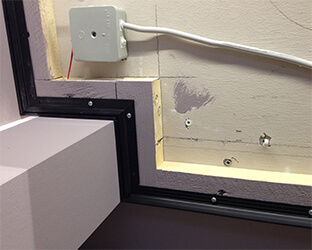
A power connection is of course required to supply the technical systems such as speakers and projectors. In addition, a suitable lighting system should ensure the right cinema atmosphere. In addition to classic wall and ceiling lights, the market today also offers a wide range of effect lighting. You should also check the routing of the cables, e.g. in cable ducts, plan and ensure that the components do not overload the circuit during operation. We recommend consulting an electrician and, if necessary, using several circuits to distribute the load more evenly. In our home cinema, the power supply and lighting can be installed in walls and ceilings.Dimensions
The dimensions of the room can also have a strong impact on the later sound in your home cinema. Certain room dimensions favour acoustic disturbances such as the so-called room modes. As a result, some frequencies in the low frequency range in the room are virtually cancelled out, while others are amplified unpleasantly. This creates a spongy sound. Even if room modes can be treated by later acoustic measures, you should make sure, if possible, that no side length of your room is a multiple of another. Square spaces are also particularly problematic, acoustically. In the case of our aixFOAM home cinema, for example. the relationship between the room’s height and width is not necessarily ideal according to these requirements. However, since the ceiling is partially suspended later and the room is acoustically optimised, this is not a problem.Adjacent rooms and neighbours
When choosing your future home cinema room, you should also think about your room mates and neighbours. Rooms that are in a central location within an apartment or house are usually more complex to convert because you have to ensure adequate sound insulation. This is another reason why we chose a room in the basement of the house. Our aixFOAM acoustic elements later ensure adequate insulation.After you have decided on a suitable room, you now have to plan your home cinema. We recommend that you create a floor plan for your home cinema - the more detailed, the better! The following points should be considered in a suitable plan:
The floor plan is the final word for the entire project and is also a very helpful basis for discussion for all the trades people involved - and, of course, at the end of the day it also constitutes the project specifications. Please take the time to prepare the floor plan so that, in the end, you’ll be able to realise your personal dream cinema within your own home. According to experience, it makes sense to have the final planning by sketching out several solution options. It is not uncommon for new design and layout ideas to come up over the course of days and weeks. In particular, discussions with experts or exchanges with other home cinema enthusiasts can really make a project grow.
It’s not just the technology that affects the cinema experience later on, it’s also the use of high quality sound absorbers. The following applies to acoustics in the home cinema: Only a reflection-free or low-reflection room offers a perfect listening experience. After all, you just want to enjoy the direct sound of your (probably very expensive) sound system and not be annoyed by distracting echoes and reflections.
That’s why we recommend not neglecting the room acoustics in your home cinema project, instead look at them with the same care as you would your choice of electronics. So you can create an impressive cinema experience with a manageable investment.
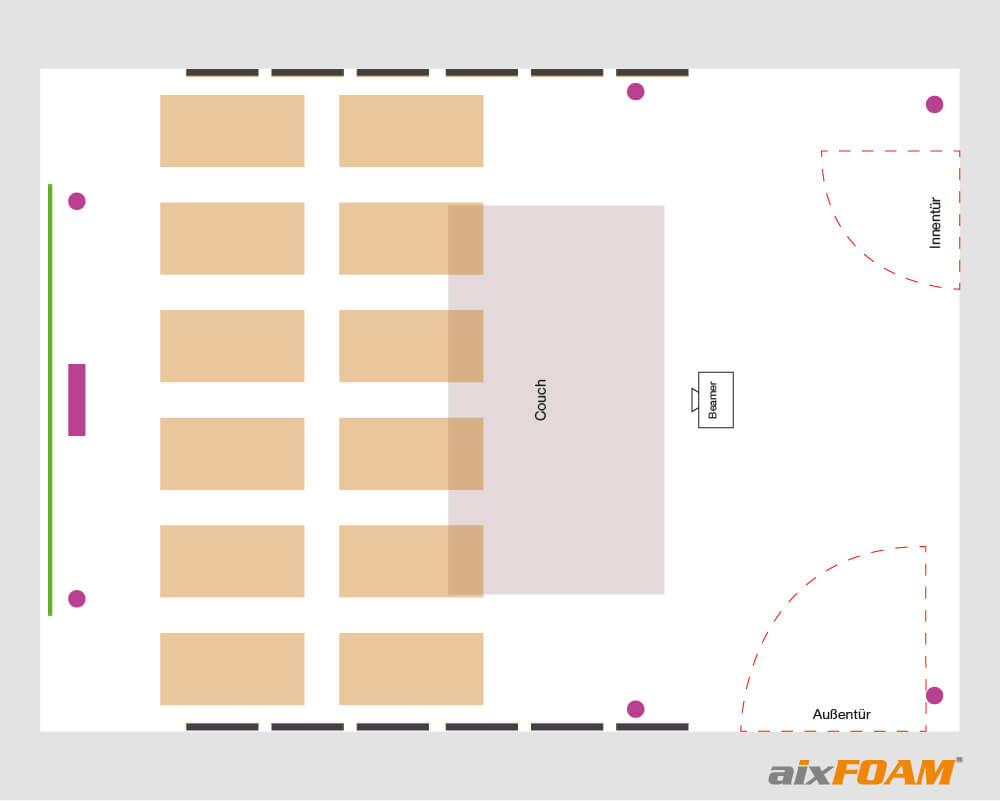
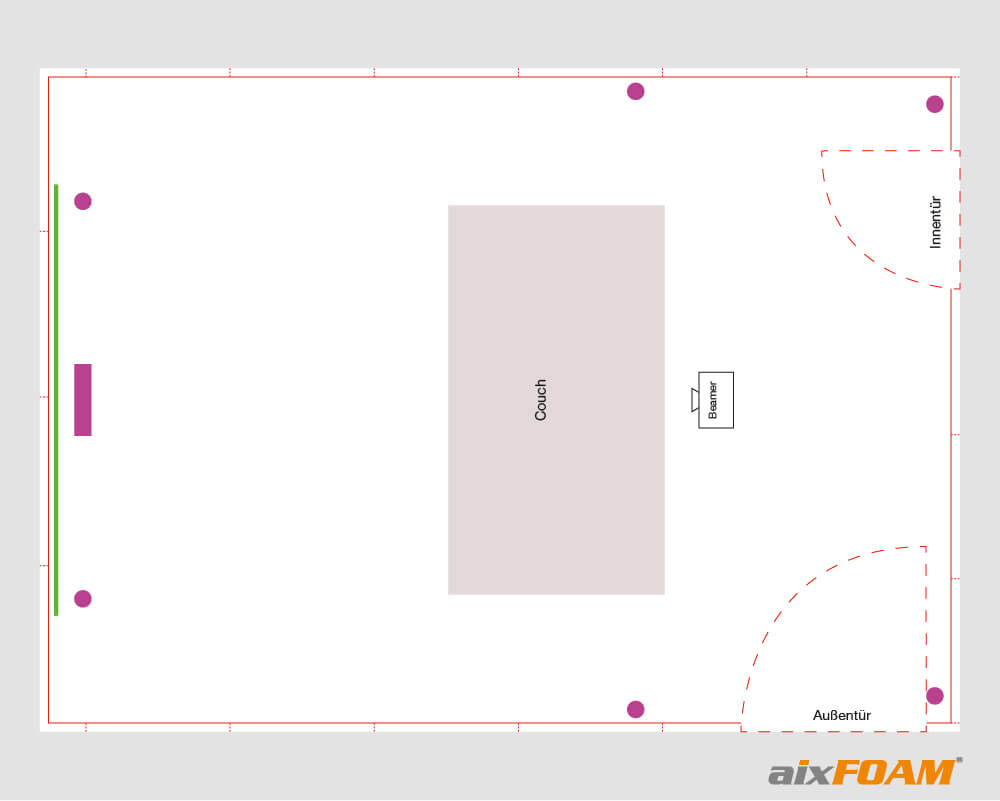
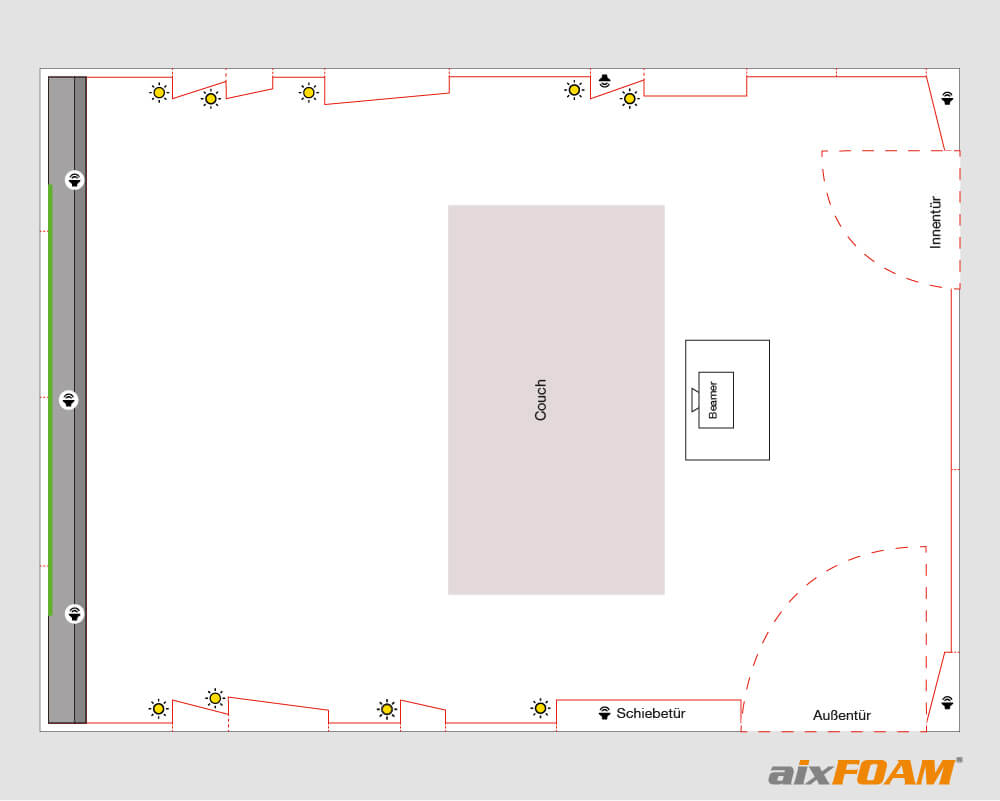
In the course of planning our aixFOAM home cinema, several floor plans were created, which vary depending on the accommodation of the technical components and the use of the respective sound absorbers. We determined the position of the sound absorbers at the reflection points in our floor plans.

The basic version of our home cinema shows glued sound absorbers on walls and ceilings - shown in black on the floor plan and orange on the ceiling.
The loudspeakers are marked in purple, the screen in green. In this case, the projector is attached to the ceiling and the cables are routed through the walls or via cable ducts. There are several lighting versions, e.g. dimmable ceiling spotlights. For this it might make sense to suspend the ceiling so that the spotlights and cables can be installed there.
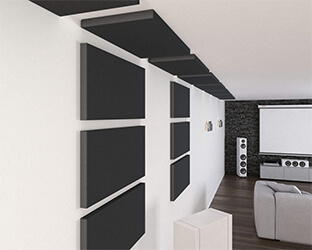
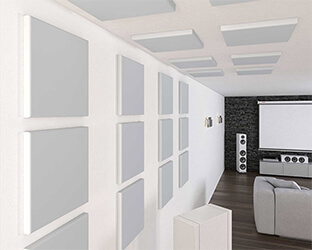
Home cinema owners particularly appreciate our classic FLAT sound absorber and the SMOOD square sound absorber. With the practical aixFOAM self-adhesive equipment, the absorbers can be easily and permanently installed.
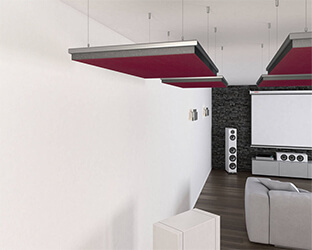
Another option would be to mount sound absorbers in anodized aluminium mounting cassettes. These can either be attached to the ceiling with a hanging system or directly to the wall. For wall mounting, we also recommend the use of special vibration anchors, which improve the acoustic effect of the absorber by preventing transmission of structure-borne noise into the wall and allowing the sound to also hit the absorber from the rear.
Both fastenings impress with their particularly elegant appearance and high flexibility. The sound absorbers can be easily removed or reassembled without damaging the surface or the acoustic elements.
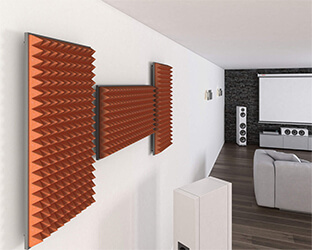
For home cinemas, we particularly recommend our sound absorbers with a pyramid surface GIZA or our sound absorbers with a fine felt surface FELT.
A particularly chic option for optimal acoustics and a particularly authentic cinema atmosphere is the use of acoustic wall covering. What exactly does that mean?
In the case of full-surface wall covering, flat sound absorbers such as the FLAT are first glued to the wall. The absorbers are then covered with a special acoustic fabric, creating a second wall with an even textile surface.
A substructure made of square-profile batons and special tensioning profiles is used to tension the fabric. The substructure divides the wall into even segments, the size of which depends on the width of the acoustic fabric. If the fabric has e.g. a web width of 1.40 m, your segments should not be larger than 1.25 m - 1.30 m.
In our home cinema room, the wall layout could look like the following floor plan:
We explain the exact procedure for creating a wall covering in detail in points 4. – 7th of our home cinema workshop, because we finally decided on an extended form of acoustic wall covering.
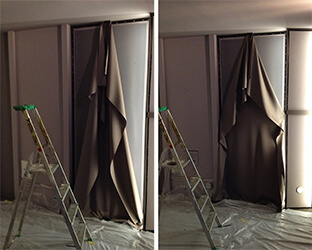
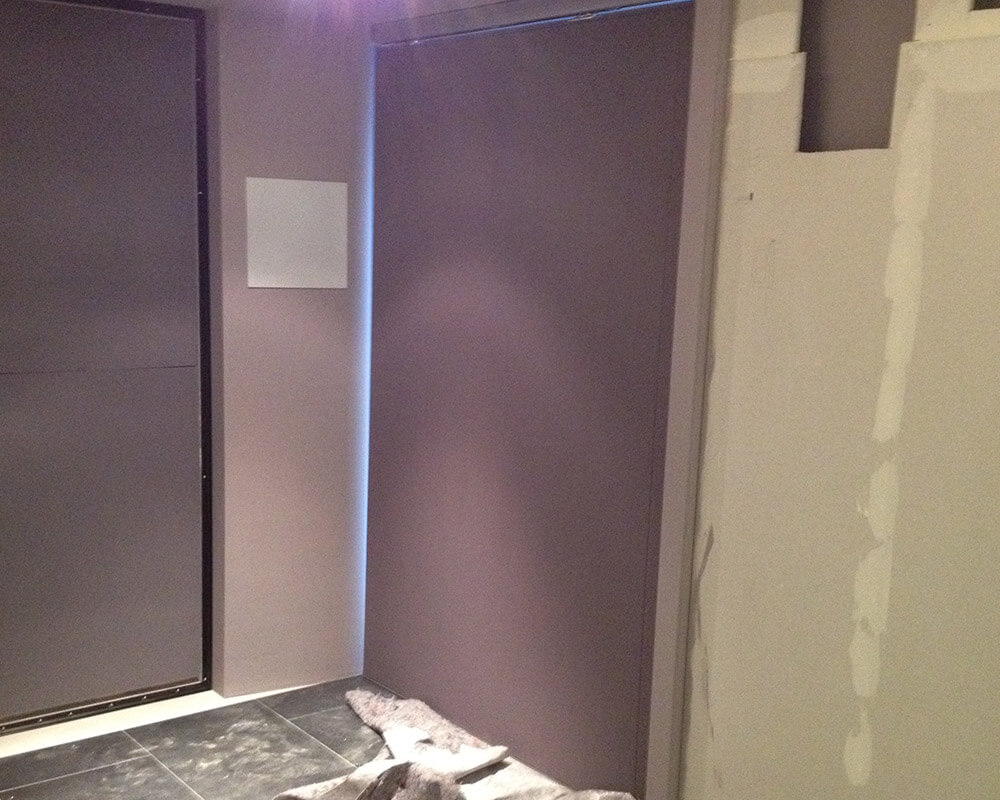
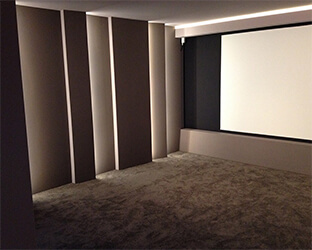
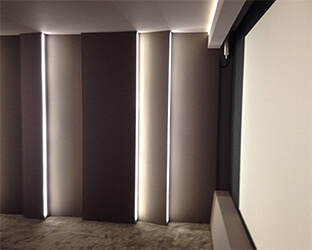
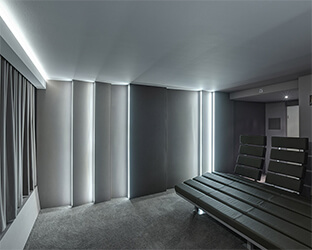
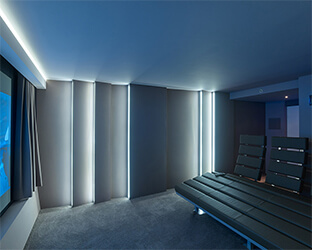
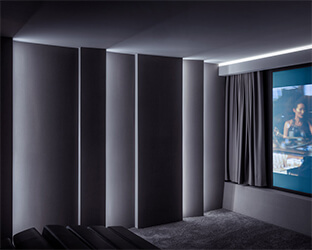
In the final version of our aixFOAM home cinema, we not only tension the wall or the plan sound absorbers with acoustic fabric, but also build separate, asymmetrical wall compartments in which the lighting, the loudspeakers and the necessary wiring are housed.
The front speakers and the centre are housed in a separate box below the screen, which is also integrated into the wall covering.
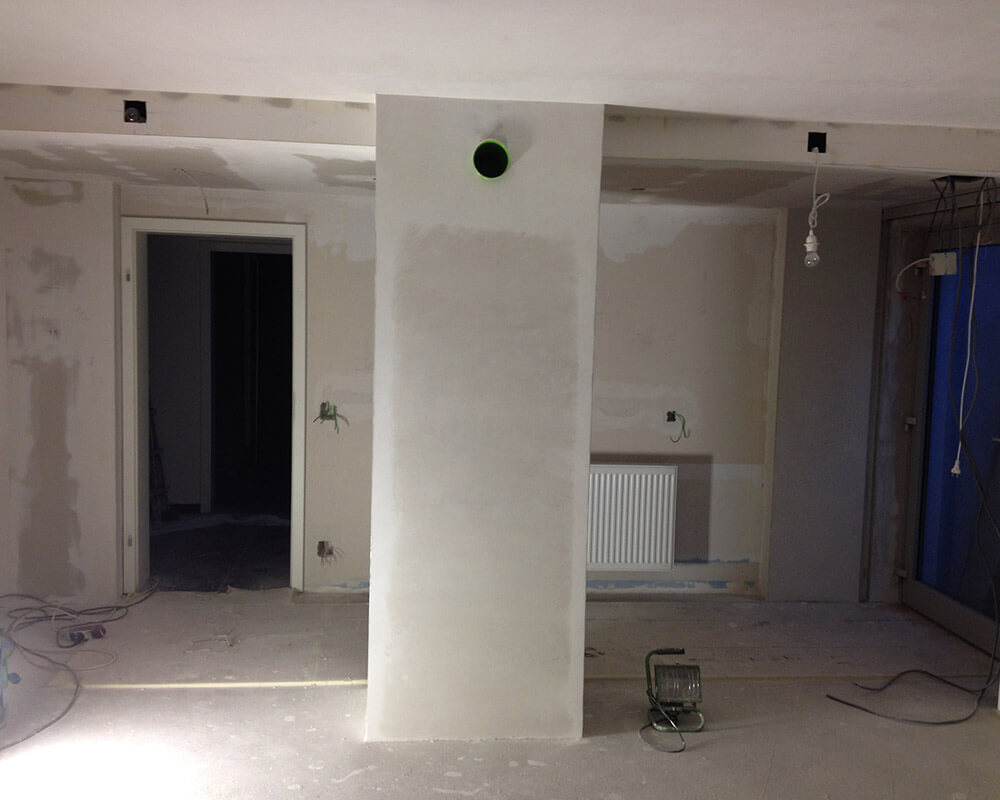
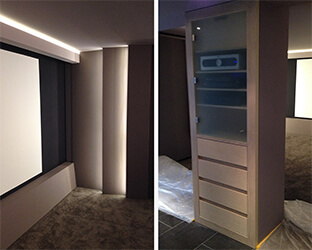
The projector gets its own tower in the middle of the room, which also serves to accommodate the technology and the exit of the ventilation system.
The rear part of the home cinema ceiling is suspended in order to create space for cables, ventilation and dimmable ceiling spotlights and to optimise the room dimensions somewhat with regard to the room modes mentioned in point 1.
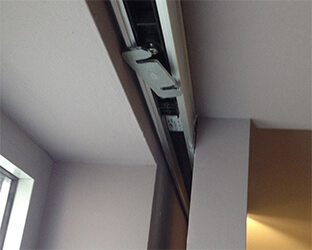
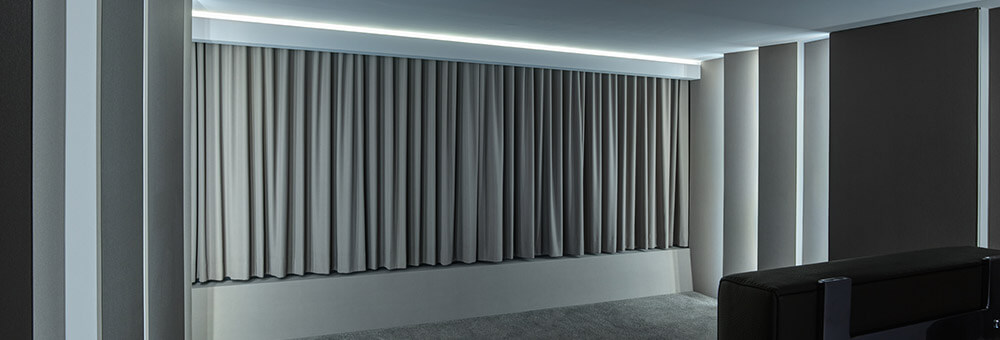
Later, the outer door with glass insert will automatically be covered with a sliding door during the film screening, which will disappear into the wall when opened. The drive for the sliding door is installed in the drop ceiling.
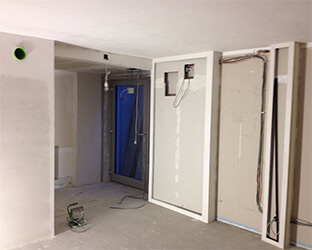
After we have completed the planning and determined our final floor plan (see point 2.5), we can now begin to expand the room. In the following we have documented all work steps for you.
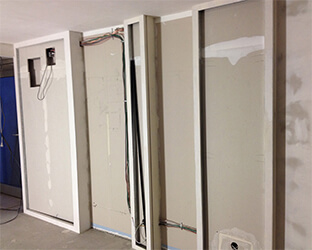
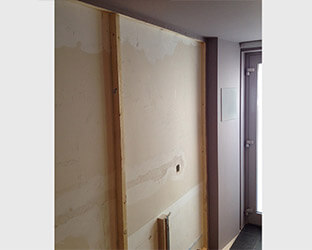
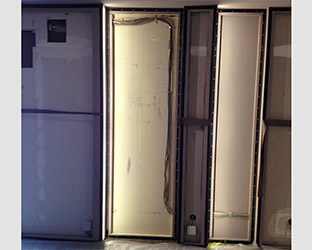
Since we opted for an asymmetrical box-shaped wall design with integrated LED lighting on the side walls for our project, the execution work starts with drywall. Already here aluminium compartments (UW / CW) and plasterboard are used to create compartments for the sound absorbers and LED lighting.
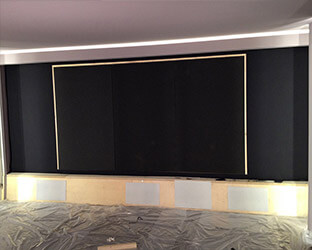
An enclosure for the installation of the front speakers and the subwoofer is created in the lower area of the projection screen. In the end, the entire loudspeaker module is also clad with aixFOAM acoustic fabric, using our tensioning profiles. In the upper area of the projection screen, a further box is constructed, which houses both the drive of the cinema curtain and the dimmable cinema curtain lighting. In the end, no technology should be visible in the finished cinema, but only by lighting effects, acoustically highly effective wall elements and of course the classic cinema curtain.
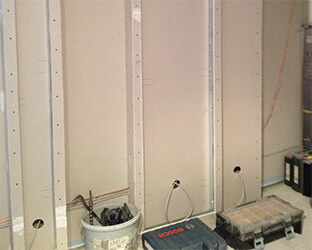
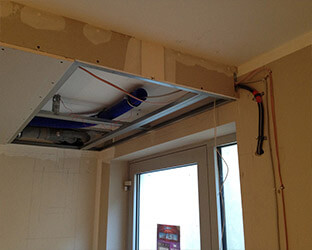
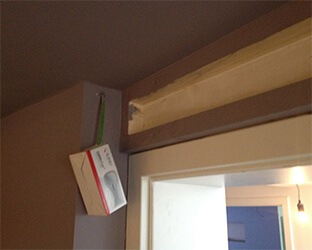
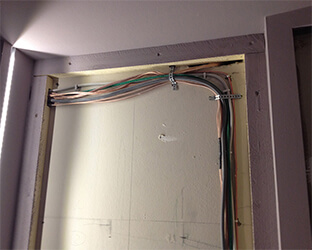
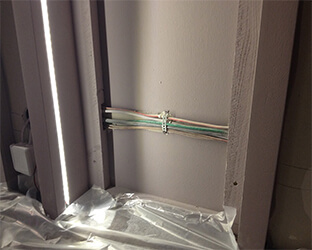
The ceiling is suspended in the rear area of the cinema, i.e. the entrance area. This enables the installation of dimmable ceiling spotlights as well as the housing of the ventilation pipes for controlled room ventilation, the entire network cabling from the home server to the cinema, the power supplies and last but not least the speaker cabling for the extensive surround system.
In front of it, a column (technology tower) is built in the middle to accommodate the hi-fi technology. The projector will also find its place in the upper area here. The recess for the lens will later be placed directly under the opening for room ventilation.
On the back wall of the cinema there is a column on the right and left to block the rear speakers.
The outer door is covered with a movable soundproofing element when the film starts. The sliding door drive is also installed in the drop ceiling. The acoustic sliding door automatically disappears behind the side wall compartment provided after the film has ended.
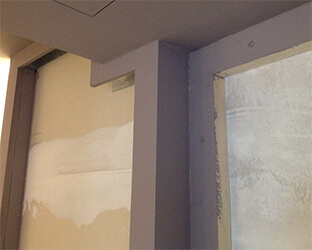
If, as in our cinema, only partial areas are to be covered with acoustic fabric, the remaining visible areas must first be painted clean, in a colour that matches the selected fabric. We opted for a light grey.
Before the substructure of the wall covering is erected, all painting work in the room must be completed. Keep in mind that acoustic fabric is a very valuable material that should only be assembled after all dirt-generating work has been completed.
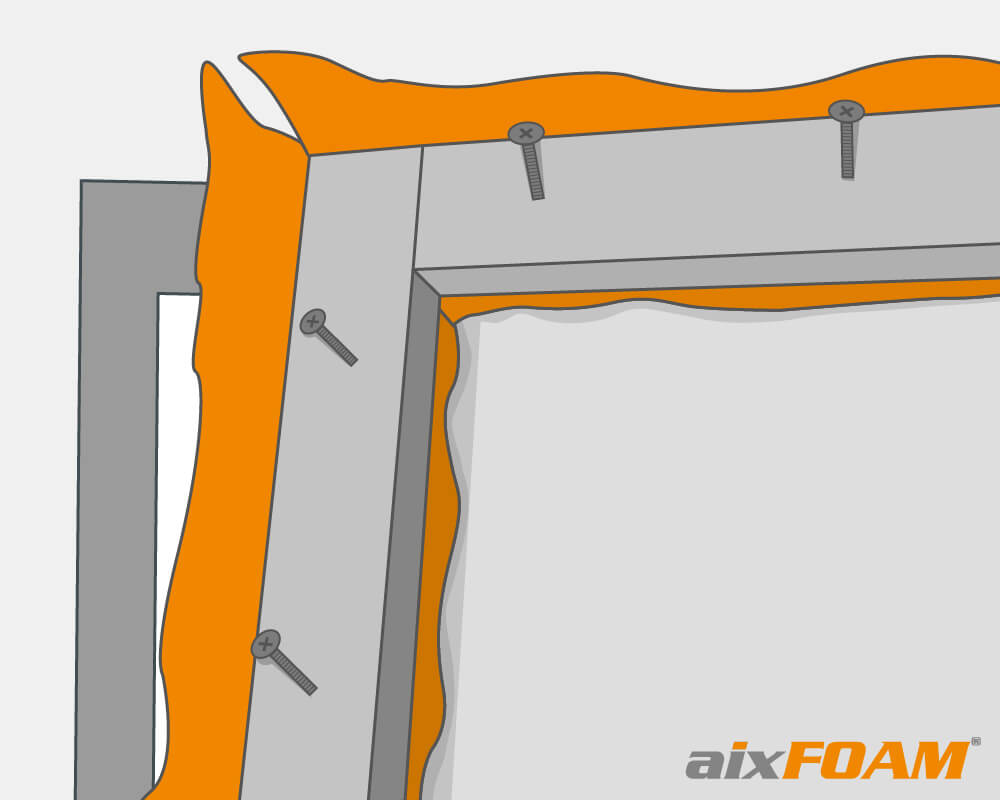
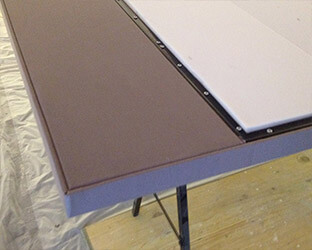
Now we can start creating the substructure. This is usually made from standard square-profile batons or alternatively from aluminium profiles.
Ensure that the height of the substructure battens is at least no lower than the height of the sound absorbers being installed afterwards so that the final textile cover can be positioned directly above the sound absorbers. This means that with our flat sound absorbers with a thickness of 5 cm, the height of the substructure must also be at least 5 cm.
According to the division from our floor plan (2.4), we are now using the square-profile batons to build frame structures along the edges of the individual segments and wall compartments that are to be covered with fabric. We also painted the square-profile batons in advance in our grey wall paint that matches the acoustic fabric. This will avoid “colour flashes” later.
Around doors or windows, the substructure installation procedure is slightly different. For visual reasons, the substructure is also covered with acoustic fabric on the visible sides of the square-profile batons.
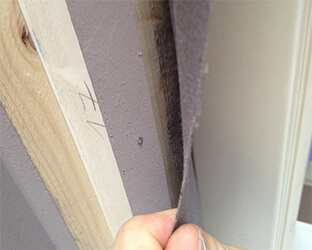
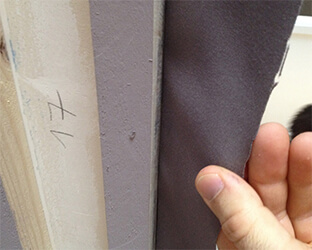
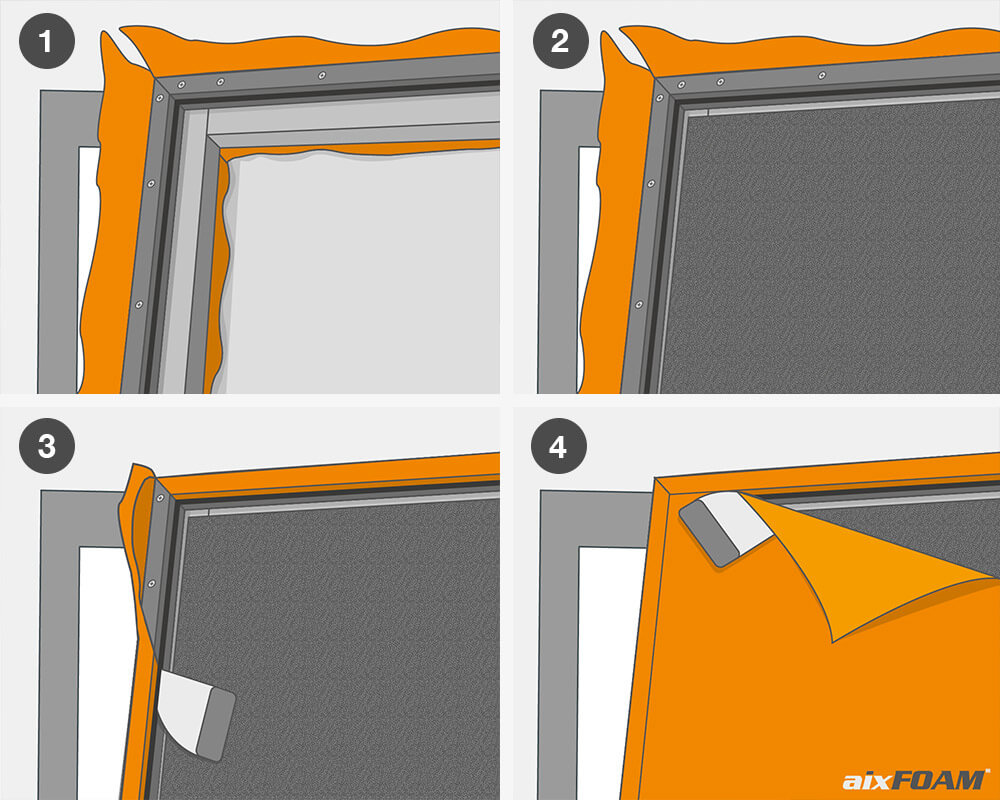
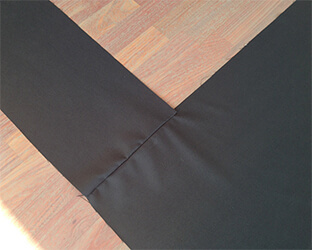
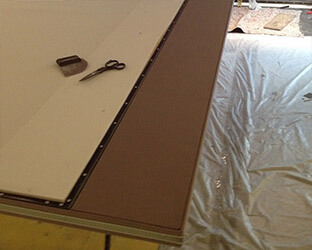
In the first step, we staple a sufficiently wide strip of acoustic fabric with some adhesive in the area in which the substructure is later positioned. The fabric should be placed in such a way that most of it is visible on the outside (visible side) under the square-profile batons. The square-profile batons are then screwed onto the fabric strip in the usual way. The fabric strip is later folded inwards and tensioned over the square-profile batons and the tensioning profile screwed onto it. It should therefore be sufficiently wide, plus a few centimetres of grip.
Note for all perfectionists: In general, it is of course possible to cover all the outer edges of the profiles with fabric. To do this, strips of fabric must be attached under all profiles along the outer edges.
We explain the further procedure for tensioning the fabric on doors, windows and visible outer edges after inserting the sound absorbers in point 7.1.
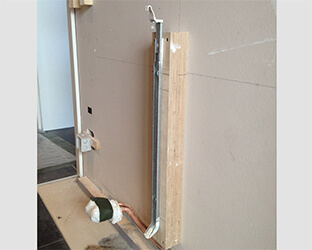
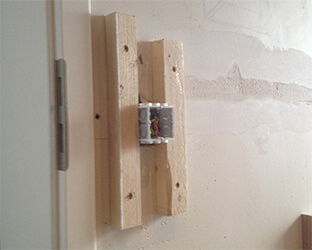
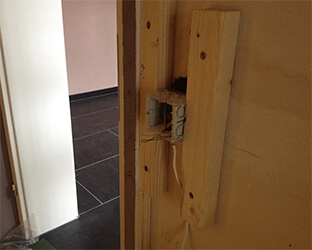
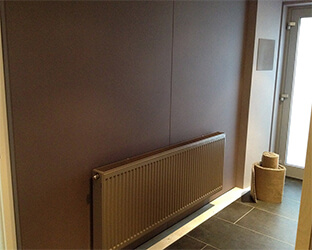
Wall elements such as switches, sockets and radiator suspensions are also later to be integrated into the braced wall and therefore also to be provided with a substructure for height compensation. As a result, the interior or the housing of the switches is behind the wall covering and the visible cover can be attached to the acoustic fabric without pressure. The substructure will later be completely covered by the fabric and will not be visible. Precise preparatory work is also required here.
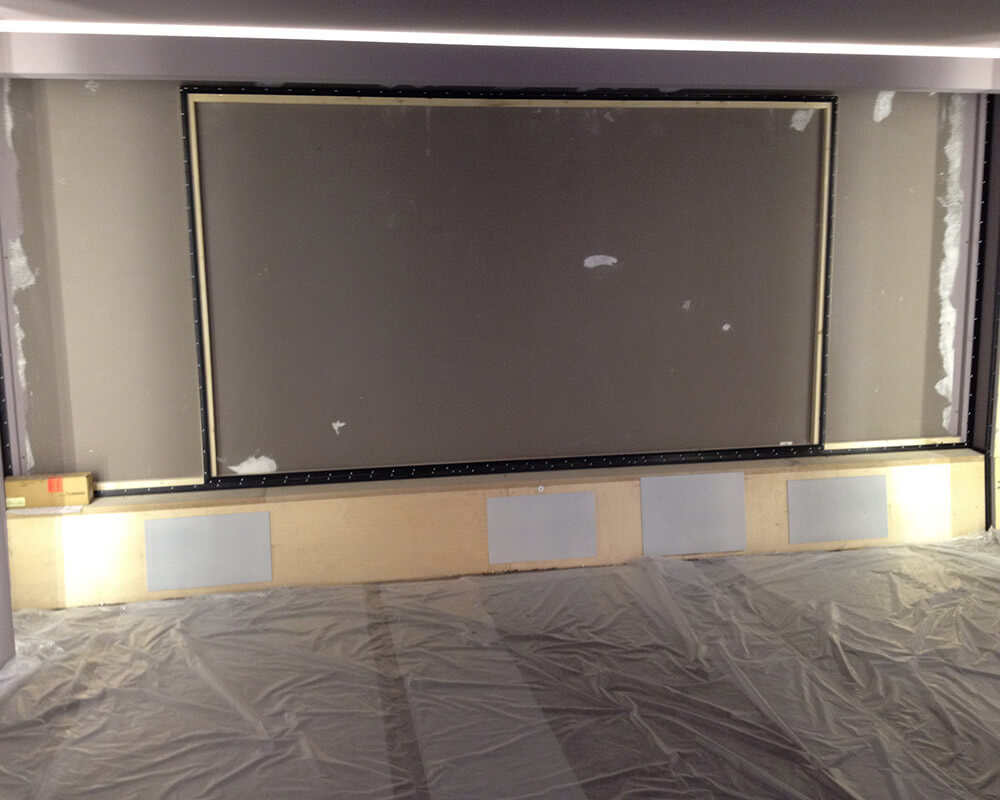
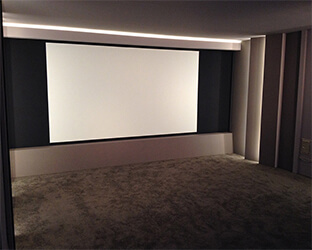
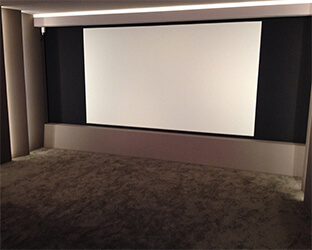
For the screen, we decided on a 16:9 format and thus a projection area of 2.99 m x 1.68 m. We would also like to brace our screen with clamping profiles in order to integrate it into the acoustic wall covering in our home cinema. In addition, flat sound absorbers should also be used on the projection screen and behind the screen for optimal acoustics. For this we also need a suitable substructure, which on the one hand surrounds the complete projection wall and on the other hand only the outline of the screen.
Alternatively, there is of course the option of using a screen with a finished aluminium frame construction or an electronic screen system.
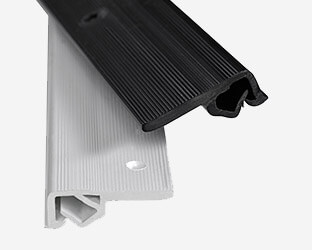
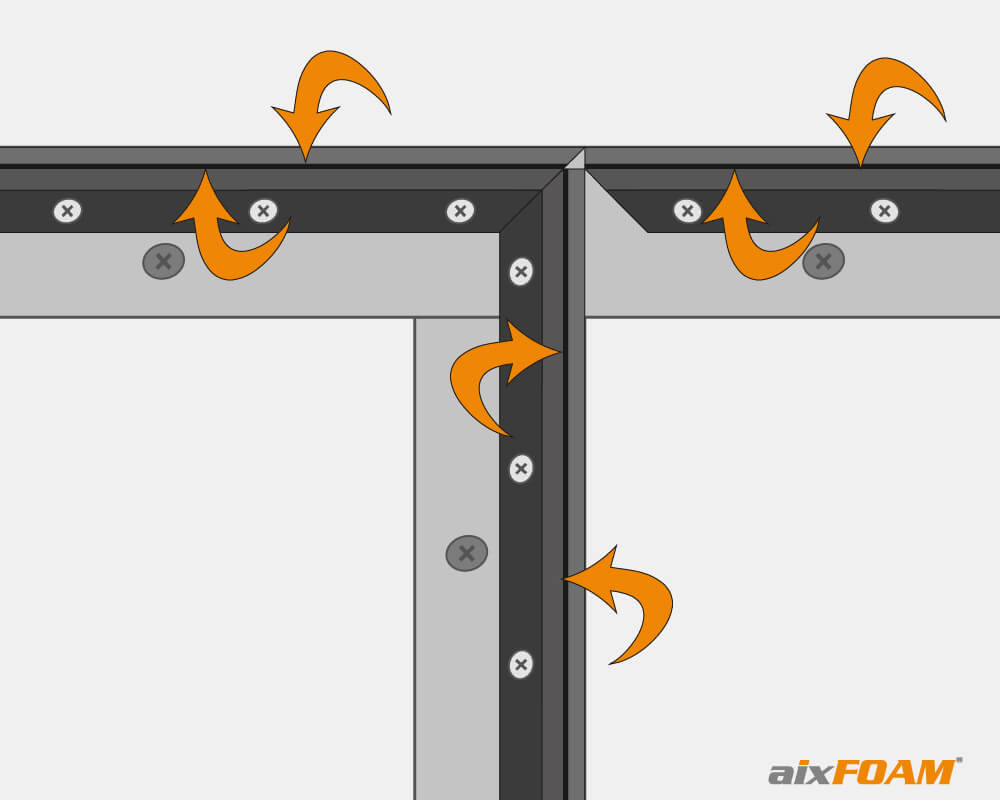
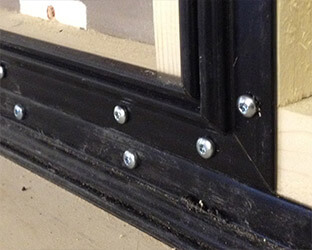
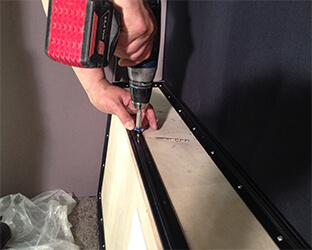
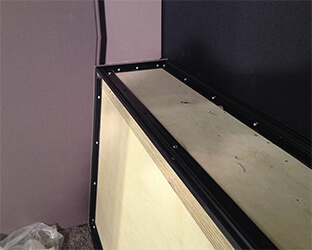
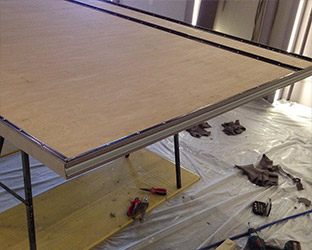
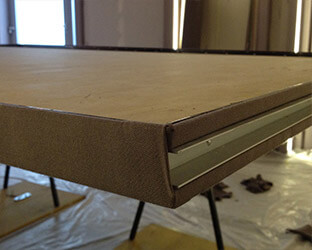
In the next step, all aixFOAM tensioning profiles are screwed onto the substructure. For this we recommend the use of short screws with a flat head (e.g. self-tapping screws flat head with washer Ø3.9x16 mm), as these lie well on the profile.
It is particularly important to work carefully and to ensure that the profiles are connected as seamlessly as possible. Any larger gap at the transitions or joints of the cover profiles would ultimately push through the braced material. For this it is essential to mitre the profiles at the corners.
An important clue: The aixFOAM wall cover profiles (PROFILO) can easily accommodate panels coming from two directions. This means that we only need one clamping profile on two directly adjacent wall segments. However, the profiles must be cut exactly so that the fabric can later be clamped into the profile from both sides without interruption.
Since the housing for the front loudspeakers is also being covered with acoustic fabric - without the installation of sound absorbers - the clamp profiles are also screwed onto these elements along the outer edges and do without the substructure made of square-profile batons.
After the profiles have been attached to the entire substructure, it is time to glue the aixFOAM sound absorber FLAT onto the wall.
In order to insert the absorber panels precisely into the segments created by the substructure, they have to be cut to size. For this we use a sharp box cutter and a metal bar on which we pull the knife along when cutting. This creates a clean, straight cutting edge. A cutting table or a simple wooden panel is suitable as a cutting surface. The self-adhesive equipment on the back of the sound absorber should point downwards when cut, i.e. it should lie directly on the cutting surface.
To avoid cutting-related accidents, it is advisable to wear cut-resistant protective gloves.
After the sound absorbers have been cut to size, they are glued into our prepared wall panels. To do this, we first pull off the liner paper on the back of the absorber only in the upper area. Then we align the absorber in the wall segment accordingly and press the exposed adhesive surface firmly with our hands. Then we slowly pull the liner paper further down and gradually press the entire panel onto the entire surface.
Pressing is an indispensable step in order to permanently fix the absorber - even if the panel apparently already holds. A uniform contact pressure can be achieved very well with standard pressure rollers from the painter's supply.
Flat sound absorbers are also glued inside the substructure on the projection screen and behind the screen.
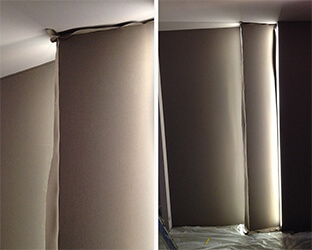
After all preparatory work for the wall covering has been completed and our sound absorbers have been attached, we can already perceive a strong acoustic effect in the room.
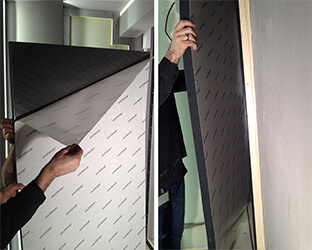
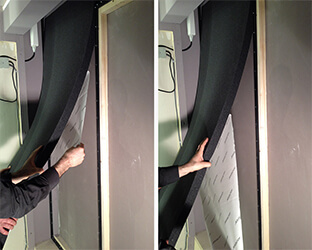
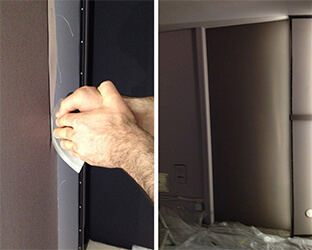
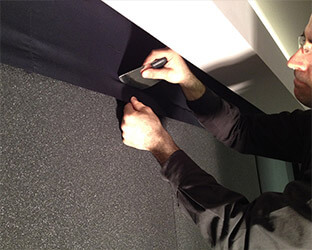
Now we start cladding with acoustic fabric, which will improve the sound absorption, especially in the high-frequency range.
To attach and stretch the fabric, it is pressed into the profile with a special spatula (EASYfixer).
The aixFOAM assembly spatula (EASYfixer) is a special tool required for tensioning the acoustic fabric. Other conventional spatulas are usually not able to apply the required tension to the material at the outer edges of the profiles. As a result, the fabric cannot be stretched evenly or is even damaged by the excessive effort. For an optimal result, we would therefore particularly like to recommend the use of the aixFOAM special spatula.
With practice, you will find that it is important to guide the spatula with the correct grip and to allow it to slide into the profile at the smallest possible angle, approx. 10°. Place the spatula as shown in the video below and roll it over the rounded edge. So you can assemble the fabric without much effort.
Since tensioning with the “wrong” technique is very exhausting in the long run, we recommend carrying out some dry exercises beforehand without fabric. This gives you a feeling for the work and quickly recognizes which way the spatula is looking to slide into the profile. Afterwards, the tensioning process is considerably easier and the risk of accidentally damaging the acoustic fabric during tensioning is significantly lower.
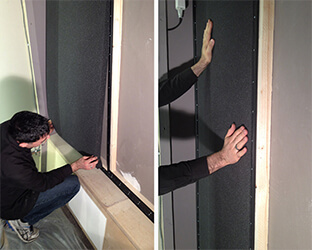
We also advise you - just like we did - to start with a simple, rectangular wall segment in order to gain initial experience with the clamping technology. This is done as follows:
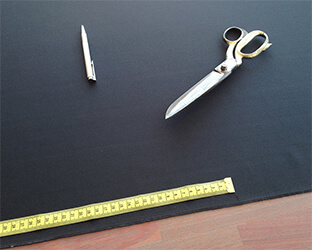
First we cut the acoustic fabric with sufficient addition (at least 2.5 cm, but better 5 cm on each side) and to fit the dimensions of the respective wall segment.
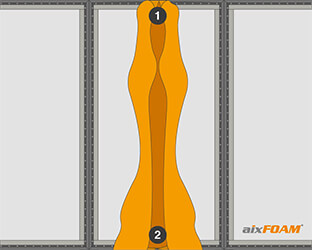
Now the fabric is aligned in the profiles and attached in the centre, pressing it into the profile with a special spatula. Working crosswise. So we start at the top (1), followed by the bottom (2) and then the left (3) and right (4) side.
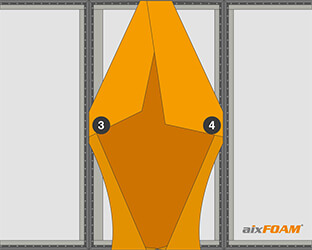
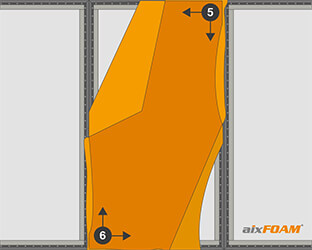
In the next step, the fabric is tacked in the corners, also crosswise. We start in the top right corner (5) and then continue tensioning in the bottom (6) and the top left corner (7). The bottom right corner (8) is braced last.
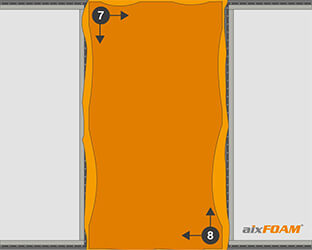
Finally, the gaps are stretched crosswise alternately. We start at the top (9), continue at the bottom (10) and then left (11) and end the tension on the right side (12).
When generating the final tension, it is very likely necessary to have to loosen the fabric again and re-tension it so that the fabric sits above the absorbers without wrinkles.
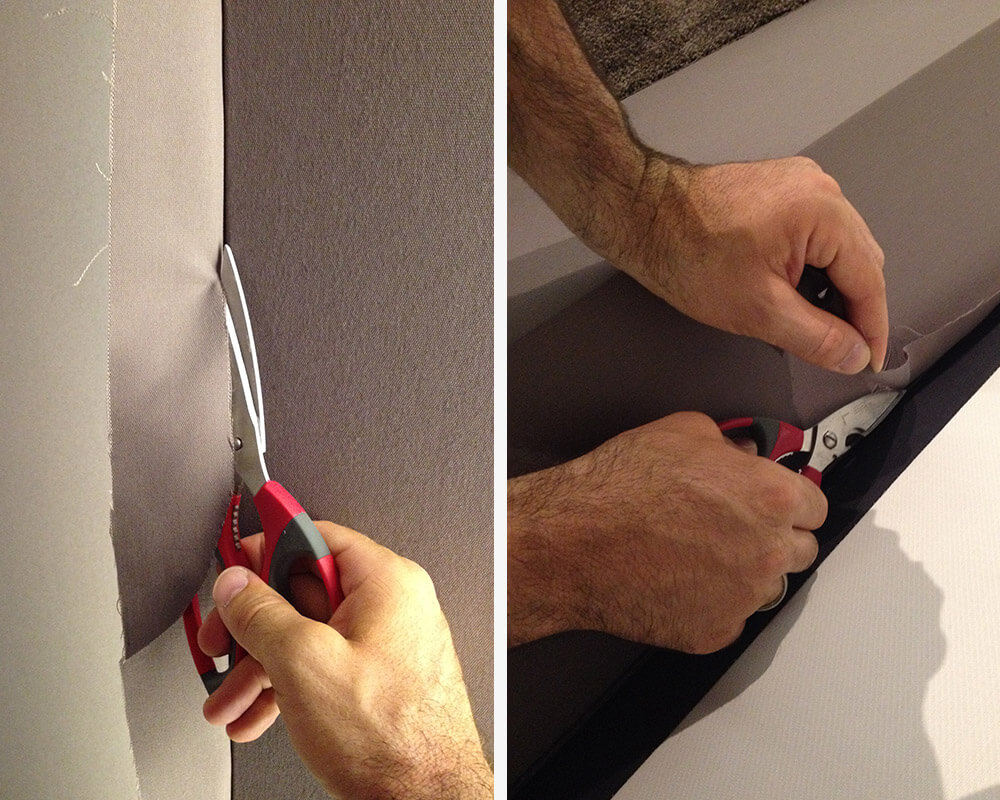
The excess fabric at the edge is now carefully cut off with sharp scissors, leaving a flag of fabric about 5 mm - 10 mm long. We take special care not to damage the stretched surface.
The remaining piece of fabric is now pressed into the profile bar with the assembly spatula, as previously learned, and disappears.
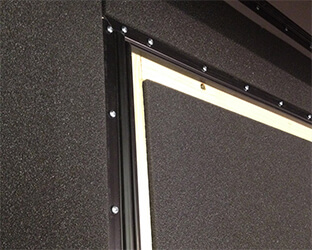
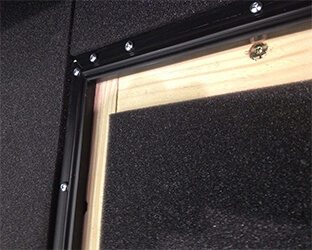
As already described in point 4.1, there are installation situations (windows, doors, visible outer edges) where it is particularly recommended for aesthetic reasons to also cover the substructure. In our home cinema, we even decided to cover all the outside edges of the profile with acoustic fabric - but in the end that's a matter of taste, of course.
In preparation for this work, we already glued a strip of acoustic fabric under the square-profile batons and attached it to the substructure (see point 4.1).
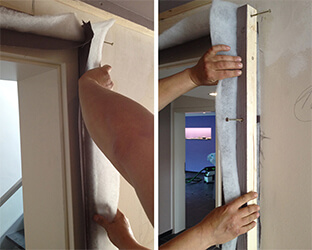
After we have screwed the cover profiles onto the substructure and inserted the sound absorbers, we now fold the fabric strip from the outside inwards over the substructure and profile and press it into the profile with the spatula as usual.
Then the surface can be covered with fabric as described in the previous point.
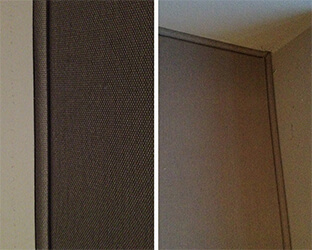
The result of the acoustic fabric cladding on the visible outer edges, the doors and the wall cover profiles looks like this in our home cinema:
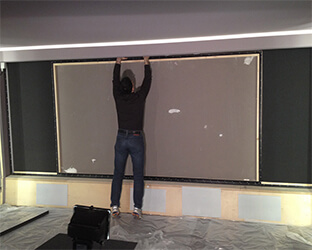
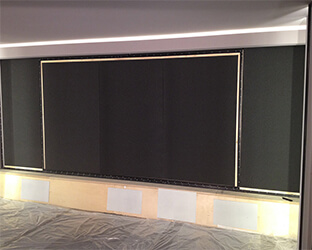
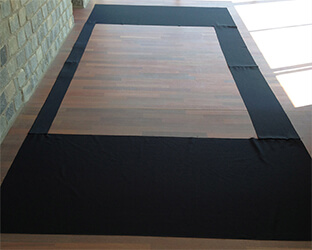
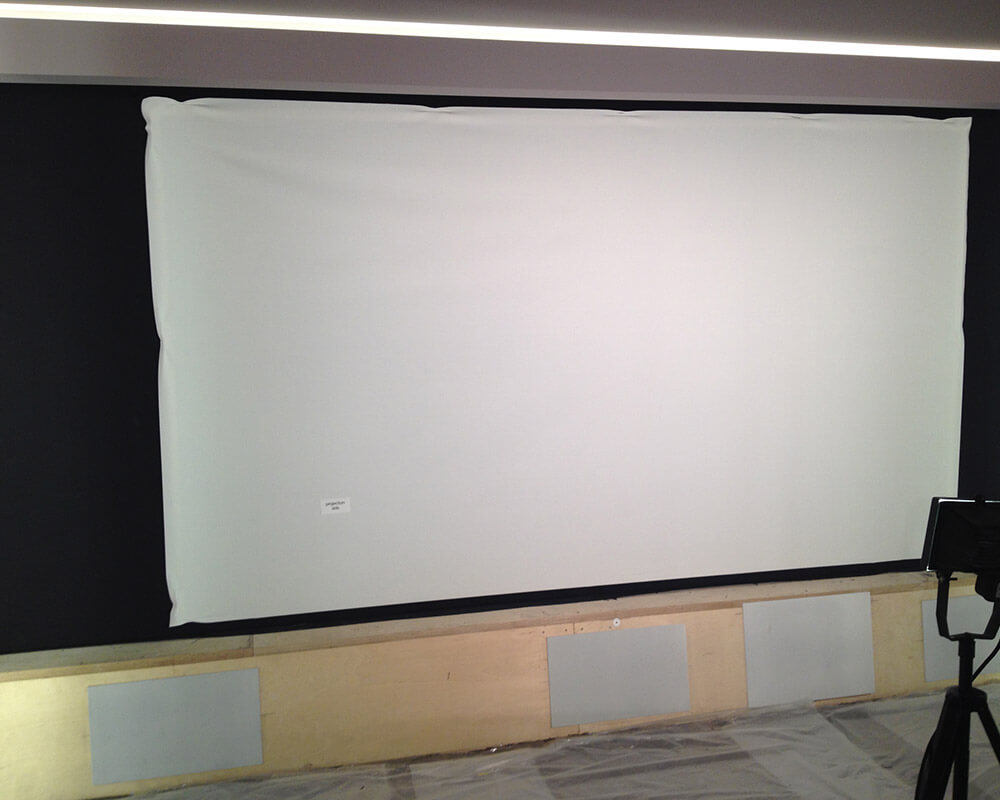
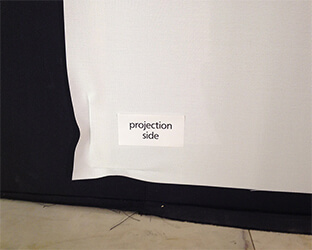
As already mentioned in Point 4.3, we decided on a slightly more sophisticated screen model for our aixFOAM home cinema, which is integrated into the wall covering. For this purpose, we created a substructure along the projection wall as well as on the outlines of the screen, attached tensioning profiles to it and used sound absorbers.
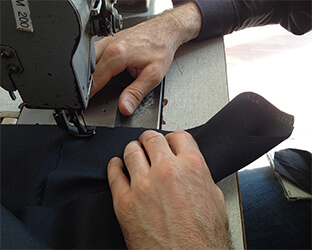
In the last step, we first create the black border for our screen and then mount it on the outside of our projection screen using the clamping profiles. To do this, we use a tape measure to determine the dimensions of the fabric, cut the individual sides to size and sew them together into a frame. Then the black fabric is stretched with the assembly spatula.
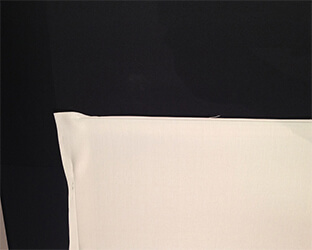
After the black background has been stretched, we assemble the white cloth for the screen inside the frame made with the tensioning profiles by sticking it into the terminal strips using the spatula.
In order to cover the outer door with glass insert during the film screening and darken the cinema, we would like to install an automatic sliding door. We have already created a housing for this during dry construction work (see point 3) in which the door disappears when it is opened.
In order to visually adapt the sliding door itself to our home cinema, we also cover it with acoustic fabric. We glue our SH001 MH sound absorbers in 1 cm thickness under the fabric. Since the absorbers are lower than the tensioning profiles, we do not need a substructure made of square-profile batons at this point. Since the sliding door is wider than our acoustic fabric, the door is divided into two segments.
When it came to the floor in our home cinema, we decided to lay a similar carpet to the acoustic fabric on the walls. Our sound absorber SH007 made of acoustic foam with a thickness of 2 cm was laid under the carpet. Due to the effect of floor soundproofing, walking over our cinema floor is almost like walking above clouds. The walkway at the back of the cinema was tiled.
Since special tools and advanced technical knowledge are required to lay the carpet and tiles, we recommend that you contact a specialist company (e.g. a room decorator from your region). The heavy foam absorbers for impact sound insulation are of course available from our aixFOAM online shop.

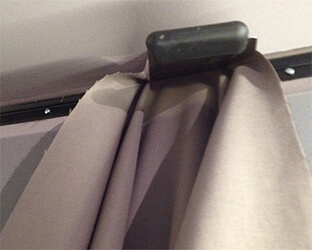
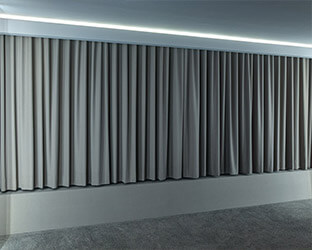
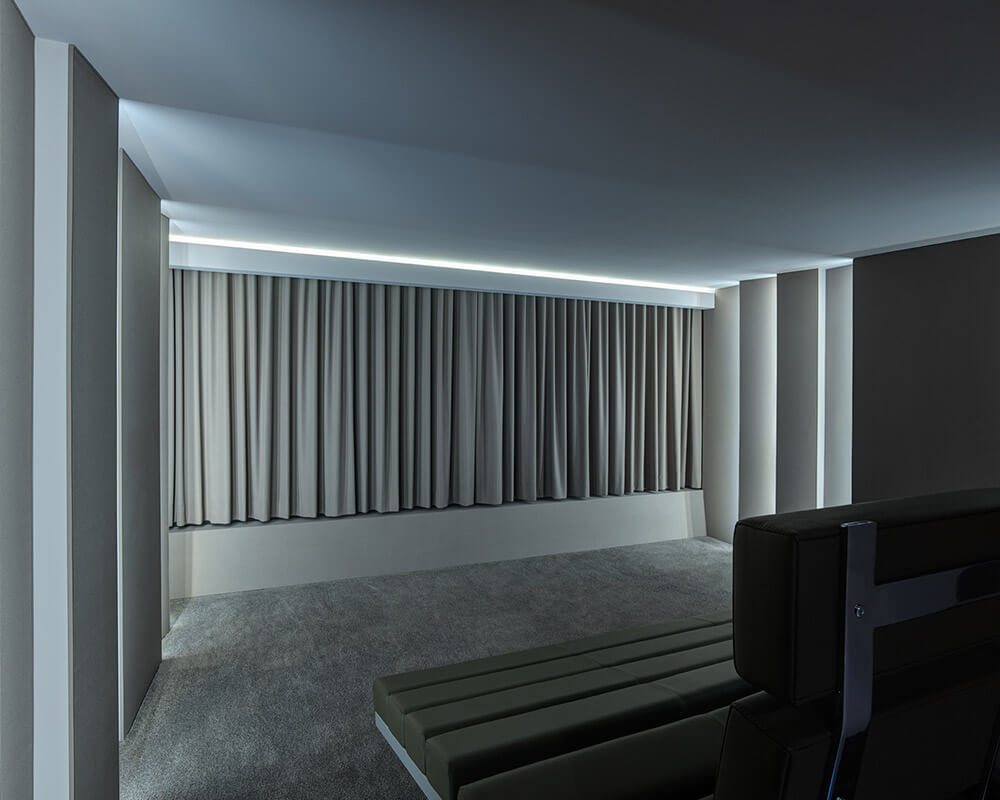
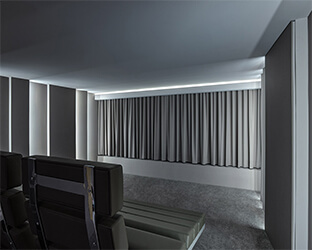
The curtain is an indispensable element and the heart of our home cinema, which is guaranteed to provide the right cinema atmosphere. This should open automatically when the film starts and close again when the film ends. We sewed our cinema curtain out of the same fabric that we used to cover our walls. The curtain is operated by a motor.
After many hours of work and with great attention to detail, our aixFOAM home cinema is now almost finished.
Various compartments were created on the walls using drywall, as well as enclosures for loudspeakers and cinema curtains, including lighting, on the projection screen. The rear part of the ceiling is suspended. The lighting, ventilation, sound system and technology for the sliding door and cinema curtain were installed in the walls and ceilings. The visible surfaces of the walls, the ceiling and the technology tower in the centre, not covered with acoustic material, were painted clean. The wall segments and loudspeaker housings were fitted with sound absorbers and covered with acoustic fabric. Floor soundproofing, carpet and tiles were laid on the floor. The screen was installed, as was the panelled sliding door.
In the last step, only our couch is placed in the middle of the screen and the cinema curtain is attached and then it finally says: Film from and welcome to the aixFOAM home cinema!
Are you also thinking about fulfilling your dream of having a cinema in your own home? What are you waiting for!? In the aixFOAM shop you will find all the materials you need to build your dream cinema. Discover our large selection of sound absorbers, acoustic fabrics and accessories for home cinemas. Our specialist planners are there to offer free advice when planning your home cinema.


Call us or send us an email. Together we'll find the right acoustic solution via a free consultation with our specialist planners.
+49 2403 / 83830 - 22
Monday to Friday
08:00 o'clock untill 17:00 o'clock
sales@aixfoam.com
Daily, 24 hours a day
Visit our aixFOAM store and find your suitable sound insulation: less noise and better acoustics with sound absorbers directly from the manufacturer.
Find your sound insulation